You only need one bowl and a few pantry staples to get these buttery, fruit-filled treats into the oven before the coffee is even finished brewing.

These Peaches and Cream Bars are the ultimate solution for those afternoons when you need a sweet treat but do not want to spend hours in the kitchen. They combine the texture of a soft sugar cookie with a creamy cheesecake center and the bright flavor of fruit. This recipe is far more straightforward than a traditional fruit pie and provides a reliable result every single time you bake it. You will find that these bars are a fantastic addition to any weekday routine because they require minimal cleanup and rely on ingredients you likely already have in your pantry.
Why These Peaches and Cream Bars Are a Kitchen Favorite
Prep: 15 min · Serves: 12 · Difficulty: Easy
- Uses common pantry staples you already own.
- Comes together in one single mixing bowl.
- Perfect for a quick Tuesday night dessert.
- Layers of cream cheese and sweet fruit.
- Better than a traditional peach upside down cake recipe for crowds.
Simple can be spectacular.
Get The Full Cake Recipe
Print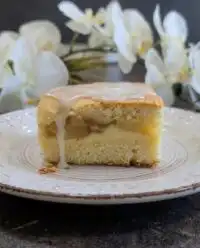
Peaches and Cream Bars
- Total Time: 50 mins
- Yield: 12 bars
Description
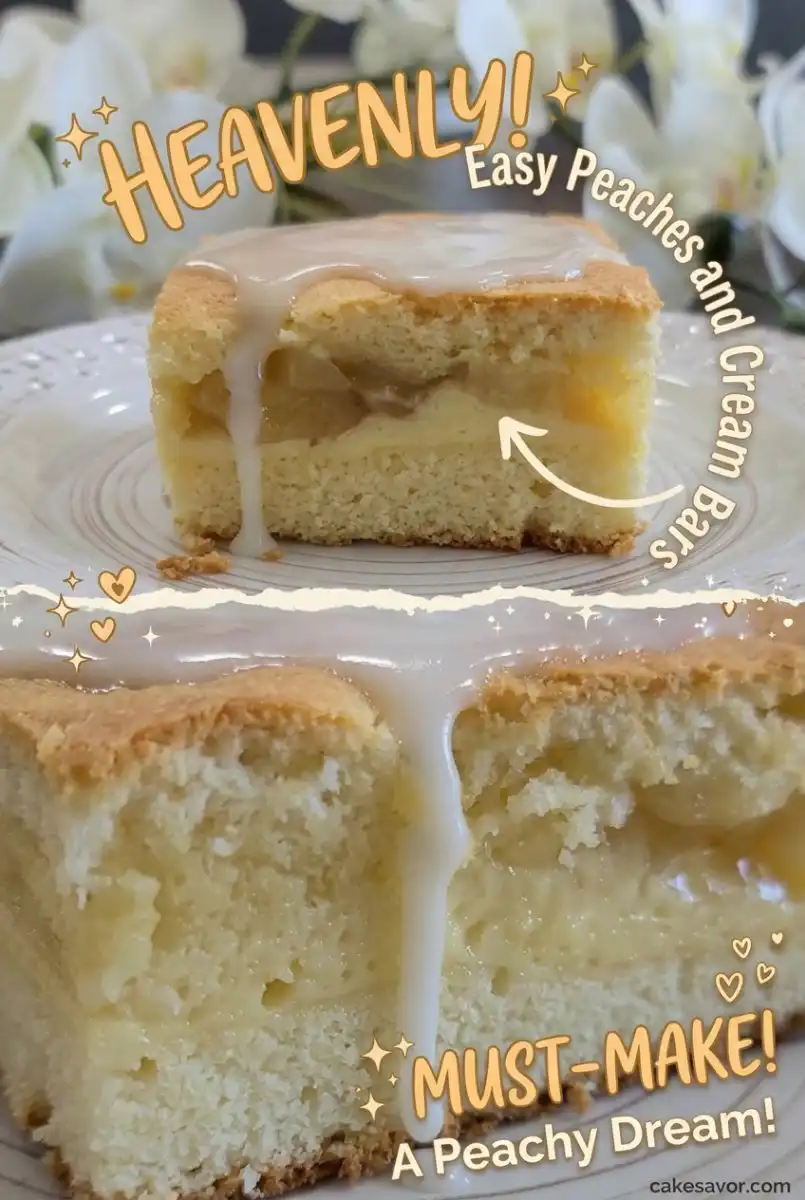
These delightful bars feature a buttery, soft cookie base layered with tangy cream cheese, sweet peach pie filling, and a delicate almond glaze. Perfectly simple to assemble, they offer an elegant, crowd-pleasing dessert that comes together in a single mixing bowl.
Ingredients
- 1 cup unsalted butter, softened
- 1.5 cups granulated sugar
- 4 large eggs
- 3 cups all-purpose flour
- 1 teaspoon salt
- 1 teaspoon vanilla extract
- 1 can (21 oz) peach pie filling
- 8 oz cream cheese, softened
- 1/2 cup powdered sugar (for filling)
- 1 cup powdered sugar (for glaze)
- 2 tablespoons milk
- 1/4 teaspoon almond extract
Instructions
- Prepare the equipment. Preheat your oven to 350°F and thoroughly grease a 9×13 inch baking dish.
- Cream butter and sugar. Beat the softened butter and granulated sugar together in a large bowl until the mixture is pale and fluffy.
- Add wet ingredients. Incorporate the eggs one at a time, followed by the vanilla extract, stirring until the mixture is smooth.
- Incorporate dry ingredients. Gradually stir in the flour and salt until a thick, soft dough forms, being careful not to overmix.
- Create base layer. Press approximately half of the dough evenly into the bottom of your prepared baking dish.
- Prepare cream layer. In a separate bowl, whisk together the cream cheese, powdered sugar, vanilla, and one egg until completely smooth, then spread over the base dough.
- Add peach filling. Spoon the peach pie filling carefully over the cream cheese layer, spreading it out to cover the surface evenly.
- Assemble and bake. Drop spoonfuls of the remaining dough over the fruit and bake for 30 to 35 minutes until the edges are golden.
- Apply the glaze. Whisk the remaining powdered sugar, milk, and almond extract together, then drizzle over the cooled bars.
Notes
- Ensure your cream cheese is fully at room temperature to avoid lumps in the middle layer.
- Chill the finished bars in the refrigerator for 30 minutes before slicing to achieve clean, professional edges.
- Use the spoon-and-level method for measuring flour to prevent the dough from becoming dry or crumbly.
- Grease the sides of your baking dish thoroughly or use parchment paper overhang for easy removal.
- Prep Time: 15 mins
- Cook Time: 35 mins
- Category: Dessert
- Method: Baking
- Cuisine: American
Pantry Lineup
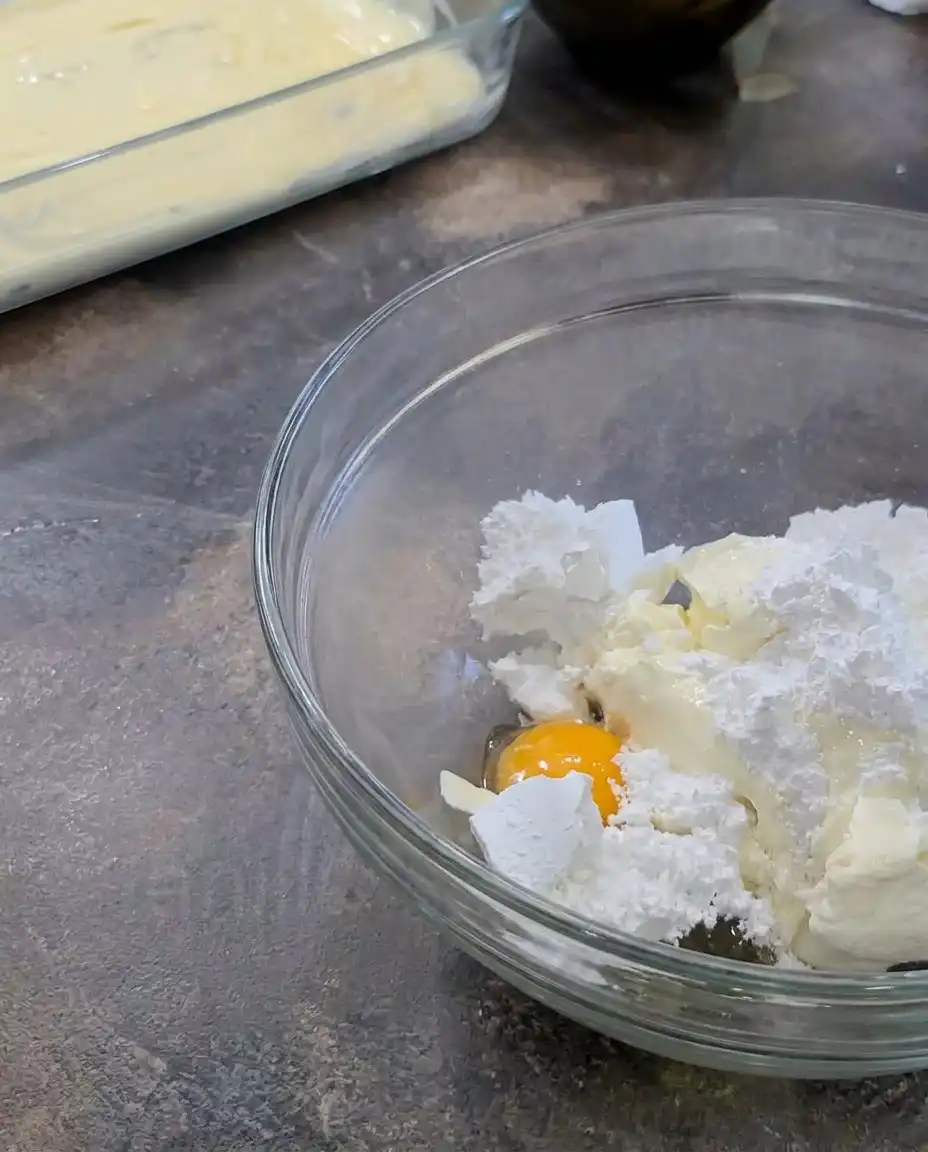
Having the right components ready makes the process move along smoothly. Most of these items are probably sitting in your kitchen right now, waiting to be turned into a delicious dessert. Using high-quality vanilla and real butter will ensure the final result has that homemade taste we all love.
- Unsalted Butter: This provides the fat and structure for the dough while allowing you to control the salt content. Use softened butter so it creams easily with the sugar.
- Granulated Sugar: It sweetens the dough and helps create a tender, golden-brown crust when baked.
- Large Eggs: These act as a binder for the dough and add richness to both the base and the cheesecake layer.
- All-Purpose Flour: The foundation of the bar, giving it a soft, cake-like crumb that holds up the heavy fruit filling.
- Peach Pie Filling: This is the shortcut that makes the recipe work for busy schedules while delivering consistent sweetness.
- Cream Cheese: The star of the middle layer, adding a tangy contrast to the sweet peaches and buttery dough.
- Powdered Sugar: This is used to sweeten the cream cheese layer and creates the final drizzle for the top.
| Ingredient | Why It Matters |
|---|---|
| Butter | Creates a tender cookie-like base and top layer. |
| Cream Cheese | Provides the creamy contrast to the fruit. |
| Peach Filling | Offers a consistent fruit flavor with no prep. |
| Almond Extract | Adds a professional bakery-style finish to the glaze. |
The Easy Method
Step 1: Prepare the Oven and Pan
Before you start mixing, set your oven to 350F so it has plenty of time to reach the correct temperature. Take a 9×13 baking dish and grease it thoroughly with butter or a non-stick spray to ensure the bars release easily after they have cooled. This preparation step is the key to a stress-free baking session.
Step 2: Cream the Butter and Sugar
In your large mixing bowl, beat the softened butter and granulated sugar together until the mixture looks pale and feels fluffy. This process incorporates air into the fat, which helps the dough rise slightly and stay tender. You can do this with a wooden spoon or a hand mixer depending on what you have nearby.
Step 3: Incorporate the Eggs and Vanilla
Add the four large eggs one at a time, making sure each is fully blended before adding the next one to the bowl. Stir in the vanilla extract to give the dough a warm, aromatic base that complements the fruit. The mixture should look smooth and slightly glossy at this stage.
Step 4: Mix the Dry Ingredients
Stir the flour and salt into the wet mixture slowly until a soft dough forms and no white streaks remain. Be careful not to overwork the dough, as this can make the bars tough rather than tender. The dough will be thick and slightly sticky, which is exactly what you want for a sturdy crust.
Step 5: Press the Base Layer
Take about half of your prepared dough and spread it across the bottom of the greased baking dish in an even layer. You can use a spatula or clean hands to press it into the corners so every bite has a solid foundation. This base will support the heavier layers of cream cheese and peaches.
Step 6: Create the Creamy Layer
In a separate small bowl, beat together the softened cream cheese, powdered sugar, vanilla, and one egg until the mixture is smooth and free of lumps. Spread this creamy mixture directly over the raw dough in the baking dish. This layer provides the tangy flavor that defines these bars.
Step 7: Add the Fruit Filling
Open your can of peach pie filling and spoon it carefully over the cream cheese layer, spreading it to the edges. You want the fruit to be distributed evenly so every square contains several pieces of peach. The syrup from the filling will mingle with the cheesecake layer as it bakes.
Step 8: Bake Your Peaches and Cream Bars Until Golden
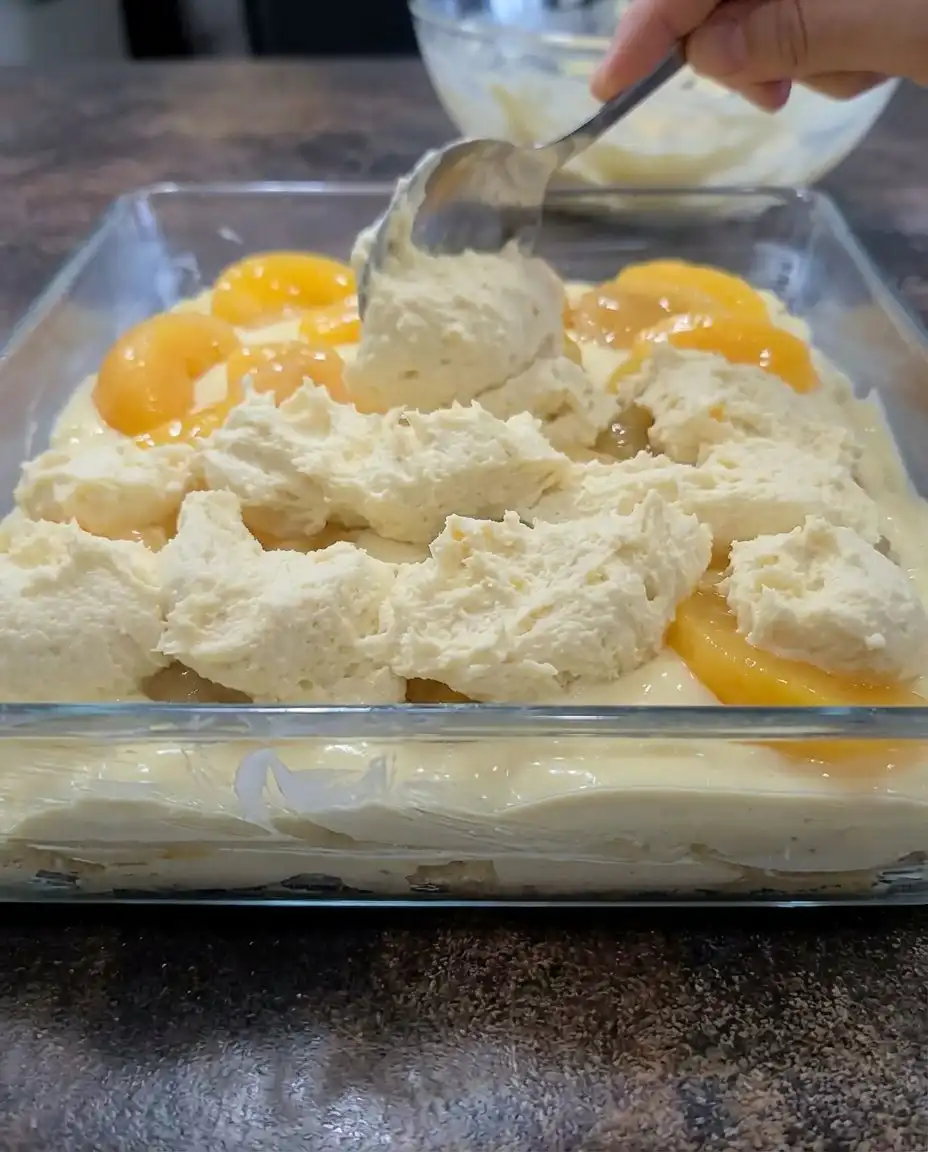
Take the remaining dough and drop it by the spoonful over the top of the fruit layer, creating a rustic, cobbled appearance. Place the dish in the oven and bake for 30 to 35 minutes until the edges are golden and the center is set. The kitchen will smell like warm vanilla and sweet fruit while these bake.
Step 9: Prepare and Apply the Glaze
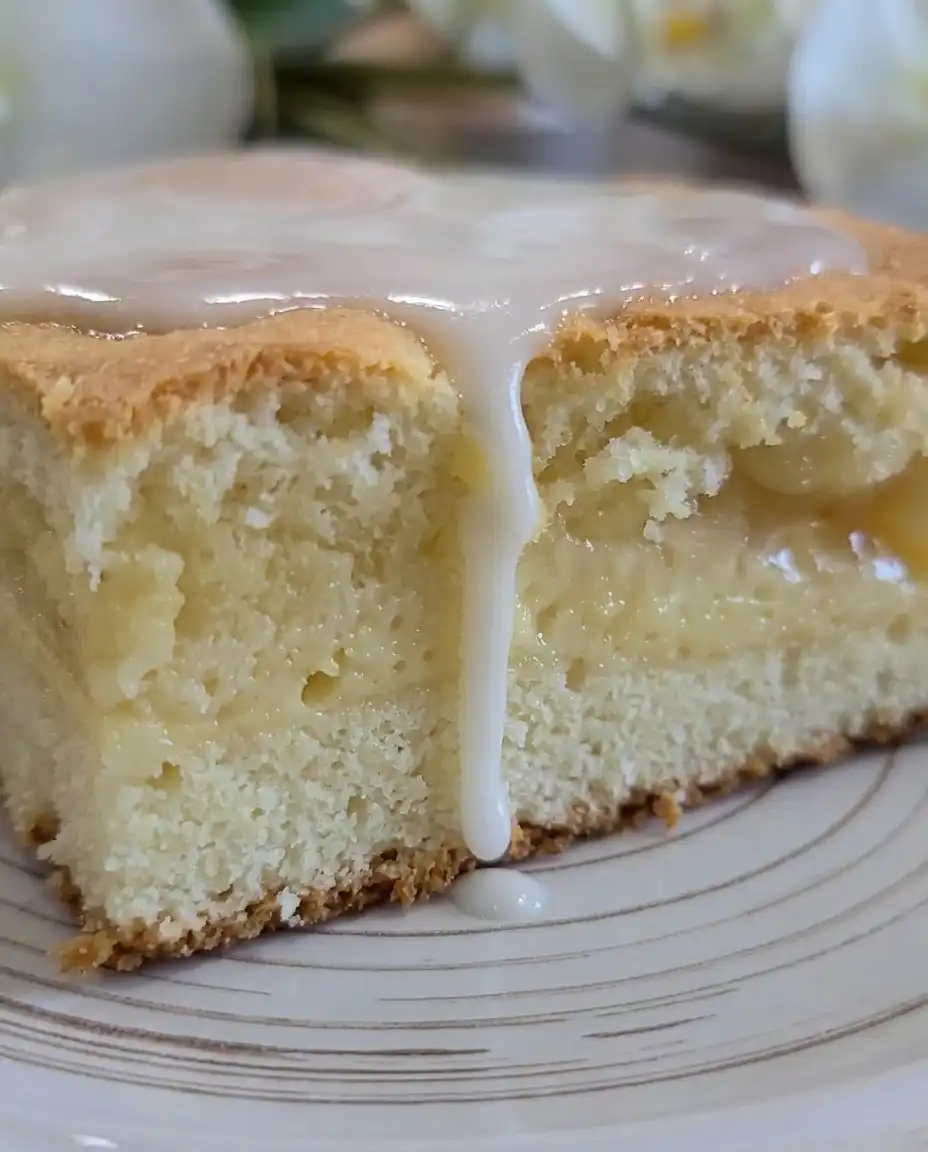
Whisk the powdered sugar, milk, and almond extract together in a small bowl until the glaze is smooth and pourable. Wait until the bars have cooled significantly before drizzling the glaze over the top in a zigzag pattern. If the bars are too hot, the glaze will melt and soak into the crust rather than sitting on top.
Easy-Baker Notes
To ensure your cream cheese layer is perfectly smooth, make sure the block is truly at room temperature before you begin mixing. If the cheese is still cold, it will create small lumps that are difficult to stir out and will show up in the final baked bars. Taking the cheese out of the fridge an hour before you start is a small step that makes a big difference.
If your bars seem a bit too soft or fall apart when you try to slice them, here is why and how to fix it. Usually, this happens because the bars are still warm in the center; the sugar and cream cheese need time to firm up as they cool. Placing the pan in the refrigerator for thirty minutes after they reach room temperature will help you get those clean, professional-looking squares.
When measuring your flour, use the spoon-and-level method rather than dipping the measuring cup directly into the bag. Dipping packs the flour down, which can lead to adding too much and resulting in a dry, crumbly crust. For more ideas on fruit-based treats, you might enjoy making peach cobbler muffins during the weekend.
Always grease your baking dish all the way up the sides because the fruit filling can become quite sticky as the sugars caramelize in the oven. A well-greased pan ensures that the delicate top layer does not pull away from the fruit when you try to remove the first piece. You can also use parchment paper with an overhang to lift the entire block of bars out at once.
Use a sharp, thin knife to cut the bars and wipe the blade clean with a damp cloth between every single cut. The cream cheese and peach layers are sticky, and a clean blade prevents the fillings from dragging into the crust layers. This keeps the beautiful lamination of the bars visible for your guests.
Frequently Asked Questions
Can I use canned or frozen peaches instead of fresh?
This recipe is specifically designed to work with peach pie filling because it has the right consistency and sweetness level built-in. If you want to use fresh or frozen peaches, you would need to cook them down with sugar and a thickener like cornstarch first. Using raw peaches directly may release too much moisture and cause the bars to become soggy.
Can I use peach pie filling?
Yes, peach pie filling is the intended ingredient for this recipe and makes the process very fast. It provides a consistent amount of fruit and syrup that pairs perfectly with the cream cheese layer. Simply spoon it out of the can and spread it evenly over the cheesecake mixture before adding the final dough dollops.
What can I substitute for the cream cheese?
If you do not have cream cheese, you can use Neufchatel cheese as a direct substitute for a slightly lighter result. Some bakers also use mascarpone for a richer, more buttery flavor, though it is less tangy than traditional cream cheese. Avoid using liquid dairy like yogurt or sour cream as they will not set up properly during the baking process.
How do you prevent peach bars from being soggy?
The best way to prevent sogginess is to ensure the bottom crust layer is thick enough and that you do not overbake the bars. Also, letting the bars cool completely before slicing allows the fruit juices to set rather than running into the crust. If the fruit filling seems excessively watery, you can stir in a teaspoon of flour before spreading it.
Do the peaches need to be peeled?
When using the recommended peach pie filling, the peaches are already peeled and sliced for your convenience. If you are making your own filling from fresh fruit, peeling is highly recommended as the skins can become tough and papery after baking. To peel fresh peaches easily, blanch them in boiling water for thirty seconds and then move them to an ice bath.
How should I store leftover bars?
Because of the cream cheese layer, these bars should be stored in an airtight container in the refrigerator. They will stay fresh and delicious for up to four days when kept cold. You can enjoy them straight from the fridge or let them sit at room temperature for a few minutes before serving.
Simple Swaps
You can easily transform this recipe by changing the fruit filling to whatever you have on hand or what is currently in season. Raspberry or blackberry pie fillings work beautifully with the cream cheese layer and offer a slightly more tart flavor profile. If you want a more rustic feel, you can try a peach dump cake which uses similar ingredients but a different assembly method.
For those who prefer a little extra crunch, try adding a handful of sliced almonds or chopped pecans to the top layer of dough before baking. The nuts toast in the oven and provide a nice textural contrast to the soft fruit and creamy center. You can also look into how to make peach bars if you want to see how different dough styles affect the final result.
If you find yourself without almond extract for the glaze, you can substitute it with lemon juice for a bright, citrusy finish. The acidity of the lemon cuts through the sweetness of the powdered sugar and pairs exceptionally well with the peaches. It is a quick change that can completely alter the personality of the dessert without requiring an extra trip to the store.
Slice & Serve
These bars are versatile enough to be served at a variety of different temperatures depending on the occasion. For a summer picnic, they are best served chilled directly from the cooler, as the cold temperature makes them refreshing and easy to handle. If you are serving them for a cozy Sunday dinner, you might prefer a peach tiramisu or these bars served at room temperature with a dollop of whipped cream.
Placing a warm bar in a shallow bowl and topping it with a scoop of vanilla bean ice cream creates a dessert that feels much more sophisticated than the effort required to make it. The heat from the bar melts the ice cream slightly, creating a rich sauce that complements the peach filling. This is an excellent way to turn a simple bar into a plated dessert for guests.
You can also serve these as part of a brunch spread alongside coffee and tea. Because they are not overly sweet, they fit right in next to savory items like quiche or bacon. Simply slice them into smaller squares for a bite-sized addition to a dessert platter or a holiday gathering where people want to sample multiple treats.
The Wrap-Up
Baking these treats is a wonderful way to bring the flavor of summer into your kitchen regardless of the season. The combination of the buttery dough and the tangy cream cheese makes every bite feel like a special occasion. If you enjoy this flavor profile, you should also try my peach cake for another easy baking win that fits perfectly into a busy life.
I hope you find this recipe as helpful and delicious as I do for those moments when you need a quick win. It is the kind of recipe that friends will ask for again and again because it tastes like you spent the whole day in the kitchen. Once you have tried it, I would love to see how your bars turned out and hear about any variations you decided to try.
Baking that fits your life is what we are all about here. Don’t forget to share your photos and join our community for more simple baking ideas that save you time and energy.