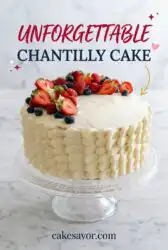
Transforming a good vanilla cake into a wow cake starts with a cloud of cream and a drop of almond extract that leaves every guest asking for your secret.

This Chantilly Cake is the answer for anyone who wants a dessert that feels like a celebration without the stress of complicated sugar work. By adding a small touch of almond extract to the batter, you create a floral, nutty depth that pairs beautifully with the light whipped topping. This specific flavor profile makes every bite of the sponge feel intentional and sophisticated. You will find that this recipe relies on high-quality basics to create a memory that lingers long after the last slice is gone.
Why the Flavor Pop Works
Prep: 15 min · Serves: 8 · Difficulty: Easy
- Floral almond notes lift the sponge flavor
- Light whipped cream stays airy and soft
- Fresh berries provide a bright citrusy pop
- Simple layers look professional and elegant
- Classic vanilla crumb remains tender and moist
This is where you make it yours by choosing berries that are in their peak season for the most colorful finish. You can even try this technique with a fresh strawberry cake base if you want an extra boost of fruit flavor.
Get The Full Cake Recipe
Print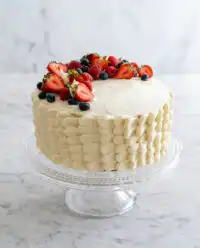
Chantilly Cake
- Total Time: 45 mins
- Yield: 8 servings
Description
This elegant Chantilly Cake features a tender, almond-infused vanilla sponge layered with fluffy whipped cream and vibrant, fresh berries. It is the perfect sophisticated dessert for any celebration, offering a light and airy texture that balances rich cream with bright, seasonal fruit.
Ingredients
- 2 cups all-purpose flour
- 1 ½ cups granulated sugar
- 2 teaspoons baking powder
- ½ teaspoon salt
- 1 cup whole milk
- 3 large eggs
- 1 tablespoon vanilla extract
- 1 teaspoon almond extract
- 2 cups heavy whipping cream
- 1 cup fresh strawberries, sliced
- 1 cup fresh blueberries
Instructions
- Prepare the oven. Preheat your oven to 350°F (175°C) and grease two round baking pans or line them with parchment paper.
- Whisk dry ingredients. Combine the all-purpose flour, granulated sugar, baking powder, and salt in a large bowl, sifting to remove any lumps.
- Mix wet ingredients. Whisk together the milk, eggs, vanilla extract, and almond extract in a separate bowl until smooth and pale.
- Combine the batter. Gradually stir the wet mixture into the dry ingredients until just combined, then divide evenly between the two prepared pans.
- Bake the layers. Bake for 25 to 30 minutes until golden brown and a toothpick comes out with just a few moist crumbs.
- Cool the cakes. Allow the cakes to rest in the pans for 10 minutes before transferring them to a wire rack to cool completely.
- Whip the cream. Beat the cold heavy whipping cream in a chilled bowl on medium-high speed until stiff peaks form.
- Assemble the cake. Spread a generous layer of whipped cream between the two cooled sponges and frost the entire outside before decorating with fresh berries.
Notes
- Ensure all dairy ingredients are cold for the whipped cream but room temperature for the cake batter to achieve the best texture.
- Use a serrated knife and dip it in warm water between slices to get clean, professional cuts through the delicate layers.
- Dry your berries thoroughly after washing to prevent excess moisture from staining or thinning the whipped cream topping.
- If the whipped cream begins to look curdled, fold in a tablespoon of fresh cold cream by hand to restore its smooth consistency.
- Prep Time: 15 mins
- Cook Time: 30 mins
- Category: Dessert
- Method: Baking
- Cuisine: American
The Flavor Lineup
The secret to an unforgettable sponge lies in the temperature of your ingredients and the quality of your extracts. For this recipe, the heavy cream must be cold enough to hold its structure, while the eggs and milk should be at room temperature to create a smooth, emulsified batter. Using whole milk provides a rich fat content that keeps the cake from becoming dry or crumbly after baking. The almond extract is the one smart addition that changes everything, giving the vanilla a professional bakery finish that smells like toasted nuts and spring flowers.
- All-purpose flour: This provides the structural foundation for the cake while maintaining a soft, delicate crumb that is easy to slice.
- Granulated sugar: Beyond sweetness, sugar helps to aerate the butter and eggs, ensuring the cake rises evenly in the oven.
- Baking powder: This leavening agent creates the tiny air bubbles that make the Chantilly Cake feel light and airy on the tongue.
- Whole milk: The extra fat in whole milk creates a tender texture that mimics the richness of a professional pastry chef’s recipe.
- Almond extract: A small amount provides a floral back-note that makes the vanilla taste more complex and interesting to your guests.
- Heavy whipping cream: High fat content is necessary here to create the stiff peaks that define the classic Chantilly topping.
- Fresh berries: Strawberries and blueberries add a sharp, sweet acidity that cuts through the richness of the dairy beautifully.
| Ingredient | Why It Matters |
|---|---|
| Almond Extract | Adds a mysterious floral depth to vanilla |
| Whole Milk | Creates a moist and sturdy sponge crumb |
| Heavy Cream | Provides the signature airy cloud topping |
| Fresh Berries | Offers a bright and colorful flavor contrast |
| Baking Powder | Ensures a light rise for every layer |
The Method
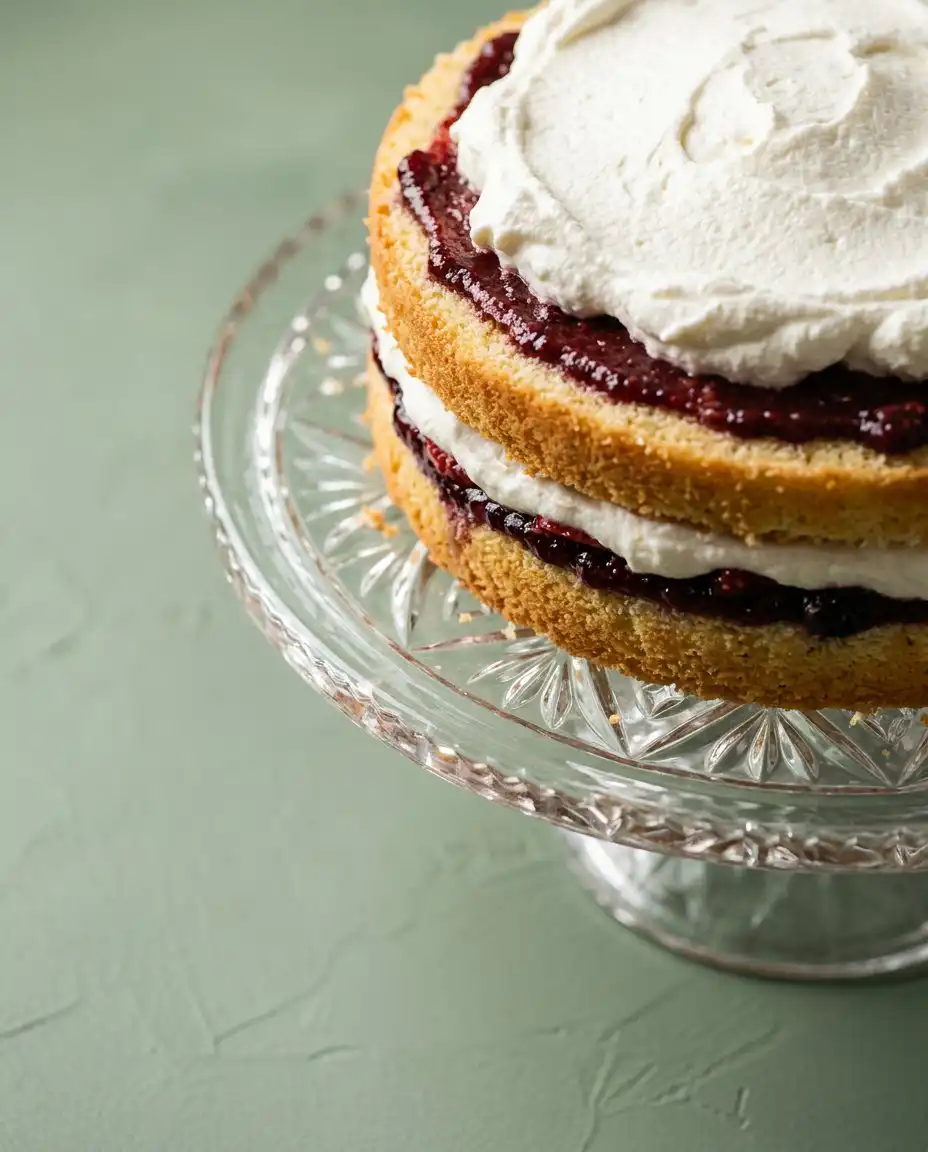
Step 1: Prepare the Oven and Pans
Before you begin mixing, preheat your oven to 350°F (175°C) to ensure a consistent temperature for the rise. Take two round baking pans and grease them thoroughly with butter or a non-stick spray to prevent any sticking. You can also line the bottoms with parchment paper for a clean release that keeps the edges of your sponge smooth. The air in your kitchen should start to feel warm and ready for the baking process to begin.
Step 2: Whisk the Dry Foundation
In a large mixing bowl, combine the all-purpose flour, granulated sugar, baking powder, and salt with a wire whisk. Sifting these ingredients together helps to remove any lumps and ensures the leavening agent is distributed evenly throughout the flour. You are looking for a uniform, powdery texture that feels light when you run the whisk through it. This dry base is the key to a cake that doesn’t have large, uneven air pockets.
Step 3: Emulsify the Wet Ingredients
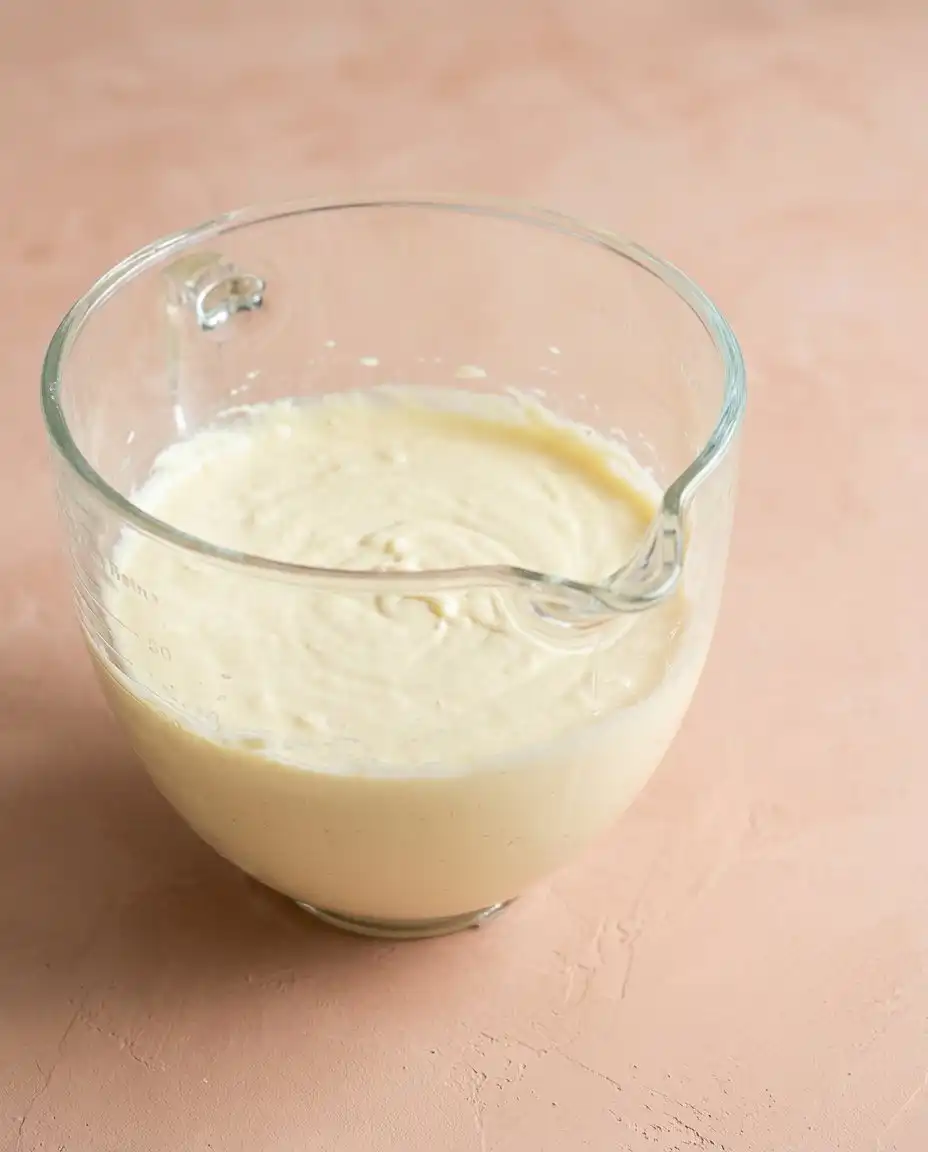
In a separate medium bowl, whisk together the whole milk, large eggs, and that crucial tablespoon of vanilla extract until the mixture is pale yellow. If you are using my flavor pop tip, this is where you would also add the almond extract to help it distribute throughout the batter. The liquid should look smooth and slightly frothy on the surface from the beaten eggs. Using room temperature liquids here prevents the batter from curdling when it hits the dry ingredients later.
Step 4: Bake Your Chantilly Cake to Perfection
Gradually pour the wet mixture into the dry ingredients, stirring gently until the batter is just combined and no large streaks of flour remain. Divide the batter evenly between your two prepared pans and slide them into the center of the oven for 25 to 30 minutes. You will know they are ready when the tops turn a light golden brown and a toothpick comes out with just a few moist crumbs. The kitchen will fill with a toasty, sweet aroma that signals the sponge is set.
Step 5: Cool the Layers Completely
Once the pans are out of the oven, let them sit on a cooling rack for at least 10 minutes before you attempt to flip them out. This brief resting period allows the structure of the cake to firm up so it doesn’t tear or break during the transfer. Move the cakes to wire racks to cool entirely to room temperature, which is vital before adding any cream. If the cake is even slightly warm, your beautiful whipped topping will melt into a messy glaze.
Step 6: Whip the Chantilly Topping
Pour your cold heavy whipping cream into a chilled glass or metal bowl and begin beating it on medium-high speed. As the cream thickens, watch for the moment it transforms from a liquid to a soft, billowy cloud that holds its shape. Continue beating until stiff peaks form, meaning the cream stands straight up when you lift the whisk. The texture should be silky and smooth, ready to be slathered over your cooled sponge layers.
Step 7: Assemble and Garnish
Place one cake layer on your serving plate and spread a generous amount of the whipped cream across the top, reaching all the way to the edges. Stack the second cake layer on top and cover the entire cake with the remaining cream using an offset spatula. Decorate the top with your fresh strawberries and blueberries in a circular pattern for a bright, festive look. The contrast of the white cream against the colorful fruit makes this dessert a true centerpiece.
Small Tweaks, Big Wow
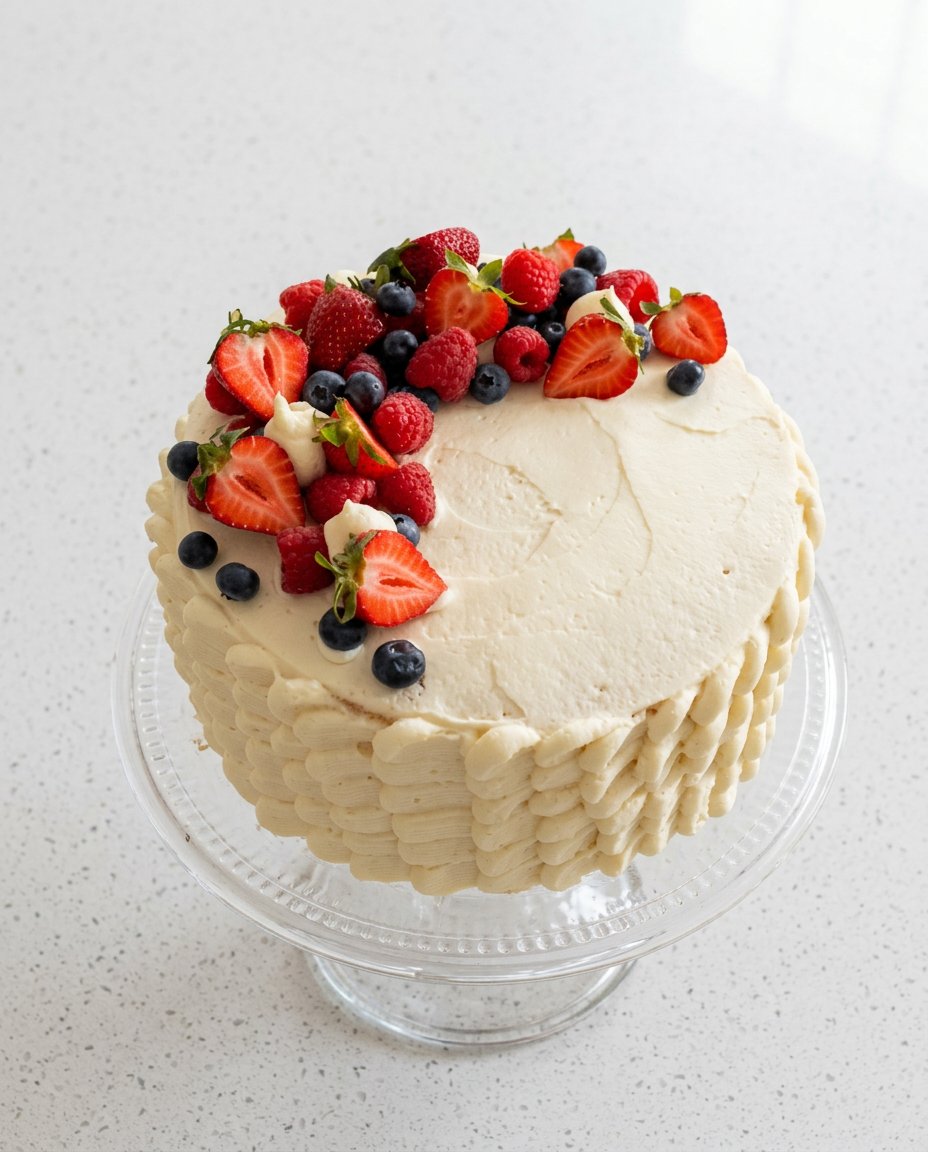
To ensure your whipped cream remains stable for hours, try adding a tablespoon of instant vanilla pudding mix or a bit of mascarpone cheese to the cream before whipping. This technique helps the air bubbles stay trapped, preventing the cream from weeping or becoming runny in warmer temperatures. If you want to learn more about similar cream-based desserts, checking out a classic vanilla butter cake can give you ideas for different sponge textures.
If your whipped cream becomes grainy or looks curdled, you have over-beaten it and the fat is starting to separate into butter. To fix this, quickly pour in a few tablespoons of unwhipped cold heavy cream and fold it in gently with a spatula by hand. This will often smooth the texture back out without you having to start over with a fresh bowl. This is a great trick when you are in a rush and need a smooth finish for your layers.
Always wash and dry your berries several hours before you plan to decorate the cake. If the fruit is even slightly damp, the juices will bleed into the white whipped cream and create unsightly purple or red streaks. For more advanced tips on berry preparation, you can read about how to properly clean and dry fruit for baking to ensure your decorations stay crisp. Simple cake, unforgettable flavor is always the goal when working with fresh produce.
For a more intense flavor pop, you can brush the cooled cake layers with a simple syrup infused with a tiny bit of almond or lemon zest. This adds an extra layer of moisture and a hidden flavor that guests will notice but won’t be able to immediately identify. It makes the transition from the soft sponge to the airy cream feel more integrated and luxurious on the palate. A little bit of liquid goes a long way, so use a light hand to avoid making the cake soggy.
Make sure your mixing bowl and whisk attachment are ice cold before you start whipping the heavy cream. You can pop them in the freezer for ten minutes to ensure the fat in the cream stays solid as you incorporate air. This results in a much higher volume and a more stable structure that won’t deflate as you assemble the layers. It is a small step that makes a massive difference in the height of your finished dessert.
Frequently Asked Questions
What is chantilly cake?
A Chantilly Cake is a light dessert typically consisting of a vanilla sponge layered with sweetened whipped cream and fresh fruit. The name comes from Chantilly cream, which is a French term for heavy cream that has been whipped with sugar and vanilla. It is known for its airy texture and simple, elegant presentation.
How do I make chantilly cream for my cake?
To make the cream, beat cold heavy whipping cream with powdered sugar and vanilla extract until stiff peaks form. The key is to keep everything cold so the fat stays stable and traps air effectively. You can add a small amount of cream cheese or mascarpone if you want a thicker, more stable frosting that lasts longer.
Can I customize my chantilly cake?
Yes, this cake is highly customizable by changing the fruit toppings or adding different extracts to the batter. You can use raspberries, blackberries, or even sliced peaches depending on what is available at your local market. Some bakers like to add a layer of fruit jam between the sponge and the cream for an extra burst of concentrated flavor.
How long will chantilly cake last?
Because it uses fresh whipped cream and fruit, this cake is best enjoyed within 24 hours of assembly. If you need to store it, keep it in an airtight container in the refrigerator to prevent the cream from absorbing other food odors. After two days, the sponge may start to soften significantly as it absorbs moisture from the cream.
Can I freeze the cake layers before assembly?
You can definitely bake the sponge layers in advance and freeze them for up to three months. Wrap each cooled layer tightly in plastic wrap and then aluminum foil to prevent freezer burn and keep them fresh. When you are ready to serve, thaw them at room temperature before adding the fresh whipped cream and berries.
Why did my whipped cream deflate?
Whipped cream usually deflates because it wasn’t beaten long enough to reach stiff peaks or because it got too warm during the process. Over time, the air bubbles will naturally escape, which is why stabilized whipped cream is a popular choice for cakes. Always assemble the cake shortly before serving if you aren’t using a stabilizer like gelatin or cornstarch.
Flavor Variations
You can easily swap the berries for tropical fruits like mango and kiwi to create a totally different flavor profile for a summer party. The acidity of the kiwi cuts through the heavy cream just as well as berries do, while the mango adds a buttery sweetness that complements the almond in the cake. If you enjoy experimenting with different dairy fillings, you might like the richness of a limoncello mascarpone cake as a more decadent alternative. This is where you make it yours by matching the fruit to the season.
For a nutty twist, fold half a cup of finely ground toasted almonds into the dry ingredients before you bake the layers. This adds a subtle crunch and reinforces the almond extract, making the cake feel more rustic and grounded. You could also replace the vanilla extract in the whipped cream with rose water for a floral variation that feels very elegant. One smart addition, all the wow, is often just a matter of looking in your spice drawer for something new.
Bringing the Wow to the Table
When you are ready to serve this cake, use a long, thin serrated knife to cut through the layers without squishing the delicate cream. It helps to dip the knife in warm water and wipe it clean between each slice for a professional, tidy look. This cake is light enough to follow a heavy dinner, making it a favorite for holiday gatherings or birthday celebrations. You can serve it alongside a strawberry shortcake platter if you are hosting a large garden party with a berry theme.
A cold glass of sparkling cider or a light dessert wine pairs beautifully with the floral notes of the almond and the creaminess of the topping. For a casual afternoon tea, a cup of Earl Grey with its citrusy bergamot notes will complement the fresh berries perfectly. You can also place extra bowls of berries on the table so guests can add more fruit to their plates as they wish. This creates a relaxed, generous atmosphere that makes the dessert feel even more special.
Try plating each slice with a small sprig of fresh mint for a touch of green that makes the red and blue berries stand out. If you are serving this for a formal event, a light dusting of powdered sugar over the fruit just before bringing it to the table adds a snowy, finished look. The goal is to make the presentation feel as light and airy as the cake itself. This simple cake, unforgettable flavor approach ensures that the ingredients remain the star of the show.
Your Turn to Riff
Baking a Chantilly Cake is a wonderful way to practice your sponge technique while playing with fresh, seasonal flavors. By focusing on the small details like ingredient temperature and that secret hint of almond, you create a dessert that is far more than the sum of its parts. I hope you feel encouraged to take this recipe and make it your own with your favorite fruits and creative toppings. There is nothing quite like the joy of sharing a light, cream-filled cake with friends and family.
If you enjoyed this airy dessert, you might also want to try an angel food cake coconut berries for another fruit-forward baking project. Every time you bake, you learn a little more about how flavors interact and how a single ingredient can change the entire experience. Don’t be afraid to experiment with different extracts or fruit combinations as the seasons change throughout the year.
Please share your beautiful cake designs with us and let us know how your flavor additions turned out. You can find more inspiration and connect with our community on Pinterest and Facebook. We also love seeing your progress on TikTok and Telegram, so be sure to tag us in your baking adventures. Happy baking and enjoy your colorful creation.