If you fear a sink full of messy dishes and recipes with twenty complicated steps, this one-dish wonder is the answer to your weeknight dessert cravings.

This Canned Peach Dump Cake with Yellow Cake Mix is the reliable treat that turns a few pantry staples into a warm, gooey masterpiece. When you are looking for a comforting sweet fix after a long day, you want something that requires zero effort but tastes like you spent hours in the kitchen. The combination of sweet syrup and a buttery crust creates a texture that is half-cobbler, half-cake, and entirely delicious. It is the kind of recipe that makes baking feel doable for everyone, regardless of how much time is left on the clock.
What Makes This Easy Canned Peach Dump Cake with Yellow Cake Mix Shine
Prep: 10 min · Serves: 24 · Difficulty: Easy
- Only four simple pantry staples required
- One single baking dish for cleanup
- Golden buttery topping in every bite
- Perfect for feeding very large crowds
This is the recipe I reach for when life gets busy but the family still wants something warm from the oven. If you have mastered the art of the 3 ingredient dump cake, you will find this version feels like a cozy upgrade with minimal extra work.
Get The Full Cake Recipe
Print
Canned Peach Dump Cake with Yellow Cake Mix
- Total Time: 55 mins
- Yield: 24 servings
Description
This effortless dump cake combines juicy canned peaches with a buttery yellow cake topping for a perfect, cobbler-style dessert. It is a foolproof weeknight treat that requires only four pantry staples and minimal cleanup.
Ingredients
- 2 cans (15 oz each) sliced peaches in heavy syrup
- 1 box yellow cake mix
- 1/2 cup unsalted butter, cold
- 1 teaspoon ground cinnamon
Instructions
- Preheat the oven. Preheat your oven to 375°F to ensure it is hot enough for the fruit to bubble.
- Layer the peaches. Empty both cans of peaches, including the heavy syrup, into a 9×13-inch baking dish and spread evenly.
- Add dry mix. Sprinkle the yellow cake mix evenly over the peaches and press down slightly with a spoon to encourage absorption.
- Distribute the butter. Cut the cold butter into small, thin tabs or grate it, scattering pieces uniformly over the top of the cake mix.
- Sprinkle the spice. Lightly dust the surface with ground cinnamon to add warmth and fragrance to the crust.
- Bake the cake. Bake for 45 minutes until the edges are bubbling vigorously and the top has reached a golden brown color.
Notes
- Use a cheese grater for the butter to ensure more even melting and a crunchier golden crust.
- Always ensure your oven is fully preheated before inserting the pan to prevent the bottom from becoming soggy.
- Let the dessert stand for at least 15 minutes after removing from the oven to allow the fruit juices to thicken into a sauce.
- Avoid stirring the dry cake mix into the fruit, as this prevents the desired cobbler-like crust from forming.
- Prep Time: 10 mins
- Cook Time: 45 mins
- Category: Dessert
- Method: Baking
- Cuisine: American
Pantry Lineup

You only need a handful of items to make this happen, and most are likely sitting in your kitchen right now. Each component plays a specific role in creating that signature gooey bottom and crisp top.
- Canned peaches in heavy syrup: These provide the essential moisture and sweetness needed to hydrate the dry mix without any extra liquid.
- Yellow cake mix: This serves as our flour, sugar, and leavening agent all in one convenient box for speed and consistency.
- Butter: This fat source is the secret to a rich, golden brown crust that tastes like a traditional homemade cobbler.
- Ground cinnamon: A light dusting adds warmth and depth to the fruit, making the entire house smell like a weekend morning.
| Ingredient | Why It Matters |
|---|---|
| Peaches in Syrup | Provides the base liquid and fruit structure |
| Yellow Cake Mix | Acts as the crumbly, sweet topping |
| Unsalted Butter | Creates the rich, toasted flavor profile |
| Ground Cinnamon | Adds aromatic warmth and spice complexity |
The Easy Method
Step 1: Prep Your Space and Pan
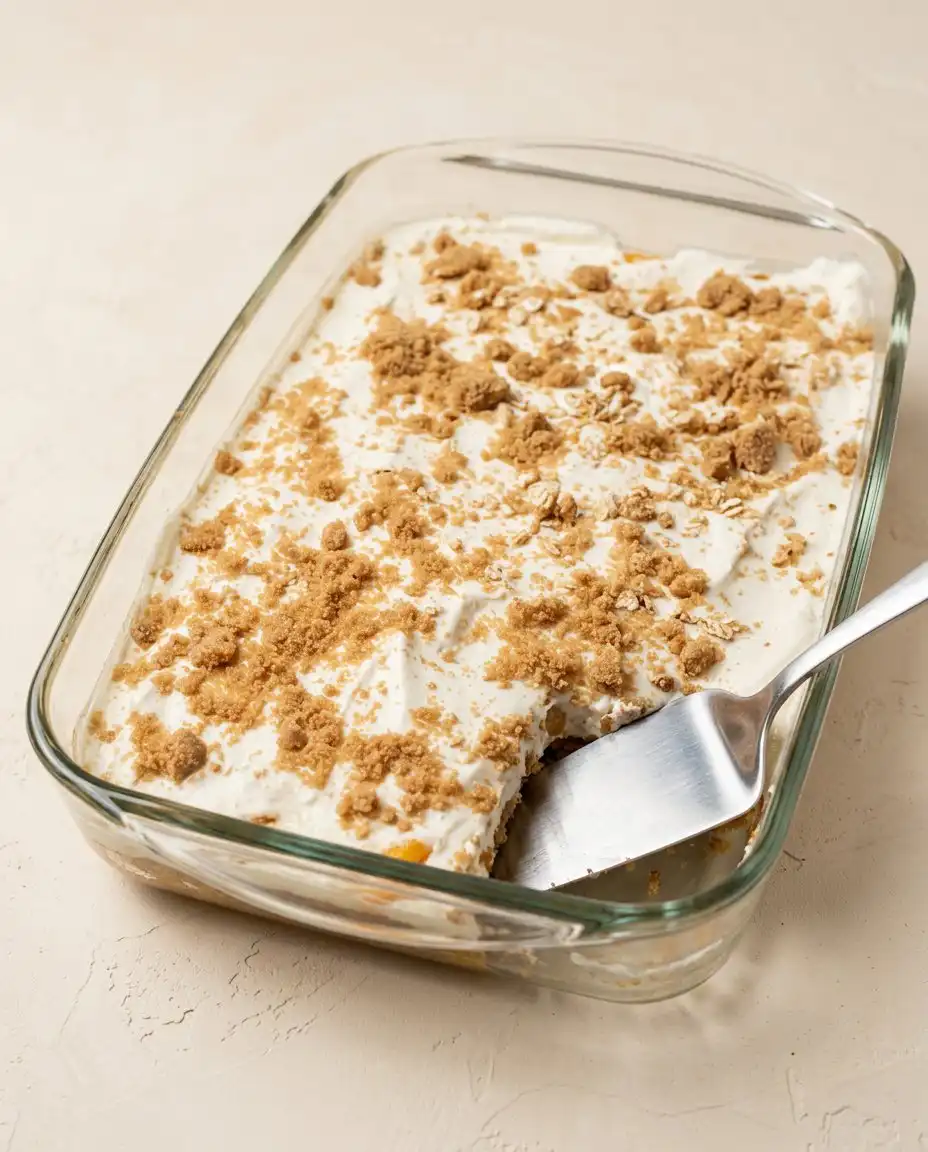
Begin by preheating your oven to 375 degrees F so it is nice and hot when the dish is ready. You do not even need to grease the pan because the fruit syrup and butter provide plenty of natural non-stick properties. Grab a standard 9×13-inch glass or ceramic baking dish from the cupboard and clear a small spot on your counter.
Step 2: Layer the Peaches
Open both cans of peaches and empty them directly into the bottom of your baking dish, ensuring you include every drop of that heavy syrup. Use a spoon to spread the fruit out in an even layer so that every corner of the pan has a fair share of peaches. You should see the bright orange fruit submerged in the thick, sweet liquid across the entire base of the dish.
Step 3: Add the Dry Mix
Cut open your package of yellow cake mix and sprinkle it evenly over the top of the fruit until the peaches are completely hidden. Use the back of a large spoon to press the dry mix down firmly into the peaches and syrup to help the moisture start soaking in. It might look like a lot of powder, but don’t worry because the magic happens once the heat and butter are added.
Step 4: Distribute the Butter
Cut your cold butter into very small pieces or use a grater to scatter it across the entire surface of the dry cake mix. It is important to cover as much of the powder as possible to prevent dry flour spots from forming during the baking process. Small, thin tabs of butter are better than large chunks because they melt more evenly across the top of the pan.
Step 5: Sprinkle the Spice
Take your ground cinnamon and lightly dust it over the butter and cake mix to give the top a beautiful speckled appearance. The spice will toast slightly in the oven, releasing a comforting scent that fills the kitchen within minutes. You can add more or less depending on how much you enjoy that classic autumn flavor profile.
Step 6: Bake Your Canned Peach Dump Cake with Yellow Cake Mix Until Golden
Slide the dish onto the center rack of your oven and bake for about 45 minutes until the edges are bubbling and the top is golden. You will know it is ready when the kitchen smells like sweet fruit and the center of the cake feels set but slightly soft. If the fruit juices are vigorously bubbling up around the sides, the dessert has reached the ideal temperature.
Little Things That Help
If you notice dry flour spots on top of your cake after thirty minutes, take a spoon and gently press those areas into the bubbling butter or fruit juice. This troubleshooting step ensures that every bit of the dry mix hydrates properly for a consistent texture.
Using a cheese grater to shred cold butter over the top is a clever trick that helps you get much better coverage than slicing tabs with a knife. This method allows the fat to melt more uniformly, which leads to a crispier and more reliable crust every single time.
Choosing peaches in heavy syrup is better than those in light syrup or juice because the thicker liquid creates a more decadent, jam-like consistency. If you want to learn more about fruit ratios, check out my guide on the original peach dump cake for more details.
Avoid the temptation to stir the layers together before putting the pan in the oven because the separation is what creates the cobbler-like effect. The dry mix needs to sit on top of the fruit to transform into a crust rather than becoming a thick, heavy batter.
Make sure your oven is fully preheated before the pan goes in so the butter starts melting and the juices start bubbling immediately. Slow heating can sometimes lead to a soggy bottom rather than the tender, gooey fruit layer we are looking for in this recipe.
Wait at least ten or fifteen minutes before serving the cake to give the hot fruit juices time to thicken and set slightly. This brief resting period makes it much easier to scoop out clean portions without the dessert falling apart on the plate.
Frequently Asked Questions
Can I use fresh peaches instead of canned ones?
Yes, you can use fresh fruit, but you will need to add about half a cup of sugar and a quarter cup of water or peach nectar. Canned peaches work best because the heavy syrup provides the necessary liquid to hydrate the dry cake mix during the baking process. If using fresh, make sure the fruit is very ripe and sliced thinly.
Why is there dry flour on top of my cake?
Dry spots usually happen if the butter was not distributed evenly enough or if the cake mix was not pressed down into the fruit. To fix this, you can grate the butter more finely or use a spoon to pat down the mix halfway through baking. Ensuring the butter covers the entire surface is the best way to prevent this issue.
Does this recipe work with light syrup peaches?
You can use light syrup, but the final result will be slightly less sweet and the sauce will be thinner. Heavy syrup provides a richer mouthfeel and helps the cake mix develop a better texture as it bakes. If you only have light syrup, consider adding a tablespoon of brown sugar to the fruit layer.
How should I store the leftovers?
Store any remaining portions in an airtight container in the refrigerator for up to four days. This cake is actually delicious when eaten cold, but you can also reheat individual servings in the microwave for twenty seconds. The crust will soften slightly in the fridge, but the flavors will continue to develop.
Can I freeze a dump cake?
Yes, you can freeze the baked cake for up to three months if it is wrapped tightly in plastic and foil. When you are ready to eat it, thaw the dish in the refrigerator overnight before reheating it in the oven at 350 degrees F. This helps restore some of the original texture to the buttery topping.
Do I need to grease the baking dish first?
Greasing the pan is not strictly necessary for this recipe because the syrup and butter create a natural barrier. However, if you are using an older ceramic dish that tends to grab food, a light coating of butter won’t hurt. Most bakers find that the fruit juices prevent any significant sticking during the process.
Simple Swaps
You can easily trade the yellow cake mix for a white cake mix or even a spice cake mix if you want a bolder flavor profile. Switching the base mix changes the personality of the dessert without adding any extra steps to your evening routine.
Try swapping one can of peaches for a can of blackberries or raspberries to create a beautiful melba-style dessert. If you enjoy experimenting with different fruits, you might also like trying a cherry dump cake for a tart and sweet variation.
Adding a handful of chopped pecans or walnuts over the butter layer provides a wonderful crunch that contrasts with the soft fruit below. For a more detailed look at how to vary these types of desserts, you can see these peach cobbler variations for inspiration.
Easy Serving Ideas
Serving this dessert warm is the best way to enjoy the contrast between the bubbling fruit and the crisp buttery crust. I highly recommend placing a large scoop of vanilla bean ice cream right on top of the warm cake so it melts into the nooks and crannies.
If you prefer something a bit lighter, a dollop of unsweetened whipped cream or a drizzle of heavy cream works beautifully. You might even enjoy a slice the next morning alongside a peach cake for a weekend brunch spread with friends and family.
For a pretty presentation, serve the cake in shallow bowls rather than on flat plates to catch all the delicious syrup and melted butter. This is the type of humble dessert that looks lovely with a small sprig of fresh mint or a few fresh peach slices on the side.

A Quick Last Note
Baking that fits your life should never feel like a chore, and this simple dessert proves that you can have a homemade treat even on your busiest days. With just ten minutes of hands-on time, you can create a crowd-pleasing dish that brings everyone to the table. Whether it is a Tuesday night craving or a weekend gathering, this recipe is a keeper that you will find yourself making again and again.
I hope this apple dump cake and our peach version become staples in your kitchen whenever you need a quick win. One bowl, one pan, no fuss is the best way to keep the joy in your baking routine. If you try this at home, please share your results with us and keep the conversation going.