You do not need a fancy specialty mold, a kitchen machine, or a trip to a high-end grocery store to make beautiful, soft cake pops from scratch.

These homemade Classic Vanilla Cake Pops bring the bakery style straight to your quiet kitchen table using honest ingredients you already keep on hand. We start with a tender, moist yellow cake baked in a simple pan, crumble it gently by hand, and stir in a spoonful of sweet buttercream. It is a slow, peaceful process that turns basic pantry staples into small bites of pure comforting sweetness. Children and grandparents alike love to gather around the counter to help roll and dip these little treats.
Why These Classic Vanilla Cake Pops Have Stayed in the Family
Prep: 120 min · Serves: 40 · Difficulty: Medium
- No special baking molds are required.
- Every single bite is tender and sweet.
- Children love helping roll the dough.
- Pantry staples make the entire recipe.
- They keep beautifully in the refrigerator.
This slow-baked treat brings back the same simple joy as a classic perfect buttermilk vanilla cake sitting under a glass dome on a Sunday afternoon.
Get The Full Cake Recipe
Print
Classic Vanilla Cake Pops
- Total Time: 156 mins
- Yield: 40 pops
Description
These delightful vanilla cake pops are handcrafted using tender yellow cake and creamy homemade buttercream. Perfectly coated in a smooth candy shell, these bite-sized treats are simple enough for family baking yet elegant enough for any special gathering.
Ingredients
- 1 cup unsalted butter, softened
- 1 cup granulated sugar
- 1 large egg
- 1 teaspoon pure vanilla extract
- 1 1/2 cups all-purpose flour
- 1 teaspoon baking powder
- 1/2 teaspoon baking soda
- 1/4 teaspoon salt
- 1/2 cup whole milk
- 1/2 cup confectioners’ sugar
- 1 tablespoon heavy cream
- 12 ounces candy melts
- 40 lollipop sticks
Instructions
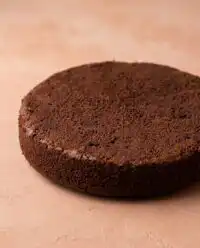
- Prep the oven. Preheat the oven to 350°F (177°C) and grease a 9-inch springform pan with butter and a dusting of flour.
- Whisk dry ingredients. Combine the flour, baking powder, baking soda, and salt in a medium bowl until uniformly mixed.
- Cream butter and sugar. Beat the softened butter and granulated sugar together until pale and fluffy, then add the egg and vanilla extract.
- Combine the batter. Alternate adding the flour mixture and whole milk into the butter mixture, stirring until the batter is smooth and glossy.
- Bake the cake. Spread the batter into the prepared pan and bake for 30 to 36 minutes, then cool completely on a wire rack.
- Prepare the buttercream. Whip the remaining softened butter, confectioners’ sugar, heavy cream, and vanilla until light and airy.
- Crumble and mix. Break the cooled cake into fine crumbs and blend thoroughly with the buttercream until a moldable dough forms.
- Shape the pops. Scoop one-tablespoon portions of dough, roll into smooth balls, and refrigerate for two hours until firm.
- Dip and set. Melt the candy coating, dip a lollipop stick into the chocolate, insert it into a cake ball, then submerge the entire ball in the coating and let it set.
Notes
- Ensure all dairy and egg ingredients are at room temperature to prevent the cake batter from curdling.
- Use a firm squeeze when rolling the dough to ensure the balls hold their shape without becoming greasy.
- Dip the lollipop stick into the melted candy before inserting it into the cake ball to act as a secure glue.
- Keep the bowl of candy coating inside a larger bowl of warm water to maintain a fluid consistency while dipping.
- Prep Time: 120 mins
- Cook Time: 36 mins
- Category: Dessert
- Method: Baking and Rolling
- Cuisine: American
Pantry Basics

Gathering these quiet ingredients is the first step toward a beautiful afternoon of baking. You will not find any boxed mixes or canned frosting tubs here, as we rely on the clean, honest flavors of real butter and sweet vanilla.
- Unsalted Butter: This provides the rich, tender crumb of our base cake and forms the backbone of the sweet buttercream frosting.
- Pure Vanilla Extract: Using real vanilla is key to getting that comforting, nostalgic aroma that fills the entire house while the oven runs.
- All-Purpose Flour: Sifted and spooned, this common flour builds a reliable structure that holds together well when rolled.
- Whole Milk: Added to the cake batter, it provides the necessary fat and liquid to keep the baked crumb soft and forgiving.
- Confectioners’ Sugar: Ground fine, it blends smoothly with our softened butter to make a rich frosting without any grittiness.
- Candy Melts: These form a smooth, protective shell around each round, locking in moisture so they stay tender for days.
| Ingredient | Why It Matters |
|---|---|
| Unsalted Butter | Creates a soft cake crumb and a creamy frosting base |
| Pure Vanilla Extract | Gives a warm, comforting fragrance and classic flavor |
| Whole Milk | Adds moisture so the cake remains easy to roll |
| Candy Melts | Forms a hard, protective coating that prevents cracking |
The Simple Method

Step 1: Prep Your Oven and Pan
Preheat your oven to 350°F (177°C) and make sure the oven rack sits right in the middle position. Grease your 9-inch springform pan thoroughly with butter and a light dusting of flour so the baked cake releases without sticking. The kitchen will begin to feel warm and inviting as the oven heats up for our baking.
Step 2: Mix Your Dry Staples
Whisk your flour, baking powder, baking soda, and salt together in a medium bowl until they are completely combined. The dry mixture should look light and uniform, with no small lumps left behind in the bowl. Set this bowl aside on your counter while you prepare the wet ingredients.
Step 3: Cream the Butter and Sugar
Beat the softened butter and granulated sugar together in a large mixing bowl until the mixture looks pale and fluffy. This step takes about three minutes of steady work to incorporate enough air for a light, soft cake crumb. Add the single egg and pure vanilla extract, then beat on high speed until the yellow mixture is smooth.
Step 4: Mix the Glossy Batter
Pour the dry flour mixture and the whole milk alternately into the bowl with the wet ingredients, stirring on low speed. The thick batter will look glossy and smell strongly of sweet vanilla as it slowly comes together. Give it a final gentle stir with your wooden spoon to make sure there are no flour pockets left at the bottom.
Step 5: Bake and Cool the Cake
Spread the thick batter evenly into your prepared springform pan and bake for 30 to 36 minutes. The kitchen will fill with a rich, buttery scent, and a wooden toothpick inserted into the center should come out clean. Set the pan on a wire rack to cool completely under a clean kitchen towel.
Step 6: Whip Your Easy Buttercream
Beat the remaining softened butter on medium speed in a clean bowl until it looks smooth and creamy. Slowly add your confectioners’ sugar, heavy cream, and vanilla, then beat on high speed for three full minutes. The frosting should look light as a cloud and hold a soft peak when you lift the beaters.
Step 7: Crumble the Cool Cake
Crumble your cooled yellow cake by hand directly into the bowl of sweet frosting, making sure no large pieces remain. Use your hands or a low-speed mixer to blend the crumbs and frosting until they form a dough that resembles damp sand. It should easily hold its shape when squeezed in your palm without feeling greasy.
Step 8: Shape the Classic Vanilla Cake Pops
Scoop exactly one tablespoon of dough and roll it between your palms into a smooth, round ball. Place each ball on a parchment-lined baking sheet and refrigerate them for two full hours to set their shape. They must feel cold and solid to the touch before you begin the next step.
Step 9: Dip and Set the Coating
Melt your candy melts in a deep glass measuring cup in the microwave, using short twenty-second bursts and stirring after each heat. Dip a lollipop stick half an inch into the warm coating, press it halfway into a cold cake ball, and then submerge the entire ball. Tap the stick gently against the rim to let the excess drip away, then place it upright to set.
Plain-Kitchen Notes

Always bring your egg and milk to room temperature before starting the cake batter. Cold ingredients will cause the creamed butter to seize up, leading to an uneven bake and a dense cake. You can place your cold egg in a cup of warm water for ten minutes to take the chill off.
Your baking butter should be soft enough to leave an indentation when pressed with a thumb, but not so warm that it looks shiny or greasy. If the butter is too warm, the cake will rise and then sink, leaving you with greasy crumbs that do not hold their shape when rolled.
If your cake balls fall off the sticks while dipping, your cake dough is likely too warm or too heavy with frosting. To fix this, return the tray to the freezer for fifteen minutes, and make sure you dip the stick into the melted candy coating before inserting it into the cake ball. The melted coating acts as a secure glue that holds the ball tight to the stick.
Avoid twirling the stick when dipping the cake ball into the melted chocolate. Only dunk the ball straight down into the cup in one fluid motion, then lift it straight back out. Twirling the cake pop while it is submerged will pull the soft dough away from the stick, causing it to slip off.
If you enjoy crafting these bite-sized sweets for family gatherings, you might want to try other classic cake pops variations that use chocolate or spice cake bases. The rolling and dipping method remains exactly the same, making it a reliable technique to keep in your memory.
Keep your candy coating warm by placing the glass measuring cup inside a larger bowl filled with hot water while you dip. If you want to read more about structural ratios, this helpful guide on how to make homemade cake pops from scratch offers great advice on standard measurements. This keeps the chocolate fluid without requiring constant trips back to the microwave.
Frequently Asked Questions
Why are my cake pops cracking?
Cracking happens when there is a sudden temperature difference between the cold cake balls and the hot candy coating. If the coating is too warm, the cold cake dough expands as it heats up, splitting the chocolate shell. To prevent this, let your melted coating sit on the counter for a few minutes to cool down slightly before you begin dipping.
Why are my cake pops falling off the sticks?
This usually happens when the cake balls are too warm or the cake dough contains too much frosting, making it heavy. Make sure your rolled cake balls are thoroughly chilled in the refrigerator before dipping. Also, always dip the tip of the stick into the melted coating before pushing it into the cake ball to act as a glue.
How long do they last, and how should I store them?
You can store these treats in an airtight container in the refrigerator for up to one week. If you need to make them far in advance, you can freeze the dipped pops for up to six weeks. Just be sure to let them thaw slowly overnight in the refrigerator before serving so moisture does not bead on the surface.
Can I use store-bought frosting?
While you can use canned frosting in a pinch, homemade buttercream is much thicker and holds the cake crumbs together far better. Store-bought frostings often contain oils that make the cake mixture too greasy or soft, which makes rolling difficult. A simple homemade batch of buttercream takes only five minutes and keeps the texture perfect.
Should I use real chocolate or candy melts?
Candy melts are much easier for beginners because they melt smoothly and set into a firm, reliable shell. Real white chocolate contains cocoa butter, which requires careful tempering to set properly at room temperature. If you prefer the flavor of real chocolate, add half a teaspoon of vegetable oil to help thin it out as it melts.
Can I make the cake a day ahead of time?
Making the cake a day in advance is a wonderful way to split up the work. Bake the yellow cake, let it cool completely, and wrap it tightly in plastic wrap overnight at room temperature. The cake will actually crumble much better on day two, as the crumb settles and loses its initial fragile moisture.
Can I freeze the undipped cake balls?
Yes, you can freeze the rolled, undipped cake balls on a baking sheet for up to six weeks. Once they are frozen solid, transfer them to a freezer-safe bag to prevent freezer burn. When you are ready to dip them, thaw them in the refrigerator overnight so they do not experience a temperature shock when dipped.
Simple Twists
You can easily transform the flavor profile by adding a teaspoon of ground cinnamon and a pinch of nutmeg to the flour mixture. This warm twist is reminiscent of old-fashioned molasses cookies and pairs beautifully with a cup of hot coffee on a chilly autumn morning. It uses the exact same base method, requiring no extra steps.
Substitute the whole milk in the cake with real buttermilk to give the crumbs a slightly tangy, rich flavor. This makes the cake even more tender, much like a traditional southern yellow cake. If you enjoy experimenting with different cake bases, you can find a reliable vanilla cake recipe that handles moisture beautifully in any format.
After dipping each ball in the sweet coating, immediately roll it in fine, toasted coconut flakes before the chocolate sets. This adds a lovely, rustic texture and a comforting nutty flavor that balances the sweetness of the buttercream. It is an easy way to dress up the treats without resorting to artificial colors or dyes.
At the Kitchen Table
These little treats look beautiful displayed on a simple wooden platter or tucked into small paper cups on a dessert table. They are wonderful for Sunday afternoon gatherings, birthday celebrations, or baby showers where guests prefer small bites over a large, heavy slice. Setting them upright in a clean styrofoam block covered with a linen napkin makes for an easy, charming centerpiece.
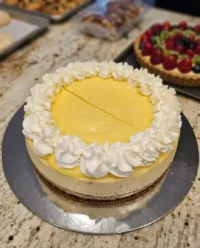
Serve them alongside a pot of hot black coffee or cold glasses of farm-fresh milk to balance the sweet vanilla coating. The rich, buttery flavor of the cake pairs wonderfully with fresh berries like strawberries and raspberries on the side. If you are hosting a larger gathering, you can arrange them next to a platter of homemade mini cakes to offer your guests a variety of old-fashioned desserts.
Because these treats keep so well, you can package them individually in small cellophane bags tied with cotton baker’s twine. They make sweet, thoughtful gifts for neighbors, teachers, or friends who appreciate a homemade touch. No matter how you choose to present them, they bring a sense of slow, honest comfort to any table.

From the Kitchen Card
Baking for the people we love is one of the simplest ways to show we care, and these little vanilla bites are proof that you do not need fancy tools to make something special. Taking the time to crumble the cake and roll each ball by hand is a quiet, peaceful ritual that slows down a busy week. When you share these with your family, you are sharing a piece of honest, from-scratch comfort that everyone will remember.
If you find yourself longing for that same comforting flavor in a traditional format, try baking a classic vanilla butter cake for your next Sunday supper. It uses the very same simple ingredients and fills the kitchen with that warm, familiar aroma of butter and vanilla. Keep this recipe card close to your heart, and pass it down to the next generation of bakers in your family.
Please leave a comment below to let me know how your baking afternoon turned out, or share a photo of your beautiful creations. You can also find more of my family-favorite recipes and kitchen inspiration by following along on Pinterest, Facebook, and TikTok. Happy baking from my kitchen to yours, and may your home always be filled with sweet warmth.

