There is something deeply special about marking the end of a long career. It is not just about closing a chapter; it is about celebrating all the hard work, the early mornings, and the dedication that filled the years. In my grandmother’s kitchen, big milestones always called for a sturdy, reliable cake—one that could stand up to travel, hold a beautiful decoration, and still taste moist and tender when sliced. We believe that a cake for such an occasion should be as honest and steadfast as the career it celebrates.

This retirement cake is a classic vanilla sponge that prioritizes texture and stability without sacrificing flavor. It uses a traditional creaming method to ensure a light crumb that is dense enough to support fondant icing. Whether you are planning a large party or a quiet family gathering, this recipe provides a foolproof base that tastes even better the next day, allowing you to focus on the celebration rather than the baking.
A Perfect Treat for New Beginnings
When you are baking for a significant event like a retirement party, you need a recipe you can trust completely. This cake is built on the principles of simple comfort—using basic ingredients to create something memorable. You will love how forgiving the batter is; it comes together easily and bakes into a golden, level sponge that is perfect for decorating.
Another reason this recipe is a keeper is its keeping quality. Unlike delicate chiffon cakes that dry out quickly, this sponge relies on a generous amount of butter and eggs to stay moist for days. It is the kind of cake you can bake on a Thursday for a Saturday party, knowing the flavor will only settle and improve. It offers that nostalgic, bakery-style vanilla taste that pairs perfectly with a cup of coffee and good conversation.
Print
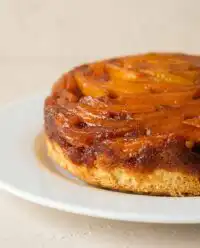
Retirement Cake
- Total Time: 2 hours 15 mins
- Yield: 16 servings
- Diet: Vegetarian
Description
A classic vanilla sponge cake designed for stability and flavor, providing a sturdy yet moist base that is perfect for milestone celebrations. This reliable recipe is ideal for fondant decoration and maintains its tender texture for several days.
Ingredients
- 1 ⅔ cups (375 g) soft butter or margarine
- 1 ⅞ cups (375 g) caster sugar
- 5 cups (625 g) self-raising flour
- 6 large eggs, room temperature
- 4 tablespoons milk
- 3 teaspoons vanilla extract
- Approx. 2.2 lbs (1 kg) fondant icing
- 140g (approx. ½ cup + 2 tbsp) softened butter
- 280g (2 ¼ cups) sifted icing sugar
- Splash of milk
- ¼ teaspoon vanilla extract
Instructions
- Preheat oven to 320°F (160°C) and line a deep 9-inch round baking tin with parchment paper.
- Cream the soft margarine and caster sugar together in a large bowl until the mixture is very pale and fluffy.
- In a separate bowl, whisk the eggs and 4 tablespoons of milk together until combined.
- Gently fold the egg mixture and self-raising flour into the creamed butter in alternating batches, then beat in the vanilla extract until smooth.
- Pour the batter into the prepared tin and bake for 1 hour and 15 minutes, or until a skewer inserted into the center comes out clean.
- Cool the cake in the tin for 10 minutes before transferring it to a wire rack to cool completely.
- Prepare the buttercream by beating 140g softened butter, 280g icing sugar, a splash of milk, and a 1/4 teaspoon of vanilla until creamy.
- Cover the top and sides of the cooled cake with a thin layer of buttercream to act as a crumb coat.
- Roll out the fondant on a surface dusted with icing sugar to a 1/2 cm thickness and carefully drape it over the cake, smoothing the surface before trimming the edges.
Notes
To ensure a perfectly smooth finish, allow the crumb coat to set in the refrigerator for 30 minutes before applying the fondant. Using room temperature eggs and butter is essential to prevent the batter from curdling and to achieve the best possible rise.
- Prep Time: 30 mins
- Cook Time: 1 hour 15 mins
- Category: Dessert
- Method: Baking
- Cuisine: British
Simple Pantry Staples

For a cake this size, we rely on standard ingredients that you likely already have in your kitchen. The magic lies in the proportions and the temperature of the ingredients.
- Butter or Margarine (1 ⅔ cups / 375 g): It is absolutely vital that your fat is soft and at room temperature. This allows it to trap air when beaten with sugar, giving the cake its lift. I often use a high-quality baking margarine for sponges as it yields a lighter texture, but butter works beautifully for a richer flavor.
- Caster Sugar (1 ⅞ cups / 375 g): This fine sugar dissolves easily into the butter, preventing a gritty texture. If you only have granulated sugar, you can give it a quick blitz in a food processor.
- Self-Raising Flour (5 cups / 625 g): This takes the guesswork out of leavening. It gives the cake a consistent rise and a tender crumb.
- Eggs (6 large): These provide structure and richness. Make sure they are at room temperature so they emulsify smoothly with the butter mixture.
- Milk (4 tablespoons + extra for buttercream): A splash of milk loosens the batter to a dropping consistency, ensuring the cake isn’t too heavy.
- Vanilla Extract (3 teaspoons): Use a good quality extract for that warm, floral aroma. Avoid artificial essences if you can.
- Fondant Icing (approx. 2.2 lbs / 1 kg): For that smooth, professional finish. Store-bought roll-out icing is perfectly fine and saves a lot of time.
How to Make It
Step 1: Prep Your Tools
Start by preheating your oven to 320°F (160°C) or Gas Mark 2.5. This lower temperature is crucial for a large cake; it allows the center to cook before the outside burns. Grease a deep, round 9-inch (23 cm) baking tin and line it with parchment paper. This simple step guarantees your cake will release perfectly later.
Step 2: Cream the Butter and Sugar
In a large mixing bowl, beat the soft margarine (or butter) and caster sugar together. You want to do this until the mixture is very pale—almost white—and fluffy. This process incorporates air, which acts as a natural raising agent. Take your time here; rushing this step leads to a dense cake.
Step 3: Mix the Wet Ingredients
In a separate jug or small bowl, beat the six eggs and the 4 tablespoons of milk together with a fork until combined. Doing this separately helps you control the addition of liquid to the fat mixture, reducing the risk of the batter curdling.
Step 4: Combine the Batter
Now, add the egg mixture and the flour to your creamed butter in alternating batches. Add a spoonful of the egg mix, followed by a spoonful of flour, and fold or beat gently. Repeat this until all the egg and flour are used. Finally, whisk the mixture until smooth and beat in the vanilla extract. The batter should be smooth and glossy.
Step 5: Bake Low and Slow
Spoon the batter into your prepared tin and smooth the top. Bake for 1 hour and 15 minutes. Resist the urge to open the oven door early. Check it with a wooden skewer; if it comes out clean, the cake is ready. If it’s still wet, give it another 5–10 minutes. Let it cool in the tin for 10 minutes before transferring to a wire rack to cool completely.
Step 6: Make the Buttercream
While the cake cools, prepare your crumb coat. Beat 140g (approx. ½ cup + 2 tbsp) of softened butter until creamy. Add half of the 280g (2 ¼ cups) sifted icing sugar and beat until smooth. Add the remaining sugar, a splash of milk, and ¼ teaspoon vanilla. Beat until creamy and spreadable. Cover the top and sides of the completely cooled cake with this buttercream.
Step 7: Apply the Fondant
Dust your workspace with icing sugar. Knead your fondant until it is pliable and warm. Roll it out to about ½ cm thick, moving it constantly so it doesn’t stick. Lift it carefully over the cake. Smooth the top with your hands or a smoother tool, then gently work down the sides, smoothing out any air bubbles or pleats. Trim the excess from the bottom for a neat finish.
Jesse’s Simple Tips

- Room Temperature is Key: I cannot stress this enough. If your butter is too cold, it won’t cream properly. If your eggs are cold, they will curdle the batter. Set your ingredients out on the counter a couple of hours before you start baking.
- Don’t Overmix: Once the flour is added, mix only until the ingredients are combined. Overworking the flour develops gluten, which can make your sponge tough rather than tender.
- The Crumb Coat: The layer of buttercream under the fondant acts as glue. Make sure your cake is absolutely cold before applying it, or the butter will melt and the fondant will slide. If you are new to baking large cakes, check out our guide on party-cakes-events for more planning advice.
- Smoother Finish: If you see small cracks in your fondant, rub a little vegetable shortening on your fingertip and gently buff the imperfection in a circular motion. It works like an eraser.
Simple Flavor Swaps
- Zesty Lemon: Swap the vanilla extract for 2 teaspoons of lemon extract and add the zest of two lemons to the butter and sugar mixture. This adds a bright, fresh note that cuts through the sweetness of the fondant.
- Almond Sponge: Replace half the vanilla with almond extract. This gives the cake a sophisticated, bakery-style flavor that pairs wonderfully with raspberry jam filling.
- Berry Filling: Before icing, slice the cake horizontally and spread a layer of strawberry or raspberry preserves. If you are looking for a lighter, fruitier option for a different occasion, you might enjoy our pink-champagne-cake.
- Chocolate Chip: Fold in a cup of milk chocolate chips at the very end of mixing. Dust the chips in a little flour first to stop them from sinking to the bottom.
Sharing the Moment

This cake is substantial and rich, so it serves a crowd easily. Slice it into generous wedges or neat squares, depending on the number of guests. Because the fondant and buttercream add plenty of sweetness, this cake pairs beautifully with unsweetened beverages.
Serve slices with a strong pot of hot coffee or a classic Earl Grey tea. The bitterness of the coffee balances the sugary icing perfectly. If you are serving this as a dessert course rather than at a casual buffet, add a dollop of unsweetened whipped cream or fresh berries on the side to cut through the richness. For those who love a vintage touch, check out our vintage-cake for more serving inspiration.
Simple Comfort for the Future
Retirement is a huge life event, and it deserves a cake made with care and affection. This recipe gives you a sturdy, delicious canvas to express your well wishes. It is simple enough for a home baker but tastes professional enough for a grand send-off. The vanilla flavor is honest and comforting—exactly what you want when gathering to share stories of the past and hopes for the future.
Whether you stick to the classic vanilla or try a variation like our old-fashioned-chocolate-cake, the most important ingredient is the love you put into it. This recipe is inspired by the traditional celebration cakes found in many English kitchens, similar to the reliable methods shared by Beechcroft. We hope this cake becomes a part of your family’s happy transitions. Let us know how it turned out on Pinterest, Facebook, or Instagram!
