I remember a frantic Tuesday night when I realized I had forgotten to buy decorations for a friend’s birthday cake. Instead of panicking, I grabbed some melting wafers from the pantry and realized that making my own Cake Toppers was actually the most relaxing part of the whole week. It is one of those simple baking revelations that makes you feel like a total pro without needing any fancy tools or expensive equipment.

These edible decorations are the perfect way to add a personal touch to your baking without any stress. With just a few basic ingredients and a bit of waxed paper, you can create custom designs that look like they came straight from a high-end bakery. It is honest, simple baking that fits perfectly into your busy life.
Simple Perfection
You are going to love these Cake Toppers because they are completely customizable for any occasion. Whether you are celebrating a graduation, a kid’s birthday, or just a fun weekend brunch, you can pipe out any name or shape you need. It is a fantastic way to make someone feel special without spending hours in the kitchen.
Another reason to love this method is that it is totally budget-friendly. Store-bought custom toppers can be surprisingly pricey, but a bag of melting wafers goes a long way. Plus, since they are made of chocolate or candy melts, they are fully edible, which means one less thing to throw away after the party is over. It is a win for your wallet and your guests!
Print
Cake Toppers
- Total Time: 35 mins
- Yield: 12 toppers
- Diet: Vegetarian, Gluten-Free
Description
Create custom, edible decorations for any occasion using simple melting wafers and a few pantry staples. This budget-friendly method allows you to pipe personalized names and shapes that add a professional, handcrafted touch to your favorite cakes and cupcakes.
Ingredients
- 1 bag (10-12 oz) melting wafers (such as Ghirardelli or Wilton)
- Assorted sprinkles (optional)
- Waxed paper
- Wooden skewers or lollipop sticks
- Piping bag or sturdy zip-top bag
Instructions
- Draw or print your desired design onto a piece of paper to use as a template.
- Cut squares of waxed paper and place them directly over your template.
- Place melting wafers in a heat-safe bowl and microwave at 50% power in 30-second increments, stirring until smooth.
- Transfer the melted chocolate into a piping bag and snip a very small hole in the tip.
- Pipe the design onto the waxed paper by outlining the shape first and then filling in the center for a smooth finish.
- Place a skewer onto the wet chocolate so that at least half an inch is covered, then pipe a small amount of extra chocolate over the skewer to lock it in place.
- Top with sprinkles while the chocolate is still wet and let the designs sit at room temperature until completely solid and firm.
Notes
If you find the chocolate is setting too quickly in your piping bag, you can gently massage the bag to distribute the heat or place the bag in a bowl of warm water for a few moments. For the best stability, ensure your piped lines are at least an eighth of an inch thick so the topper doesn’t snap when you lift it off the paper.
- Prep Time: 15 mins
- Cook Time: 20 mins
- Category: Dessert Decorating
- Method: No-Bake
- Cuisine: American
The Pantry Basics

You only need a few straightforward supplies to get started with these Cake Toppers. I love that these are mostly things you might already have tucked away in your baking cabinet.
- Melting Wafers: I usually go for Ghirardelli melting wafers or Wilton candy melts because they have a reliable, smooth finish. They are designed to melt easily and set up firm at room temperature.
- Sprinkles: These are optional, but they add such a joyful pop of color and texture. Use whatever you have on hand that matches your theme.
- Waxed Paper: This is the secret to getting your toppers to release without breaking. Cut it into small squares so you can handle each design individually.
- Skewers: Make sure you choose a skewer that is long enough to attach to the topper and still sit deep in the cake. You can always trim them with kitchen shears if they are too tall.
- Piping Bag: A disposable bag is handy, but a sturdy zip-top bag with a tiny corner cut off works just as well for these simple shapes.
The Simple Process
Step 1: Design Your Template
Start by drawing or printing your desired design onto a piece of paper. This will be your guide, so make sure the size and scale are exactly what you want for your cake or cupcakes.
Step 2: Prep the Work Surface
Cut a square of waxed paper for every character or shape in your design. Lay the waxed paper directly over your template. Gather your skewers and have your sprinkles ready to go.
Step 3: Melt the Wafers
Place your melting wafers in a heat-safe bowl. Microwave on 50% power in 30-second increments. Stir frequently until the mixture is fully melted but still just-slightly thick. If it gets too runny, let it sit for a minute to cool.
Step 4: Fill and Snip
Transfer the melted chocolate into your piping bag. Snip the very tip off to create a small hole. It is better to start with a tiny hole, as you can always make it bigger if the flow is too slow.
Step 5: Pipe the Design
Carefully pipe the melted wafers onto the waxed paper, using the template underneath as your guide. I find it easiest to pipe the outline first and then fill in the center for a smooth look.
Step 6: Secure the Skewer
Place a skewer onto the wet chocolate. You want at least half an inch of the skewer to be covered by the topper for sturdiness. Pipe a little more melted wafer over the top of the skewer to lock it into place.
Step 7: Add Some Sparkle
While the chocolate is still wet, shake your sprinkles over the design. Gently press them in if needed. Let the toppers sit flat at room temperature until they are completely cool and solid.
Meagan’s Easy Wins

Getting the consistency of your melting wafers just right is the key to success. If they are too runny, your lines will spread out; if they are too thick, they won’t flow smoothly. If you find your chocolate hardening too fast in the bag, just squeeze it back into the bowl and reheat it for a few seconds. For more decorating inspiration, check out our guide on simple white cake decorating to see how these shapes can stand out.
Another quick trick is to work one topper at a time. If you pipe everything at once, the first ones might dry before you can add the sprinkles or the skewer. Working in small batches keeps everything fresh and easy to manage. You can also find more great technical advice at Always Eat Dessert if you want to see this process in action.
Simple Swaps
You can easily change the look of your Cake Toppers by adding a couple of drops of gel food coloring to white melting wafers. This allows you to match any specific color palette without buying ten different bags of candy melts. These toppers also look beautiful when paired with a whimsical butterfly cake for a garden-themed party.
If you want a more rustic look, try using dark chocolate and skipping the sprinkles. You can also create a marbled effect by piping two different colors of chocolate next to each other and lightly swirling them with a toothpick before they set. It is a quick way to make your decorations look sophisticated with zero extra effort.
Everyday Enjoyment

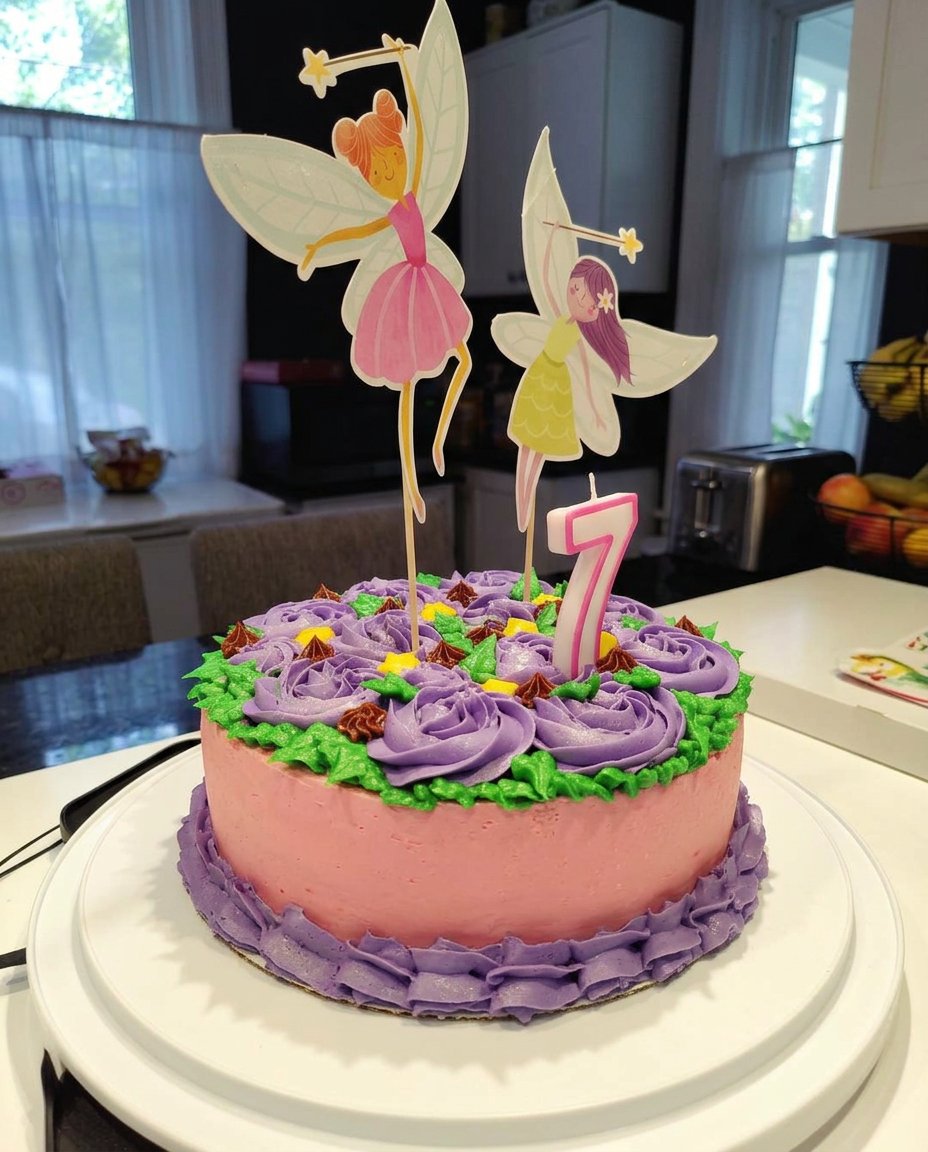
These Cake Toppers aren’t just for large cakes; they look absolutely darling on top of a single cupcake or even a small smash cake for a first birthday. They add such a happy, finished look to even the simplest store-bought treats.
When you are ready to serve, simply lift the toppers off the waxed paper and slide the skewers into your dessert. If you are baking in a warm kitchen, keep the toppers in the fridge until the very last second so they stay nice and firm. They are a great conversation starter and always make guests smile.
The Sweet Spot
Baking should be about the joy of sharing something homemade, and these Cake Toppers make that easier than ever. They prove that you don’t need to be a professional decorator to create something beautiful and unique. For even more fun project ideas, see how we use custom decorations on a doll cake to bring a little extra magic to the table.
I would love to see your finished designs! Feel free to share your photos and tag me on Pinterest, Instagram, or Facebook. Happy baking, and remember to keep it simple and delicious!
