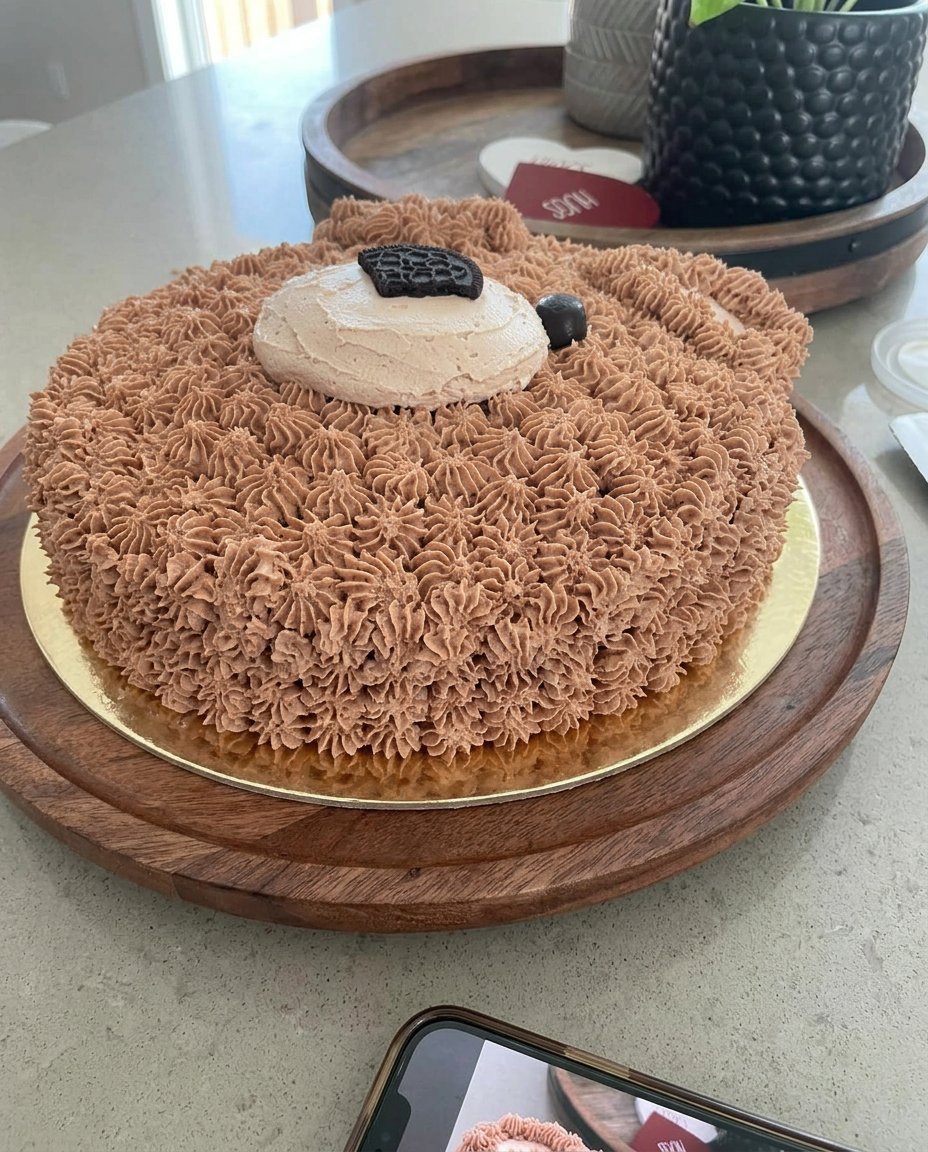
I remember the first time I wanted to make a themed cake for a friend but felt totally overwhelmed by all the fancy tools. I sat in my kitchen with a bowl of simple vanilla batter and realized that by just splitting it and adding a tiny bit of cocoa, I could create the most amazing marble effect. That discovery changed everything for me, showing me that you don’t need to be a professional to make something that looks like it came from a high-end bakery. This adorable design is the result of that simple game-changer moment, and it brings a huge smile to everyone’s face!

This Cow Cake is a total joy to put together and perfect for anyone who loves that classic combination of chocolate and vanilla. We’re using a moist buttermilk base that creates a tender crumb, making every bite a wonderful experience. By using some basic fondant shapes and a little clever piping, we can turn a standard round cake into a friendly farmyard character. It’s a fantastic way to show off your simple creativity while keeping the process stress-free and fun!
Simple Farmyard Magic
This cake is a absolute winner because it combines a beautiful visual with flavors that everyone loves. You get the perfect mix of rich cocoa and aromatic vanilla in every single slice thanks to the smart marbling technique. It’s a special treat that feels incredibly thoughtful but doesn’t require any complicated skills to pull off beautifully. The ‘flavor pop’ here comes from the addition of dark chocolate chips in the black spot frosting, giving those little patches a deeper, more intense taste that surprises everyone in the best way!
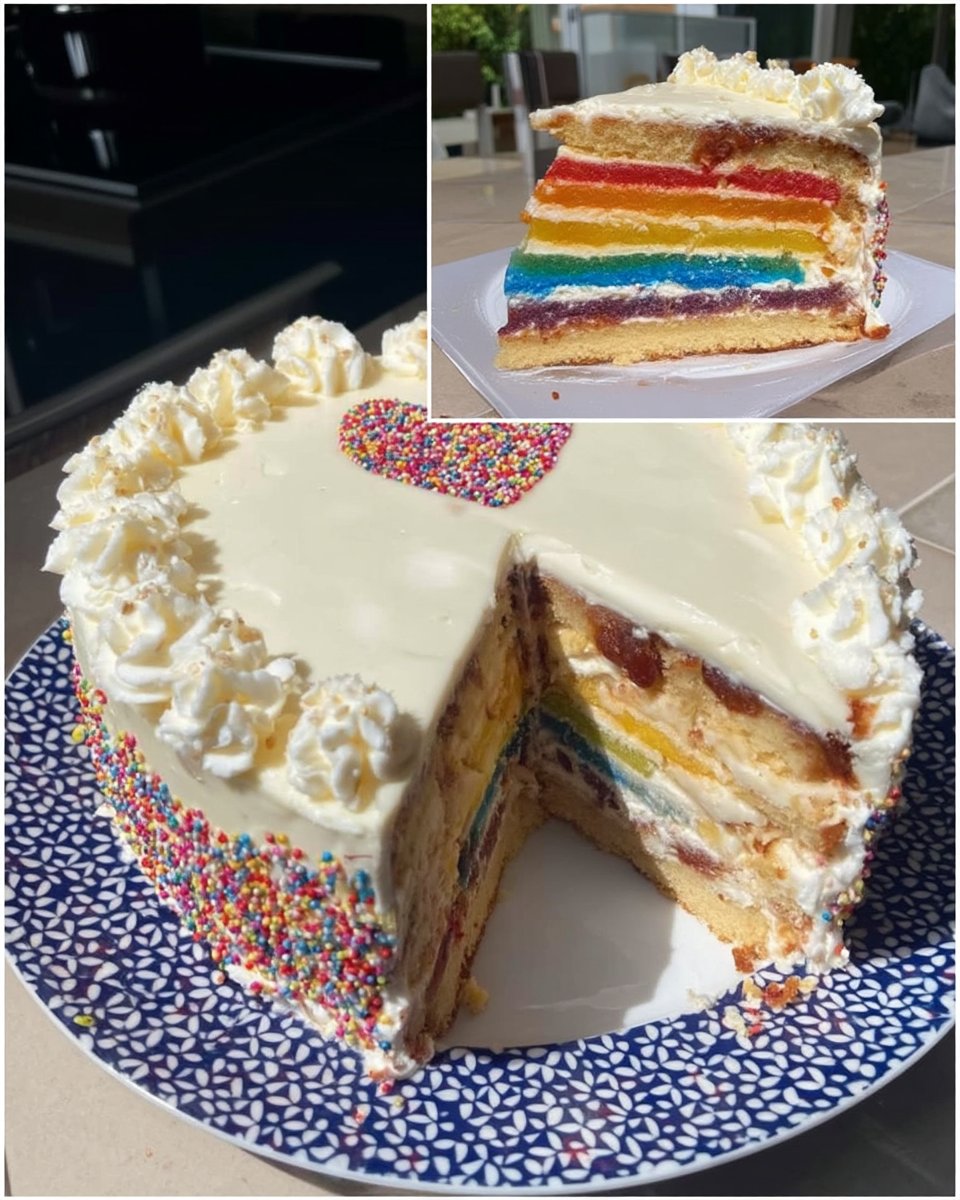
I love how this cake looks on a dessert table because it’s so vibrant and happy. It’s the kind of bake that makes people lean in and ask, ‘How did you do that?’ when the secret is actually very simple. You’re taking ordinary ingredients and making them extraordinary with just a few smart additions like vanilla bean paste and high-quality cocoa. It’s a joyful project that reminds us why we love home baking in the first place—creating something unique and delicious to share with the people we love most.
Print
Cow Cake
- Total Time: 1 hour 20 mins
- Yield: 12 servings
- Diet: Vegetarian
Description
This delightful Cow Cake features a moist buttermilk marble interior and a whimsical farmyard design. With its classic chocolate and vanilla flavors and adorable fondant details, it is a perfect centerpiece for birthday parties or rustic celebrations.
Ingredients
- 2 1/2 cups all-purpose flour
- 2 cups granulated sugar
- 1 tablespoon baking powder
- 1/2 teaspoon salt
- 1 cup unsalted butter, room temperature
- 4 large egg whites
- 1 1/4 cups buttermilk
- 1/4 cup vegetable oil
- 2 teaspoons vanilla bean paste
- 1/4 cup unsweetened baking cocoa
- 2 tablespoons extra granulated sugar
- 1/2 teaspoon extra baking powder
- 1 large egg
- Splash of extra buttermilk
- 1 lb unsalted butter (for frosting)
- 6–8 cups powdered sugar
- 1/4 cup heavy cream
- Black gel food coloring
- Pink food coloring
- Small amounts of white and black fondant
Instructions
- Preheat your oven to 350°F (175°C) and grease three 6-inch cake pans, lining the bottoms with parchment paper.
- In a stand mixer with the paddle attachment, combine the flour, granulated sugar, baking powder, and salt on low speed for 30 seconds.
- Add the room-temperature butter chunks one by one, mixing until the mixture looks like fine, damp sand.
- Slowly pour in the egg whites and buttermilk, scraping the bowl, then add the oil and vanilla and beat on medium speed for 30 seconds.
- Divide the batter in half; to one portion, add the cocoa powder, extra sugar, extra baking powder, one egg, and a splash of buttermilk, then mix until combined.
- Alternate large spoonfuls of vanilla and chocolate batter into the prepared pans and bake for 33-35 minutes until a skewer comes out clean.
- Make the buttercream by beating butter until fluffy, then adding vanilla, salt, powdered sugar, and heavy cream until smooth.
- Stack the cooled layers with white frosting, cover the cake in a white base layer, then pipe the pink snout and black chocolate spots before adding fondant ears and horns.
Notes
Ensure all your dairy ingredients, especially the butter and buttermilk, are at room temperature to prevent the batter from curdling. When marbling, avoid over-swirling the batters with a knife; simply dropping spoonfuls into the pan creates the best distinct cow-print pattern inside. If the fondant ears and horns feel too soft, prepare them a day in advance so they have time to dry and hold their shape.
- Prep Time: 45 mins
- Cook Time: 35 mins
- Category: Dessert
- Method: Baking
- Cuisine: American
The Flavor Stars

To get this cake just right, we’re using some staple ingredients that work together to create a fantastic texture and taste. Every part of this recipe is chosen to make the process easy while the results stay high-quality.
- Buttermilk: This is our secret weapon for a moist and tender cake. It reacts with the baking powder to give the layers a beautiful lift.
- Unsalted Butter: Using room-temperature butter makes sure your batter is smooth and well-incorporated without any lumps.
- Vanilla Bean Paste: I prefer this over extract because those tiny black flecks add a touch of sophistication and a much deeper flavor profile.
- Unsweetened Baking Cocoa: This is what transforms our base batter into a rich chocolate delight for that iconic marble look.
- Black Gel Food Coloring: We use this to get a deep, true black for the spots without watering down the frosting.
- Fondant: A little white and black fondant allows us to sculpt the 3D elements like ears and horns that really bring the cow to life.
- Heavy Cream: Adding this to your buttercream makes it incredibly silky and easy to pipe, which is vital for getting those smooth spots.
How to Make It
Step 1: Prep Your Space
Before you get started, preheat your oven to 350°F (175°C). Take three 6-inch cake pans and line the bottoms with parchment paper, then grease the sides well. This makes sure your beautiful layers come out perfectly every time without any sticking.
Step 2: Mix the Dry Base
In your stand mixer fitted with the paddle attachment, combine the flour, granulated sugar, baking powder, and salt. Mix on a low speed for about thirty seconds just to get everything evenly distributed. This simple start builds the foundation for our fluffy cake.
Step 3: Add the Butter
Take your room-temperature butter and cut it into small chunks. With the mixer on low, drop them in one by one. Continue mixing until the butter is fully incorporated and the mixture looks like fine, damp sand. This technique creates a very tender crumb that melts in your mouth.
Step 4: Combine the Liquids
Slowly pour in your egg whites followed by the buttermilk, making sure to stop and scrape the sides of the bowl with a spatula. You want to make sure every bit of flour is hydrated. Finally, add the oil and vanilla, then beat on medium speed for about 30 seconds to aerate the batter slightly.
Step 5: Create the Chocolate Batter
Pour half of your vanilla batter into a separate bowl. To the remaining batter in the mixer, add the cocoa powder, extra sugar, and a bit more baking powder. Mix in an additional egg and a splash of buttermilk until it becomes a rich, dark chocolate batter that smells amazing.
Step 6: Marble the Pans
Now for the fun part! Alternate large spoonfuls of the vanilla and chocolate batter into your prepared pans. Don’t worry about being too precise; the random swirls are what make it look like a real cow print inside. Bake for 33-35 minutes until a skewer comes out clean, then let them cool completely on a wire rack.
Step 7: Whip the Buttercream
Beat your butter until it’s light and fluffy, then add the vanilla and salt. Gradually add the powdered sugar, alternating with the heavy cream. Once it’s smooth, set aside small amounts to color pink for the snout and chocolate-black for the spots. This frosting is the ‘wow’ factor that holds everything together.
Step 8: Assemble and Decorate
Stack your cooled cake layers with white buttercream in between. Cover the whole cake in a smooth white layer and chill it. Once firm, pipe on the pink oblong snout and use the black chocolate frosting to create irregular spots. Finish by adding your fondant ears, horns, and eyes for the cutest cow you’ve ever seen!
Jasmine’s Flavor Tips

One of my favorite tricks for a perfectly smooth cake is to use a metal bench scraper that has been dipped in warm water. This helps the buttercream glide over the surface for a professional finish. If you find your black frosting isn’t dark enough, let it sit for an hour; the color deepens over time! For more tips on creating adorable animal designs, you can check out our dog-cake guide which uses similar techniques. Also, for another perspective on this design, this guide offers some fantastic visual inspiration to help you get those spots just right. Always make sure your cake is fully chilled before adding the spots so they don’t bleed into the white base!
Flavor Swaps
If you want to try a different flavor pop, swap the vanilla for almond extract in the white batter for a sweet, nutty twist. You can also turn this into a ‘strawberry’ cow by using strawberry reduction in the pink snout and adding some freeze-dried strawberry powder to the vanilla batter. For those who love a bit of spice, adding a touch of chai spice to the chocolate batter makes for an incredible flavor combination. If you’re looking for more theme ideas for a big party, our jungle-theme-cake post has some wonderful suggestions that could complement this farmyard friend perfectly. Don’t be afraid to experiment with different colors for the spots to create a whole herd of unique cakes!
Simple Serving

This cake looks absolutely stunning when served on a simple wooden cake stand to emphasize that rustic, farmhouse feel. It’s a wonderful centerpiece for any birthday party or baby shower. I love serving it with a big pitcher of cold milk or even a vanilla bean iced coffee for the adults. If you’re planning a themed celebration, these smash-cake ideas can help you create a mini version that perfectly matches the main event. For a clean slice that shows off the marble interior, use a sharp knife dipped in hot water and wiped dry between each cut. It makes the ‘wow’ moment of seeing the inside even better!
Keep Popping
I hope you have as much fun making this Cow Cake as I did! It’s such a joyful way to practice your decorating skills and try out a fun marble technique. If you’re feeling adventurous and want to try another themed bake, our dino-cake tutorial is another fantastic project to tackle. I would love to see your beautiful creations, so please tag me and share your photos on Instagram, Pinterest, and Facebook. Remember, the best part of baking is the simple creativity you bring to every recipe. Happy baking, and keep making those flavors pop!
