I remember the first time I saw a cake that looked like it had a literal canyon of sprinkles running through the middle. I assumed it required some kind of architectural degree or at least a very steady hand, but it turns out it’s one of the most forgiving decorating styles out there. This Fault Line Cake is my favorite way to make a big statement on a busy Tuesday when I still want things to look special.

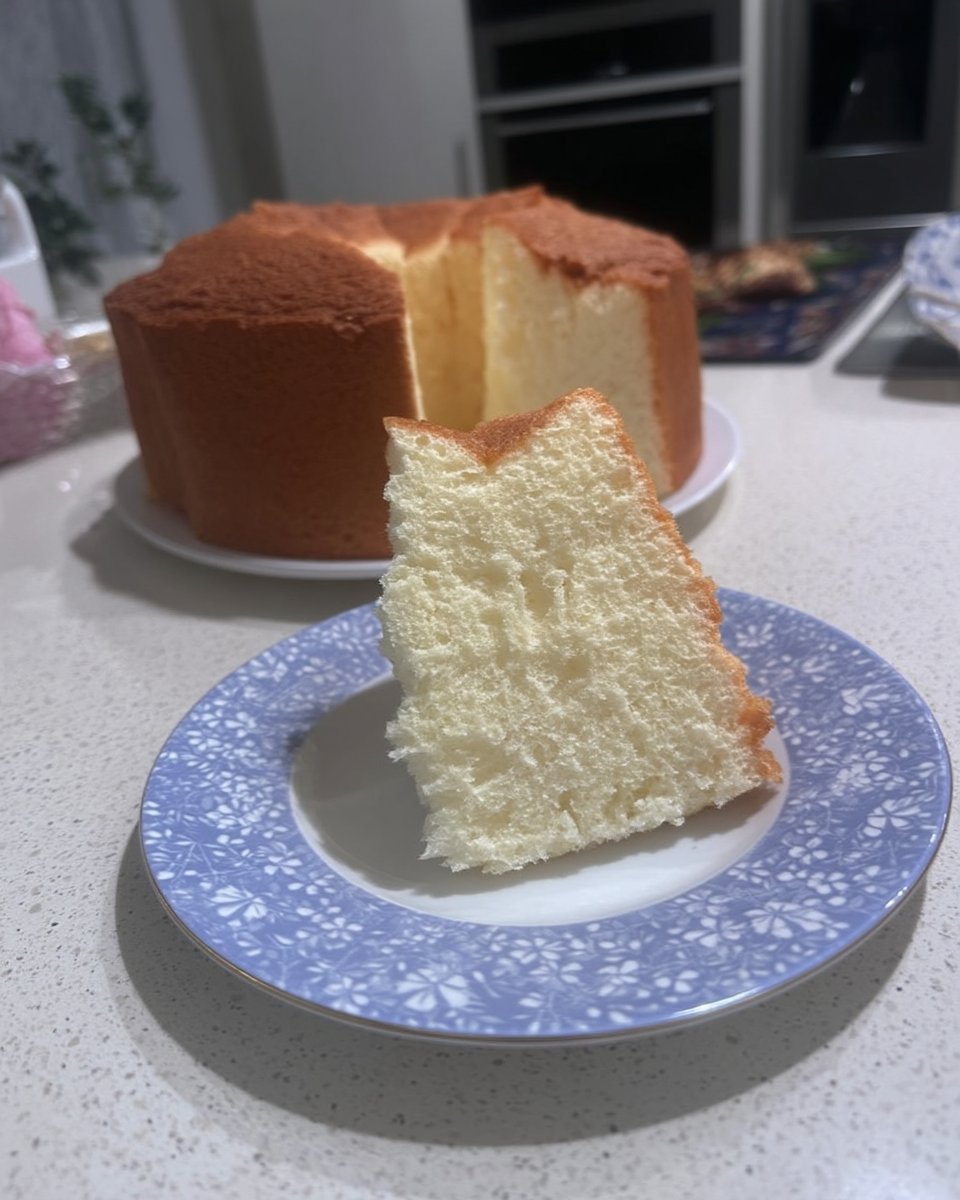
We are keeping things classic with a tender, buttery yellow cake and a silky-smooth Nutella Swiss Meringue Buttercream. The ‘fault line’ effect is created simply by layering your frosting, which means you don’t have to worry about perfectly smooth sides. It’s all about honest flavor and a little bit of creative fun in the kitchen.
Simple Perfection
You are going to love this recipe because it takes the stress out of ‘perfect’ cake decorating. Instead of fighting with your frosting to get a glass-like finish, you are intentionally creating texture and layers. It is a fantastic way to hide any little crumbs or uneven spots while making the cake look like a piece of modern art.
The yellow cake base is incredibly reliable and uses standard pantry ingredients like flour, sugar, and buttermilk. It has a tight but soft crumb that holds up beautifully to the weight of the buttercream. Plus, the Nutella addition brings a rich, nutty sweetness that feels fancy but comes straight out of a jar.
This is the kind of bake that makes you feel like a pro without requiring a whole day in the kitchen. It fits right into a busy life while still delivering that ‘wow’ factor we all crave for birthdays or family gatherings. You get to play with your food and end up with something delicious—what could be better than that?
Print
Fault Line Cake
- Total Time: 1 hour 30 mins
- Yield: 12 servings
- Diet: Vegetarian
Description
Create a stunning modern masterpiece with this Fault Line Cake, featuring three layers of tender yellow cake paired with a rich Nutella Swiss Meringue Buttercream. This forgiving decorating technique allows you to produce a bakery-quality showstopper that highlights beautiful textures and delicious hazelnut flavors.
Ingredients
- Cake flour
- Baking powder
- Salt
- Unsalted butter (room temperature)
- Granulated sugar
- Light brown sugar
- 6 Large eggs
- Canola oil
- Buttermilk
- Vanilla extract
- Egg whites
- Sugar (for buttercream)
- Cream of tartar
- Unsalted butter cubes (for buttercream)
- Nutella
Instructions
- Preheat your oven to 350°F (175°C) and prepare three 8-inch cake pans with cooking spray and parchment paper.
- In a medium bowl, whisk together the cake flour, baking powder, and salt.
- Cream the room-temperature butter with the granulated and brown sugars in a stand mixer for 3 to 4 minutes until light and fluffy.
- On low speed, add eggs one at a time, followed by the canola oil, buttermilk, and vanilla extract; beat until smooth.
- Gradually mix in the dry ingredients, then divide the batter between the pans and bake for 40 to 45 minutes. Let cool completely.
- Whisk egg whites, sugar, salt, and cream of tartar over simmering water until the mixture reaches 160°F (71°C).
- Whip the mixture on high speed for 8 to 10 minutes until a glossy meringue forms and the bowl feels room temperature.
- Switch to the paddle attachment and gradually add butter cubes on medium-high speed before swirling in the Nutella.
- Stack the cakes with frosting, apply a crumb coat, and then create a fault line by adding thick frosting to the top and bottom thirds, leaving a gap in the center.
Notes
To ensure your Swiss Meringue Buttercream is perfectly stable, make sure your mixing bowl and whisk are completely grease-free before starting the meringue. If you notice your cake layers have a slight dome after baking, simply use a serrated knife to level them off once they are fully cooled for a more stable stack.
- Prep Time: 45 mins
- Cook Time: 45 mins
- Category: Dessert
- Method: Baking
- Cuisine: American
The Pantry Basics

To make this stunning cake, we are sticking to simple ingredients that deliver honest flavor. You likely have most of these in your cupboard right now, which is exactly how I like to bake. Making sure your cold items are at room temperature is the only real ‘secret’ to success here.
- Cake Flour: This gives us that fine, delicate crumb that makes homemade cake feel so much better than a box mix.
- Unsalted Butter: We use this in both the cake and the frosting for a rich, creamy taste and the perfect texture.
- Granulated and Light Brown Sugar: The mix of sugars in the cake adds moisture and a subtle hint of caramel.
- Eggs: Six large eggs provide structure and richness to our yellow cake layers.
- Canola Oil: Combining oil with butter keeps the cake moist for days, even if you keep it in the fridge.
- Buttermilk: This adds a beautiful tang and helps the baking powder do its job for a great rise.
- Nutella: Our star player for the buttercream! It adds that unmistakable chocolate-hazelnut flavor we all love.
- Egg Whites: These are whipped with sugar to create the light-as-air base for our Swiss Meringue Buttercream.
The Simple Process
Step 1: Prep the Oven and Pans
Start by getting your oven ready at 350°F (175°C) with the rack in the middle. Give your three 8-inch cake pans a good spray with cooking spray, line the bottoms with parchment paper circles, and spray the paper too. This makes sure your cakes pop right out without any drama.
Step 2: Mix Your Dry Ingredients
In a medium bowl, whisk together the cake flour, baking powder, and salt. Whisking helps break up any lumps and mixes the leavening agent evenly so your cake rises perfectly every time.
Step 3: Cream the Butter and Sugars
Using a stand mixer with the paddle attachment, beat the room-temperature butter with the granulated and brown sugars. Do this on medium speed for about 3 to 4 minutes until the mixture looks light, fluffy, and much larger in volume. Scrape down the bowl halfway through.
Step 4: Add Eggs and Wet Ingredients
Turn the mixer to low and add your eggs one at a time, letting each one disappear into the batter before adding the next. Slowly pour in the canola oil, buttermilk, and vanilla extract. Keep beating until the mixture looks smooth, which should take another 3 or 4 minutes.
Step 5: Combine and Bake
Gradually add your flour mixture to the wet ingredients while the mixer is on low. Mix until it’s just combined—don’t overdo it! Divide the batter between your three pans. Bake for 40 to 45 minutes until the tops bounce back and a skewer comes out clean. Let them cool completely in the pans.
Step 6: Heat the Frosting Base
For the buttercream, whisk egg whites, sugar, salt, and cream of tartar in a heatproof bowl over a pot of simmering water. Whisk occasionally until the mixture hits 160°F (71°C) on a thermometer and the sugar is totally dissolved.
Step 7: Whip the Meringue
Move the mixture to your stand mixer with the whisk attachment. Whip on high for 8 to 10 minutes until you have a glossy meringue with medium-stiff peaks. The bowl should feel room temperature to the touch before you move on to the next step.
Step 8: Add Butter and Nutella
Switch to the paddle attachment. On low speed, add your butter cubes a few at a time. Once it’s all in, beat on medium-high until it’s silky and smooth. Finally, swirl in the Nutella and beat for a few more minutes until it’s perfectly creamy.
Step 9: Create the Fault Line
Stack your cake layers with frosting in between. Apply a thin coat of frosting all over the cake (the crumb coat) and chill. Then, apply a thick layer of frosting around the top and bottom thirds of the cake, leaving a ‘gap’ or ‘fault’ in the middle where the crumb coat shows. Use a bench scraper to smooth the thick parts, letting the edges look jagged and natural.
Meagan’s Tips

One of my favorite tricks for a smooth finish is to dip your metal bench scraper in hot water and wipe it dry before doing your final pass on the frosting. The warmth helps the butter in the Swiss Meringue Buttercream glide perfectly. If you are looking for more fun ways to play with frosting textures, you should definitely see our guide on cartoon-cake decorating.
Another helpful tip is to make sure your butter for the frosting is truly at room temperature—soft enough to leave a fingerprint but not greasy. If your buttercream looks like it is curdling while you add the butter, don’t panic! Just keep the mixer running, and it will eventually come together into a beautiful, silky dream. For more detailed troubleshooting on frosting, check out this fault line cake tutorial which offers some great visual cues.
Simple Swaps
You can easily change the look and flavor of this cake to fit any mood. Instead of Nutella, try using a smooth peanut butter or even a cookie butter spread for a different twist. If you want a more colorful look, you can fill the ‘fault’ area with bright sprinkles or edible gold leaf before you add the outer layers of frosting.
For those who love a graphic look, this technique works beautifully with high-contrast colors like black and white. If you find you enjoy these more artistic and modern styles, you might want to try making a comic-cake-2d-cake, which uses similar layering principles to create a totally different effect. You can also swap the yellow cake for a rich chocolate base if you want an extra decadent treat.
Everyday Enjoyment

This cake is best served at room temperature so the Swiss Meringue Buttercream is soft and the cake is tender. If you have been keeping it in the fridge, try to take it out about an hour before you plan to eat. It looks stunning on a simple wooden board or a modern cake stand, making it a great centerpiece for a party.
I love serving a big slice of this with a steaming cup of coffee or a cold glass of milk. If you want to keep the presentation simple but beautiful, you can find more inspiration in our post about simple-white-cake-decorating. This cake is rich enough that you don’t need much else, but a few fresh berries on the side can add a nice brightness to the Nutella flavor.
The Sweet Spot
Baking a show-stopper like this Fault Line Cake doesn’t have to be a stressful ordeal. By using reliable pantry staples and a few clever frosting tricks, you can create something that looks like it came from a high-end bakery right in your own kitchen. It is all about finding those little moments of joy in the simple process of mixing and decorating.
If you enjoyed this playful project, you will likely love our tutorial on the princess-tsunami-cake, which is another fun way to surprise your guests. I can’t wait to see your creations, so please share them with me! You can find more easy baking joy on our Pinterest, Instagram, and Facebook pages. Happy baking!
