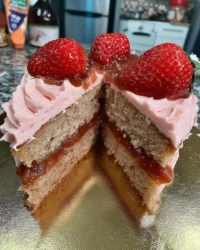
I still remember the first time I added a tiny splash of almond extract to my cream layer—it was an absolute flavor game-changer that turned this simple treat into a total “wow” moment!

This No-Bake Strawberry Dream is your new secret weapon for summer gatherings. It is light, airy, and features that one smart addition of high-quality vanilla that makes the fruit sing with every bite. You will love how the buttery crust provides the perfect foundation for the cloud-like filling and vibrant berries.
Simple Magic
This refreshing treat combines creamy textures with a vibrant fruit crunch that everyone in your family will absolutely adore.
- 🍓 Bursting with fresh, juicy berry goodness
- ☁️ Light as a cloud whipped texture
- ⏱️ Zero oven time required for easy prep
- 🍪 Buttery graham cracker crust provides crunch
- 🥳 Perfect for any summer party crowd
Get The Full Cake Recipe
Print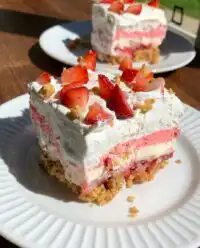
No-Bake Strawberry Dream
- Total Time: 4 hours 30 mins
- Yield: 9 servings
- Diet: Vegetarian
Description
This refreshing no-bake dessert layers a crisp graham cracker crust with a cloud-like cream cheese filling and a vibrant topping of fresh strawberries. It is the perfect make-ahead treat for summer gatherings that requires no oven time and comes together in just a few simple steps.
Ingredients
- 1 1/2 cups graham cracker crumbs
- 1/4 cup granulated sugar
- 1/2 cup unsalted butter, melted
- 8 oz cream cheese, softened
- 1/2 cup powdered sugar
- 1 teaspoon vanilla extract
- 1 cup heavy whipping cream, cold
- 2 cups fresh strawberries, sliced
Instructions
- Combine graham cracker crumbs and sugar, then stir in melted butter until the mixture resembles wet sand.
- Press the mixture firmly into an 8×8 inch baking dish and refrigerate for 30 minutes.
- Beat softened cream cheese until smooth, then mix in powdered sugar and vanilla extract until fluffy.
- In a separate bowl, whip the cold heavy cream until stiff peaks form.
- Gently fold the whipped cream into the cream cheese mixture without overmixing.
- Spread the cream filling evenly over the chilled crust.
- Top with a layer of sliced strawberries, covering the entire surface.
- Cover and refrigerate for at least 4 hours, or overnight, to set before slicing and serving.
Notes
For the best results, ensure your cream cheese is at room temperature before you begin mixing to prevent any lumps in the filling. Chilling your bowl and whisk attachment beforehand significantly helps the heavy cream reach its maximum volume, creating a lighter texture for the dessert.
- Prep Time: 20 mins
- Cook Time: 0 mins
- Category: Dessert
- Method: No-Bake
- Cuisine: American
The Flavor Stars
Creating a No-Bake Strawberry Dream starts with simple, accessible ingredients that work together to create something spectacular. The real secret here is the cold heavy cream—it is the engine that drives that airy, cloud-like texture we all crave in a chilled dessert. I always suggest using the freshest berries you can find to make the flavor really pop against the sweetened cream.
- Graham Cracker Crumbs: These provide the sturdy, honey-sweet base that anchors the entire dish.
- Fresh Strawberries: The absolute star of the show, providing natural sweetness and a bright, acidic balance.
- Cream Cheese: Provides a subtle tang and the necessary structure to keep the layers distinct.
- Vanilla Extract: My favorite way to add depth to the cream; it bridges the gap between the fruit and the dairy.
- Unsalted Butter: This holds our crust together and adds a rich, toasted flavor that balances the sugar.
The Simple Process
Step 1: Prep the Graham Base
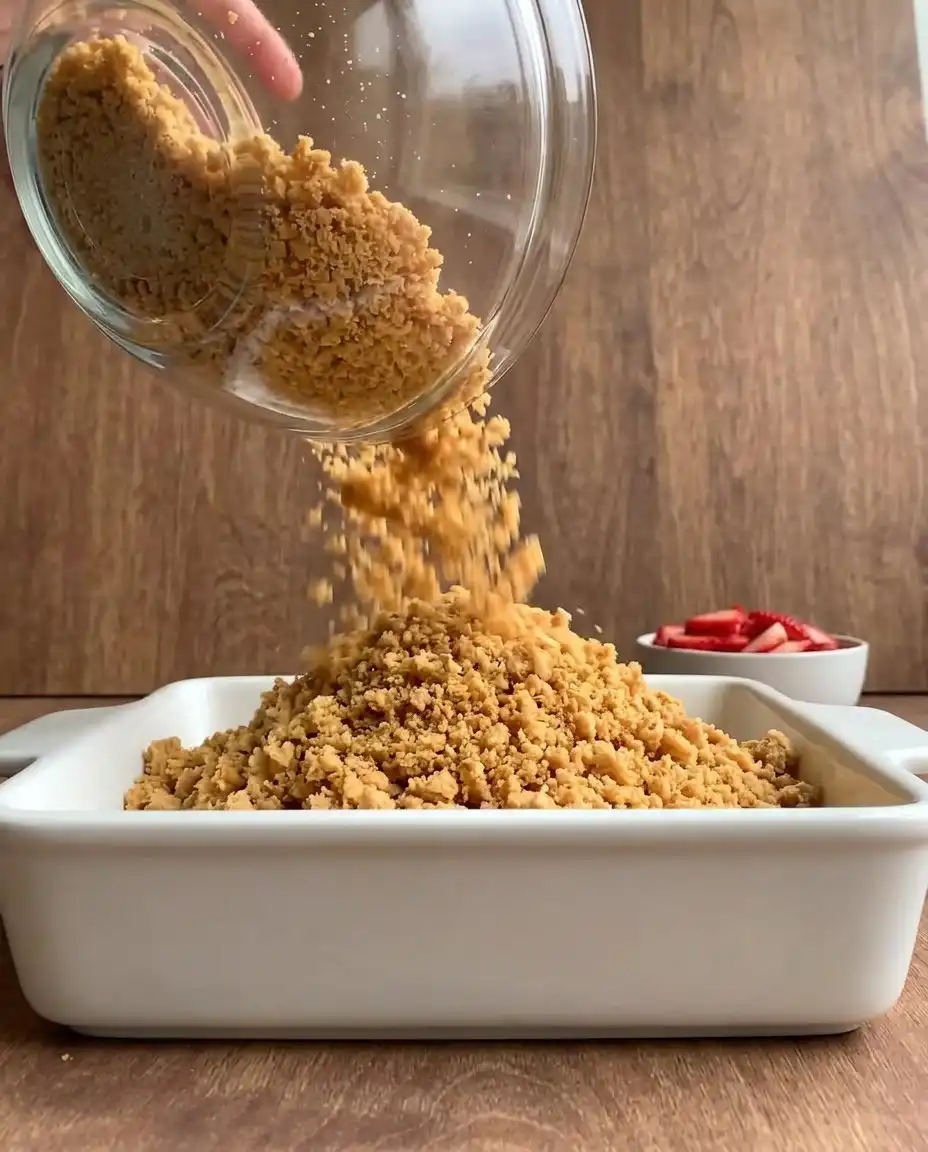
In a medium bowl, combine the graham cracker crumbs and granulated sugar. Pour in the melted butter and mix until all crumbs are moistened. This mixture should look like wet sand and hold together when pressed.
Step 2: Set the Crust
Transfer this mixture to an 8×8 inch square baking dish. Using the bottom of a glass or your knuckles, press the crust mixture down very firmly and evenly into the bottom of the dish. Firm pressing is key to a crust that doesn’t crumble later.
Frequently Asked Questions
How long does it need to set?
You should let this No-Bake Strawberry Dream chill for at least 4 hours. For the absolute best results and cleanest slices, leaving it in the fridge overnight is the way to go.
Can I use frozen strawberries?
While fresh is best for texture, you can use frozen berries if you thaw them and pat them dry first. Be aware that they might release more juice, which can slightly color the cream layer pink.
What is the difference between Strawberry Dream and Strawberry Delight?
These names are often used interchangeably! Usually, a ‘Dream’ refers to the whipped, airy texture of the cream layer, while ‘Delight’ might sometimes include a pudding-based layer or different crust types.
How do you keep the crust together without baking?
The secret is the butter ratio and the chilling time. By pressing the crumbs very firmly and letting the melted butter solidify in the fridge, you create a solid block that holds up well.
Step 3: Initial Chill
Place the crust in the refrigerator for at least 30 minutes. This helps the butter solidify, creating a sturdy foundation for the layers to come.
Step 4: Cream Cheese Base
In a large mixing bowl, beat the softened cream cheese until smooth and creamy. Make sure there are no lumps before moving to the next step, as this ensures a silky mouthfeel.
Step 5: Flavor Addition
Add the powdered sugar and vanilla extract to the cream cheese. Beat these together until the mixture is well combined and feels light and fluffy.
Step 6: Whip the Cream
In a separate, very cold bowl, beat the cold heavy whipping cream on high speed. Continue until stiff peaks form. You want it to be firm enough to hold its shape but not so far that it turns into butter.
Step 7: The Gentle Fold
Gently fold the whipped cream into the cream cheese mixture until just combined. Use a rubber spatula and a slow circular motion to keep as much air in the mixture as possible. Do not overmix!
Step 8: Spread the Filling
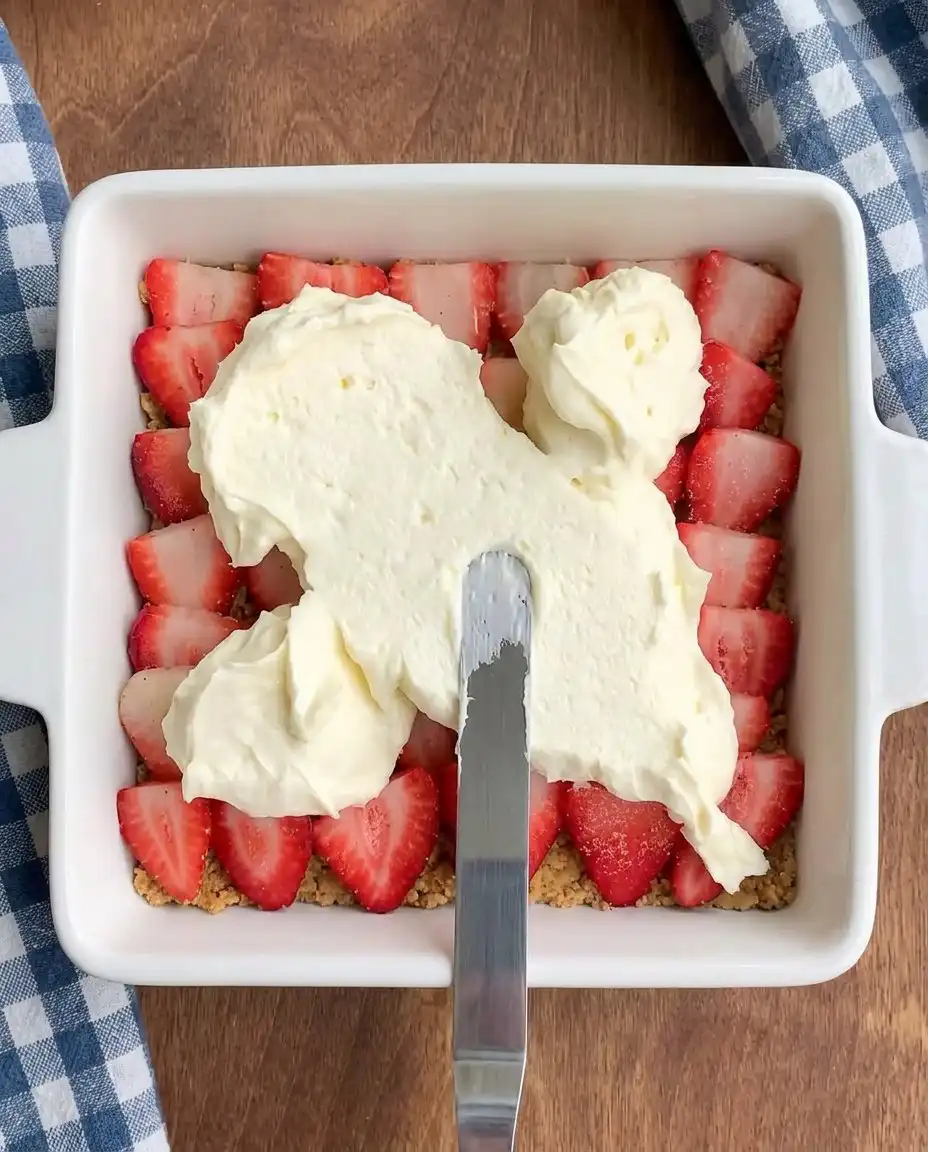
Spread the cream cheese filling evenly over the chilled graham cracker crust. Use an offset spatula to get it smooth from corner to corner.
Step 9: Strawberry Layer
Arrange the sliced fresh strawberries on top of the cream cheese layer, covering the entire surface. I like to overlap them slightly for a beautiful, shingled appearance.
Step 10: Final Set
Cover the dish tightly with plastic wrap and refrigerate for at least 4 hours, or overnight. This time allows the flavors to meld and the structure to set completely for perfect slicing.
Step 11: Serve Chilled
Cut into squares and serve immediately while cold. The contrast between the cold cream and the crisp crust is where the magic happens!
Jasmine’s Flavor Tips
To make this recipe truly stand out, ensure your cream cheese is at room temperature before beating, or you will end up with tiny lumps that ruin the texture. If you want an even more interesting base, you can try using crushed pretzels for a salty-sweet vibe, similar to our ritz cracker salted caramel icebox cake. Another great secret is to chill your metal bowl and whisk attachment in the freezer for 10 minutes before whipping the heavy cream; this helps the cream reach its maximum volume and stability. Always choose strawberries that are fragrant, as the smell is the best indicator of how much flavor they will bring to the final dessert.
Flavor Swaps
This recipe is incredibly versatile! You can swap the vanilla extract for almond extract or even a bit of lemon zest for a citrusy pop. If you are feeling adventurous, try adding a layer of blueberry jam between the crust and the cream for a berry explosion, much like the profile in our no-bake lemon blueberry dessert. You can also use different cookie crumbs like vanilla wafers or gingersnaps to change the personality of the crust. For a more indulgent version, drizzle some melted dark chocolate over the strawberries just before serving to add a bit of bitter complexity to the sweet berries.
Simple Serving
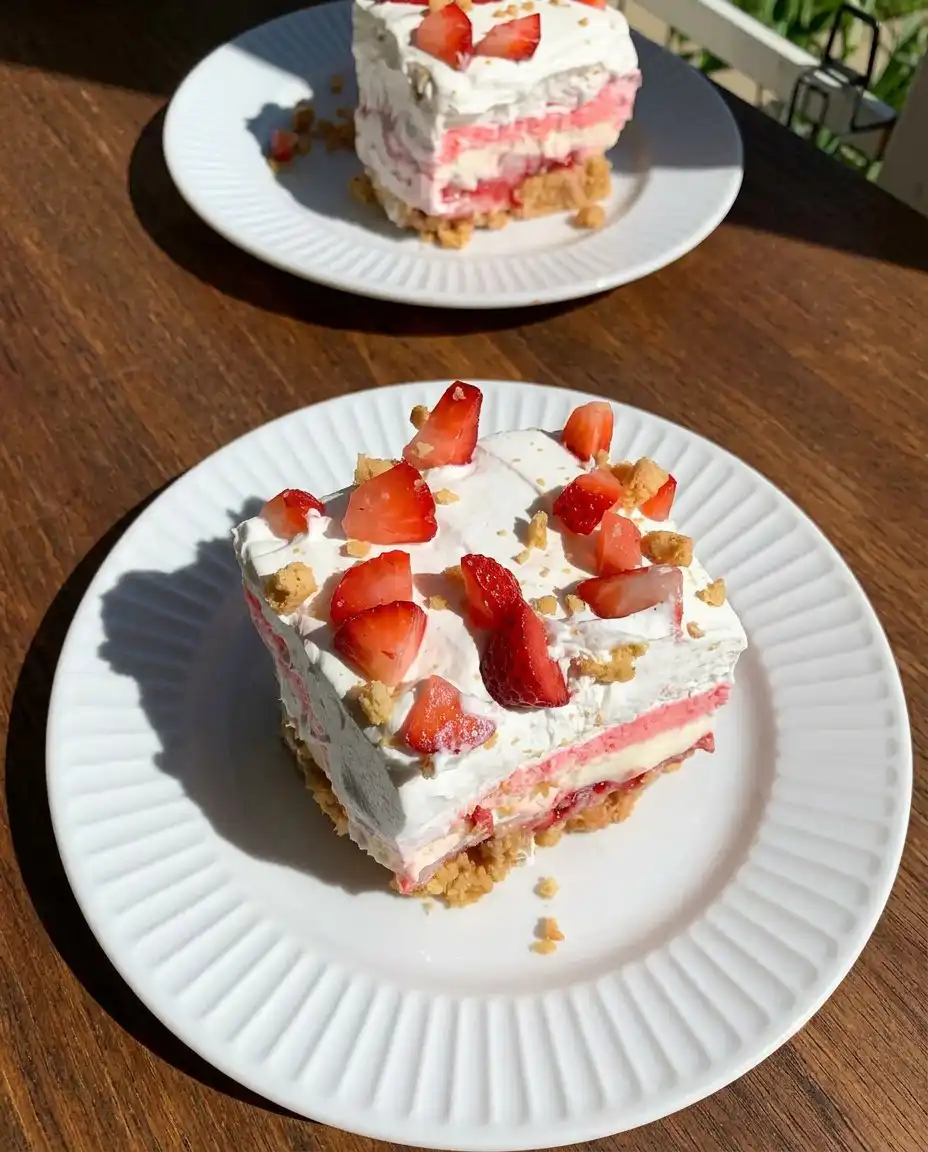
I love serving this No-Bake Strawberry Dream with a small sprig of fresh mint on each slice for a touch of green. It pairs wonderfully with a cold glass of prosecco or a light iced tea. For a larger party spread, you can serve it alongside our strawberry icebox cake to give your guests different texture options. If you want to go all out, add a dollop of extra whipped cream on top of the berries right before you hand out the plates. It makes the presentation look professional and extra inviting for your guests.
Keep Popping
I hope this No-Bake Strawberry Dream brings as much joy to your kitchen as it does to mine. It is the perfect example of how a few simple ingredients can create a total showstopper without even turning on the oven. If you are a fan of this flavor profile, you definitely need to check out our strawberry chocolate icebox cake for your next baking project. Please share your creations with me on Pinterest and Instagram. I cannot wait to see how you make this recipe your own!