I invite you to play with your pantry by swapping vanilla for almond extract, creating a floral, nutty depth that transforms a simple bake into a memorable celebration.

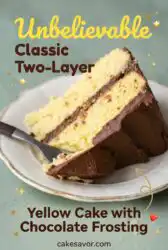
This cake represents a comfort bake with a sophisticated twist that leaves guests asking for your secret. By using buttermilk and a touch of olive oil, we ensure a tender crumb that stays moist for days. The rich chocolate frosting uses cream cheese to balance the sweetness, making every bite of this Classic Two-Layer Yellow Cake with Chocolate Frosting a perfect harmony of flavors. When you master the balance of fats and leavening, you create a sponge that stands tall without feeling heavy.
Why the Flavor Pop Works for a Classic Two-Layer Yellow Cake with Chocolate Frosting
Prep: 30 min · Serves: 16 · Difficulty: Medium
- Almond extract adds mysterious floral depth.
- Buttermilk creates an incredibly soft crumb.
- Cream cheese stabilizes the rich frosting.
- Olive oil keeps every slice moist.
- Simple steps lead to professional results.
This is the yellow cake recipe that turns a standard afternoon into a special occasion. Simple cake, unforgettable flavor.
Get The Full Cake Recipe
Print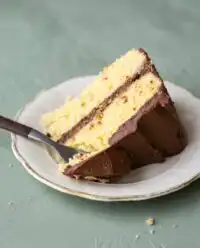
Classic Two-Layer Yellow Cake with Chocolate Frosting
- Total Time: 50 mins
- Yield: 16 servings
- Diet: Vegetarian
Description
This elevated yellow cake features a tender buttermilk crumb and a hint of almond extract for floral depth. It is finished with a stable, tangy cream cheese chocolate frosting that creates a perfect balance of flavors for any occasion.
Ingredients
- 2 9-inch round cake pans
- Butter and flour for pans
- Parchment paper
- Egg whites
- Sugar
- Buttermilk
- Melted butter
- Egg yolks
- Olive oil
- Almond extract
- All-purpose flour
- Cornstarch
- Baking powder
- Baking soda
- Sea salt
- Cream cheese
- Cocoa powder
- Powdered sugar
Instructions
- Prepare the pans. Butter two nine-inch round cake pans, line with parchment paper, and lightly dust with flour.
- Whip egg whites. Whisk room temperature egg whites until soft peaks form, then gradually add sugar until stiff, glossy peaks hold.
- Combine wet ingredients. Whisk together buttermilk, melted butter, egg yolks, olive oil, and almond extract until uniform.
- Mix dry ingredients. Combine sugar, flour, cornstarch, baking powder, baking soda, and sea salt in a large bowl and whisk well.
- Fold the batter. Incorporate the buttermilk mixture into the dry ingredients, then gently fold in the whipped egg whites until combined.
- Bake the layers. Divide batter into pans and bake at 350°F for roughly twenty minutes, rotating pans halfway through.
- Cool the cakes. Rest cakes in pans for fifteen minutes before inverting onto a wire rack to cool completely.
- Prepare the frosting. Beat butter and cream cheese until smooth, then incorporate cocoa powder, extract, and powdered sugar until creamy.
- Assemble the cake. Spread frosting between layers and cover the outside, creating swirls with an offset spatula.
Notes
- Ensure all dairy and egg ingredients are at room temperature to prevent the butter from seizing and to improve aeration.
- Use a kitchen scale to measure flour weight to guarantee a light, consistent crumb rather than a dense, dry result.
- If the frosting becomes too soft, chill the bowl in the refrigerator for twenty minutes before re-whipping to regain structural stability.
- Place cakes in the refrigerator for an hour before frosting to firm up the crumb and prevent tearing during the assembly process.
- Prep Time: 30 mins
- Cook Time: 20 mins
- Category: Dessert
- Method: Baking
- Cuisine: American
Simple Ingredients + One Smart Add
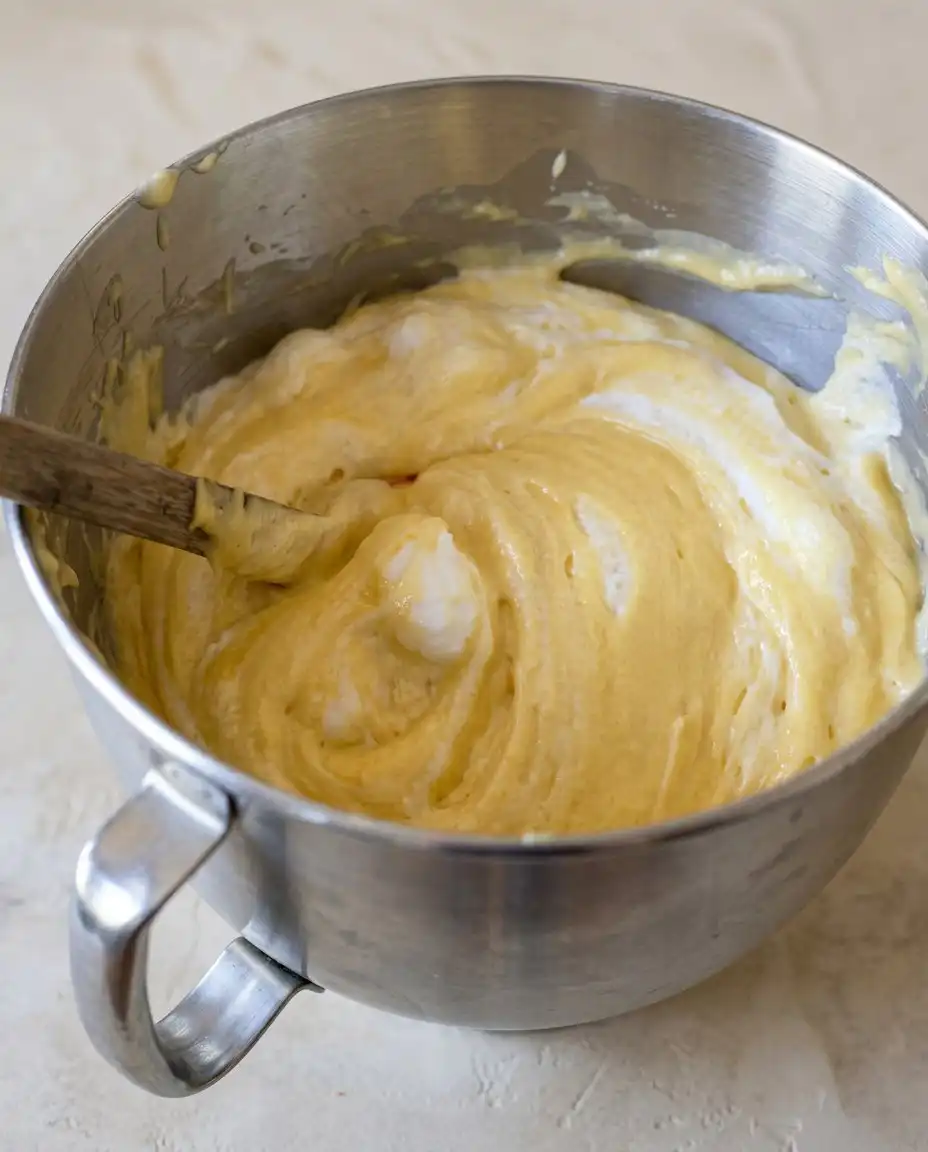
Creating a moist, golden sponge requires a careful balance of acidic buttermilk and rich fats like butter and olive oil. The one smart addition here is the almond extract, which provides a toasty, floral background note that distinguishes this from a grocery store box mix. High-quality cocoa powder ensures the frosting has a deep, resonant chocolate profile that isn’t masked by excessive sugar.
- Buttermilk: The acidity tenderizes the gluten and provides a subtle tang that balances the sugar.
- Olive Oil: This liquid fat remains liquid at room temperature, ensuring your cake never feels dry or crumbly.
- Egg Whites: Whipping these separately and folding them in provides a light, airy structure without losing the richness of the yolks.
- Cornstarch: A small amount softens the all-purpose flour to mimic the delicate texture of professional cake flour.
- Cream Cheese: Adding this to your chocolate frosting provides stability and a slight tang that cuts through the buttery sweetness.
- Almond Extract: This is the secret behind those “what is that?” reactions from your guests.
| Ingredient | Why It Matters |
|---|---|
| Buttermilk | Tenderizes the crumb through acidity |
| Olive Oil | Maintains moisture for several days |
| Egg Whites | Creates a light, billowy lift |
| Cocoa Powder | Provides deep, dark chocolate flavor |
| Cream Cheese | Stabilizes the frosting for easy spreading |
Building the Flavor
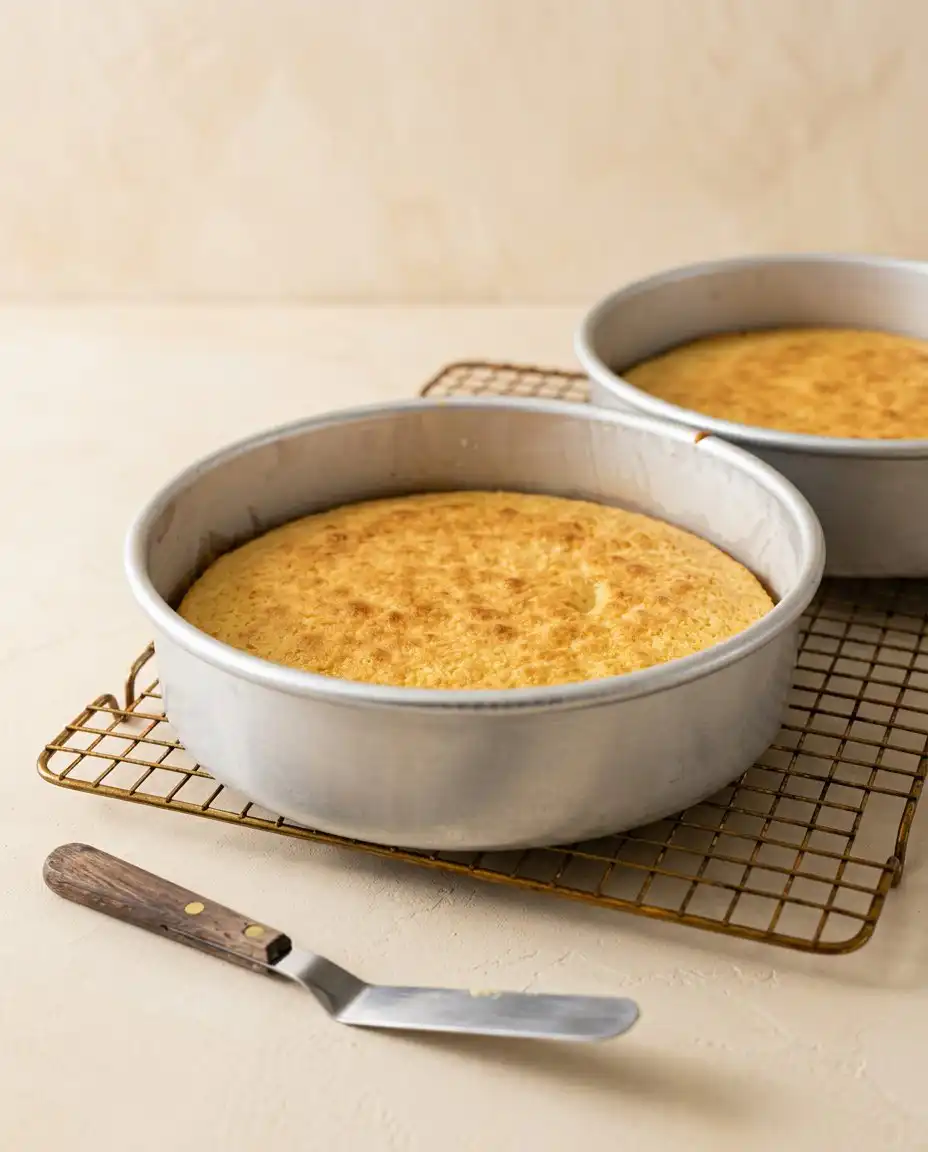
Step 1: Prepare the Foundations
Begin by buttering two nine-inch round cake pans and lining the bottoms with parchment paper for a clean release. Applying a light dusting of flour over the buttered surface ensures the batter can climb the sides of the pan evenly during the bake. Preheating your oven to 350 degrees Fahrenheit allows the heat to stabilize so the leavening agents react immediately upon entry.
Step 2: Whip the Egg Whites
Whisk the room temperature egg whites in a clean mixing bowl until soft peaks form under the beaters. Gradually add a quarter cup of sugar, continuing to mix until the whites are glossy and hold stiff peaks that stand upright. This aeration is the secret to a sponge that feels light on the tongue while maintaining its structure.
Step 3: Emulsify the Wet Ingredients
In a separate bowl, whisk together the buttermilk, melted butter, egg yolks, olive oil, and your choice of extract until the mixture is uniform. The olive oil helps the butter emulsify, creating a silky liquid base that will hydrate the flour perfectly. Ensure your butter is melted but not hot to avoid prematurely cooking the delicate egg yolks.
Step 4: Aerate the Dry Ingredients
Combine the remaining sugar, all-purpose flour, cornstarch, baking powder, baking soda, and sea salt in a large bowl. Whisking these dry components for at least fifteen seconds ensures the leavening is distributed evenly, preventing large holes or uneven rising. This step acts like a sifter, breaking up any clumps of flour for a smoother final batter.
Step 5: Folding in Whites for the Classic Two-Layer Yellow Cake with Chocolate Frosting
Gradually add the buttermilk mixture to the dry ingredients, stirring until the batter is just uniform without overworking the gluten. Gently fold in half of the whipped egg whites to loosen the texture, then fold in the remaining half until no white streaks are visible. This careful folding preserves the air bubbles you worked so hard to create during the whipping process.
Step 6: Bake the Golden Layers
Divide the batter equally between your prepared pans and tap them firmly on the counter to release any large air pockets. Bake for roughly twenty minutes, rotating the pans halfway through to ensure a consistent golden color across both layers. The cakes are ready when a tester inserted into the center comes out clean or with just a few moist crumbs.
Step 7: Cool and Chill
Allow the cakes to rest in their pans on a wire rack for fifteen minutes before attempting to invert them. Once removed from the pans, let them cool completely; placing them in the refrigerator for an hour makes them much easier to slice and frost. Chilling the sponge firms up the crumb so it doesn’t tear when you apply the billowy chocolate frosting.
Step 8: Prepare the Billowy Frosting
Beat the room temperature butter and cream cheese together until the mixture is smooth and pale. Sift in the cocoa powder and add your extract, then gradually incorporate the powdered sugar until the frosting is thick but spreadable. If the consistency feels too stiff, add buttermilk one tablespoon at a time until it glides effortlessly across a spatula.
Step 9: Assemble the Masterpiece
Place the first cake layer on a platter and spread a generous amount of frosting to the very edges. Top with the second layer, pressing down gently to secure the structure before coating the top and sides with the remaining chocolate. Use an offset spatula to create decorative swirls or a smooth finish that highlights the contrast between the yellow cake and dark icing.
Small Tweaks, Big Wow
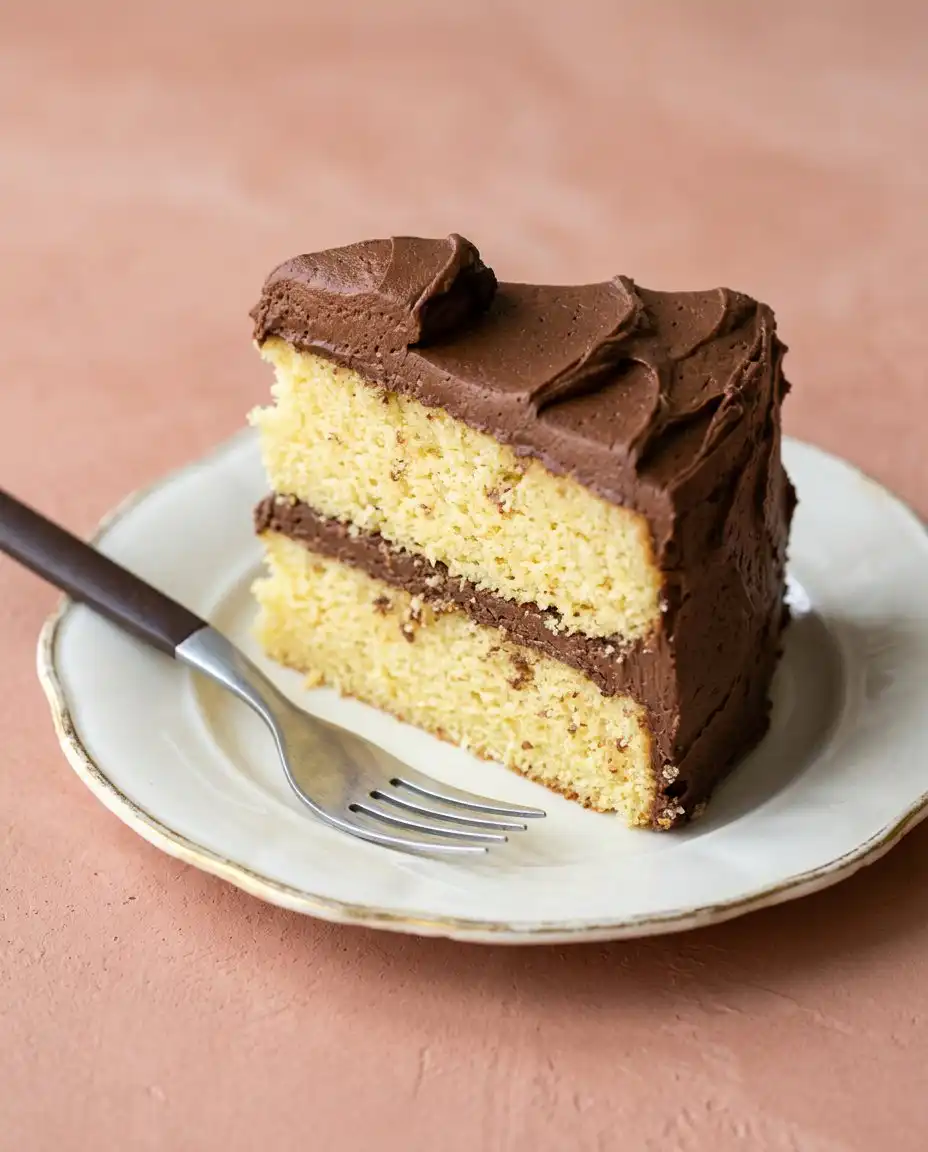
If your frosting feels too soft and starts to slide, your cream cheese or butter might have been too warm during the mixing process. You can easily fix this by placing the entire bowl of frosting in the refrigerator for twenty minutes and then re-beating it to restore its billowy texture. For more insights on cake chemistry, you might enjoy reading about the perfect buttermilk vanilla cake and how acidity impacts crumb structure.
Always use room temperature eggs to ensure they emulsify properly into the fat and buttermilk mixture. Cold eggs can cause the melted butter to seize up, resulting in a lumpy batter that bakes unevenly. To warm eggs quickly, place them in a bowl of warm water for five minutes before you begin the baking process.
Measuring your flour by weight rather than volume is the most reliable way to avoid a dense or dry cake. A cup of flour can vary significantly in weight depending on how tightly it is packed into the measuring tool. You can find excellent guidance on how to prepare traditional yellow cake layers using professional weight measurements for consistent results every time.
One smart addition, all the wow comes from the quality of your extracts, so choose a pure almond or vanilla bean paste. The floral notes of almond extract bloom beautifully when mixed with the fats in the batter, creating a sensory experience that synthetic flavorings cannot match. If you prefer a more subtle profile, you can use a half-and-half split between vanilla and almond.
If you find your cake layers are doming too much in the center, it may be because your oven temperature is slightly too high. This causes the edges to set before the center has finished rising, pushing the middle upward. You can use damp cake strips around the outside of your pans to encourage the layers to bake perfectly flat and even.
Frequently Asked Questions
Can I use regular milk instead of buttermilk?
While you can use regular milk, the cake will lose some of its characteristic tenderness and tang. Buttermilk’s acidity reacts with the baking soda to provide lift and a soft crumb. If you must substitute, add one tablespoon of lemon juice to a cup of whole milk and let it sit for ten minutes.
How should I store this cake to keep it moist?
Because the frosting contains cream cheese, this cake should be stored in the refrigerator if not eaten within a few hours. Keep it in an airtight container or under a cake dome to prevent the sponge from drying out. Always bring slices to room temperature before serving to allow the butter in the frosting to soften.
Can I freeze the cake layers in advance?
Yes, these yellow cake layers freeze exceptionally well when wrapped tightly in plastic wrap and a layer of foil. You can freeze them for up to three months and thaw them in the refrigerator overnight before frosting. Frosting a slightly chilled cake is actually easier as it produces fewer crumbs.
What is the difference between Dutched and natural cocoa powder?
Dutched cocoa has been treated with an alkalizing agent to reduce acidity, resulting in a darker color and smoother flavor. Natural cocoa is more acidic and has a fruitier, sharper chocolate taste. Both work in this frosting, but Dutched cocoa will provide that deep, dark appearance many people love.
Why did my cake turn out dense instead of fluffy?
A dense cake often results from overmixing the batter after the flour is added, which develops too much gluten. It can also happen if the egg whites were not whipped to stiff peaks or were folded in too vigorously. Be sure to use a light hand when incorporating the whites to preserve the air.
Can I use this recipe to make cupcakes instead?
This batter works beautifully for cupcakes, though you will need to adjust the baking time. Fill cupcake liners about two-thirds full and bake for fifteen to eighteen minutes. This recipe should yield approximately twenty-four standard cupcakes with plenty of frosting for high swirls.
Where to Take It Next
To create a citrus-forward version, swap the almond extract for a tablespoon of fresh orange zest and a teaspoon of orange blossom water. This creates a bright, floral profile that pairs beautifully with the dark chocolate frosting. You can explore similar flavor profiles in my classic vanilla butter cake which focuses on pure, clean notes.
For a warm spice variation, add a teaspoon of ground cardamom or a chai spice blend to the dry ingredients before mixing. These spices bloom in the butter as the cake bakes, filling your kitchen with an aroma that feels like a cozy hug. This transformation takes the recipe from a standard birthday treat to a sophisticated dessert perfect for autumn gatherings.
If you want to lean into the toasty notes, try browning the butter before melting it for the batter. This adds a nutty, caramelized depth that complements the almond extract and makes the chocolate frosting taste even more decadent. This small tweak is exactly how simple cakes gain an unforgettable flavor profile that keeps guests coming back for seconds.
Bringing the Wow to the Table
When serving this Classic Two-Layer Yellow Cake with Chocolate Frosting, a simple dusting of flaky sea salt over the frosting can accentuate the cocoa notes. Pairing a slice with a tart raspberry coulis or fresh strawberries provides a bright contrast to the rich, buttery sponge. For more ideas on pairing, look at the yellow cake chocolate frosting combinations that highlight seasonal fruits.
This cake is a natural centerpiece for birthday celebrations or Sunday dinners where a traditional dessert is expected. Serve it on a vintage glass pedestal to show off the clean layers and the billowy texture of the icing. A cold glass of milk or a hot cup of dark roast coffee balances the sweetness perfectly for an afternoon treat.
If you are serving this at an outdoor event, keep the cake chilled until the last possible moment to maintain the frosting’s integrity. The cream cheese provides more stability than a standard buttercream, but it still prefers a cool environment. Slicing with a warm, dry knife will ensure clean edges that show off the beautiful yellow crumb inside.
Your Turn to Riff
Baking this cake is about more than just following a recipe; it is about learning how one smart addition can change everything. Whether you choose the floral hint of almond or the classic comfort of vanilla, you are creating a memory. I hope you feel encouraged to play with these flavors and make this recipe your own. For another deep dive into cocoa, try my chocolate layer cake for your next project.
Once you have mastered the fold and the frost, I would love to see your results and hear about the swaps you tried. Sharing your bakes is how we grow as a community of curious home cooks. Please join us on Pinterest, Facebook, and TikTok to share your photos. You can also follow our updates on Telegram for the latest kitchen inspiration.