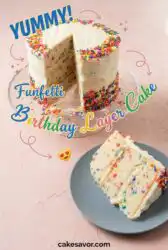
What is that creamy richness hiding behind the rainbow of sprinkles? is the question guests always ask when they take their first bite of this festive dessert.

This Funfetti Birthday Layer Cake represents the pinnacle of celebratory baking, offering a texture that is both sturdy enough for stacking and incredibly light on the tongue. By incorporating a small amount of vegetable oil alongside the butter, we achieve a crumb that stays moist for days without sacrificing that classic dairy flavor. Most home bakers struggle with dry vanilla cakes, but this recipe uses a specific ratio of fats and buttermilk to ensure every slice is tender. You will find that the addition of extra egg whites provides a lift that makes the layers feel airy rather than dense.
Why This Funfetti Birthday Layer Cake Gets the Wow
Prep: 45 min · Serves: 14 · Difficulty: Medium
- Provides a nostalgic and creamy flavor profile.
- Uses oil for a soft, moist crumb.
- Features bright colors for celebratory party cakes events atmosphere.
- Assembles easily with stable vanilla buttercream layers.
- Delivers a consistent bakery-style result every time.
This is the recipe my family requests for every single celebration.
Get The Full Cake Recipe
Print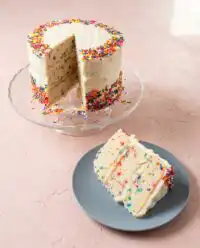
Funfetti Birthday Layer Cake
- Total Time: 1 hour 10 mins
- Yield: 14 servings
Description
This festive layer cake features a tender, moist vanilla crumb packed with colorful rainbow sprinkles. Topped with a silky vanilla buttercream, it is the perfect show-stopping dessert for any birthday celebration.
Ingredients
- 2 1/2 cups cake flour
- 2 1/2 tsp baking powder
- 1/2 tsp baking soda
- 1/2 tsp salt
- 3/4 cup unsalted butter, softened
- 1 1/2 cups granulated sugar
- 1/4 cup vegetable oil
- 4 large egg whites
- 2 large whole eggs
- 1 tbsp clear vanilla extract
- 1 cup buttermilk
- 1/2 cup rainbow jimmies
- 1 cup unsalted butter (for frosting)
- 4 cups confectioners’ sugar
- 2–4 tbsp heavy cream
Instructions
- Prepare the oven. Preheat the oven to 350°F (177°C) and line cake pans with parchment paper.
- Combine dry ingredients. Whisk together the cake flour, baking powder, baking soda, and salt in a large bowl.
- Cream butter and sugar. Beat the softened butter and sugar on high speed for five minutes until pale and voluminous.
- Emulsify the fats. Add the vegetable oil, eggs, egg whites, and vanilla, mixing until the batter is smooth.
- Mix the batter. Alternately add the dry ingredients and buttermilk in three additions, mixing on low speed until combined.
- Fold in sprinkles. Gently fold the rainbow jimmies into the batter using a silicone spatula.
- Bake the layers. Divide batter into pans and bake for 25 minutes or until a toothpick comes out clean.
- Cool the cake. Let cakes rest in pans for 20 minutes before inverting onto a wire rack to cool completely.
- Whip the frosting. Beat butter, confectioners’ sugar, and heavy cream until light, airy, and spreadable.
- Assemble and frost. Level the cakes, stack with frosting layers, apply a crumb coat, and chill before final frosting.
Notes
- Use room temperature ingredients to prevent the batter from curdling.
- Always use jimmies rather than nonpareils to prevent colors from bleeding into the batter.
- The crumb coat is essential for achieving a professional finish without loose cake debris.
- Use a kitchen scale to measure flour accurately to ensure the cake does not turn out dry.
- Prep Time: 45 mins
- Cook Time: 25 mins
- Category: Dessert
- Method: Baking
- Cuisine: American
The Flavor Lineup
Crafting a festive dessert requires a balance of pantry staples and a few specific choices that create the signature birthday flavor. We focus on high-quality fats and a specific flour type to build a structure that is both delicate and reliable for a tall stacked presentation.
- Cake Flour: This low-protein flour is the secret to a fine, tight crumb that feels like velvet. It prevents the cake from becoming tough or bread-like during the mixing process.
- Unsalted Butter: Using butter provides that essential toasty richness that defines a classic vanilla base. It carries the floral notes of the extract throughout every bite.
- Vegetable Oil: This is our one smart addition that guarantees moisture. While butter provides flavor, the oil stays liquid at room temperature for a softer feel.
- Buttermilk: The acidity in buttermilk reacts with the leavening agents to create a beautiful rise. It also adds a subtle tang that balances the sweetness of the sugar.
- Rainbow Sprinkles: Choosing the right jimmies ensures the colors stay suspended in the batter. They provide those tiny pockets of sweetness that make the cake look like a party.
- Egg Whites: Adding two extra whites alongside the whole eggs provides protein for structure without the heaviness of extra yolks. This keeps the color of the cake light and the texture fluffy.
| Ingredient | Why It Matters |
|---|---|
| Cake Flour | Creates a tender and soft texture |
| Buttermilk | Adds moisture and a delicate tang |
| Clear Vanilla | Provides that nostalgic bakery-style aroma |
| Vegetable Oil | Keeps the crumb moist for days |
The Method
Step 1: Prep Your Baking Space
Start by preheating your oven to 350°F (177°C) and preparing your pans with grease and parchment paper. Lining the bottoms of your pans with parchment rounds is a non-negotiable step for a clean release. You want the pans to be ready so the batter can go into the heat the moment it is finished mixing.
Step 2: Combine the Dry Base
In a large bowl, whisk together the cake flour, baking powder, baking soda, and salt. Sifting or vigorous whisking ensures there are no clumps of leavening agent hidden in the flour. You will notice the flour feels much lighter and more aerated after this step, which is a great sign for the final texture.
Step 3: Cream the Butter and Sugar
Place the softened butter and granulated sugar in your mixer and beat on high speed for at least five minutes. The mixture should change from a yellow color to a pale, almost white ivory while becoming significantly more voluminous. This process creates a network of tiny air bubbles that will expand in the oven for a light crumb.
Step 4: Emulsify the Fats and Liquids
Add the vegetable oil to the creamed butter and beat for another minute until the mixture looks uniform and smooth. Follow this by adding the whole eggs, egg whites, and vanilla extract, mixing on medium-high until fully combined. The batter should look creamy and slightly thick at this stage, smelling strongly of sweet vanilla.
Step 5: Mix the Funfetti Birthday Layer Cake Batter
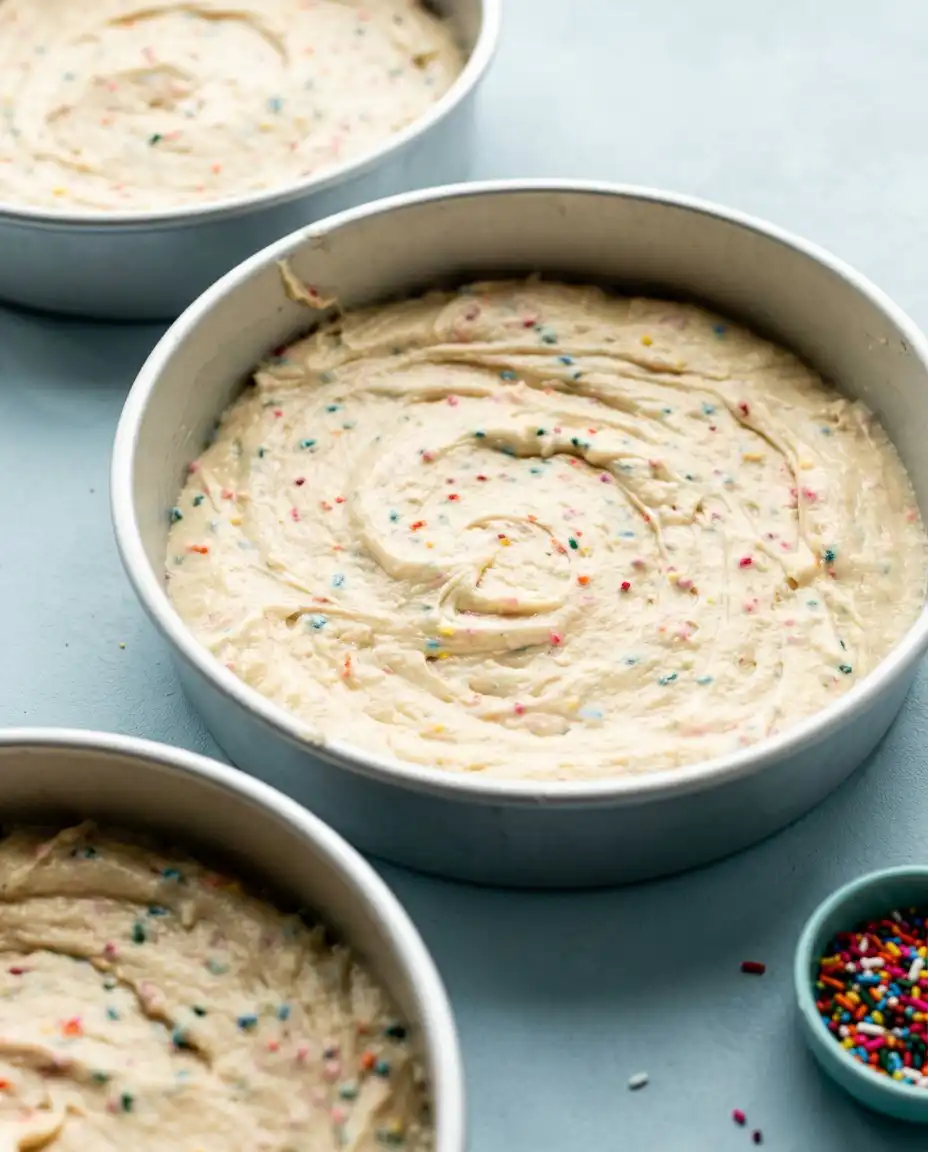
Alternately add the dry ingredients and the buttermilk in three separate additions, starting and ending with the flour mixture. Mix on the lowest speed possible just until the white streaks of flour disappear to avoid overworking the gluten. The resulting batter will be thick, velvety, and look incredibly smooth before the sprinkles are added.
Step 6: Fold in the Colors
Using a silicone spatula, gently fold the rainbow sprinkles into the thick batter with a slow, sweeping motion. You want to distribute them evenly without stirring so much that the colors begin to bleed into the vanilla base. Stop as soon as the sprinkles are scattered throughout the bowl to maintain a clean appearance.
Step 7: Bake the Layers Evenly
Divide the batter equally between your prepared pans and smooth the tops with a spatula for an even rise. Place them in the center of the oven and bake for approximately 25 minutes, or until a toothpick comes out clean. If the tops begin to brown too quickly, loosely drape a piece of foil over them to protect the delicate surface.
Step 8: Cool for Stability
Allow the cakes to rest in their pans for about 20 minutes before attempting to invert them onto a wire rack. Removing them too early can cause the warm structure to collapse, while waiting too long can make them stick. Once they are on the rack, they must cool completely to room temperature before you even think about the frosting.
Step 9: Whip the Vanilla Buttercream
Beat the softened butter until it is pale and creamy, then gradually add the confectioners’ sugar and heavy cream. Switch to high speed and whip for several minutes until the frosting is light, airy, and easily spreadable. Adjust the consistency with a splash more cream if it feels too stiff to glide over the cake.
Step 10: Assemble and Crumb Coat
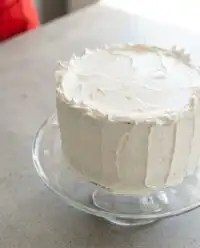
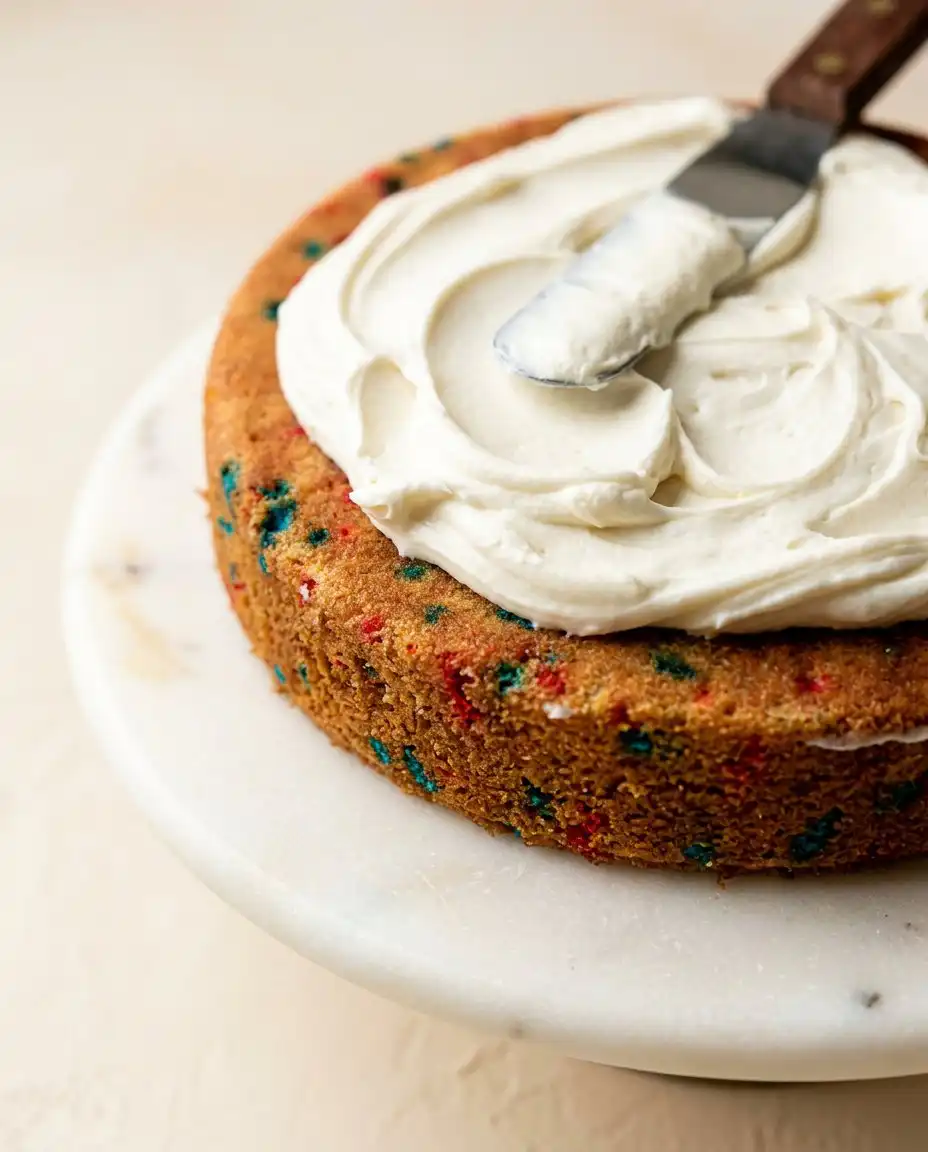
Level the cooled cake tops with a serrated knife and stack them with a generous layer of frosting between each. Apply a very thin layer of buttercream over the entire exterior to trap any loose crumbs and chill for thirty minutes. This chilled base makes applying the final decorative layer of frosting much smoother and cleaner.
Small Tweaks, Big Wow
Always ensure your butter and eggs are at true room temperature to allow for a proper emulsion during the creaming stage. Cold ingredients will cause the batter to break or curdle, resulting in a dense and uneven bake. You can quickly warm eggs by placing them in a bowl of warm water for ten minutes if you forgot to take them out early.
If your cake feels dry, it is often a sign of over-measuring the flour or over-baking the layers by even a few minutes. Use the spoon and level method for your flour to avoid packing too much into the cup. A vanilla cake recipe relies on precise ratios, so a kitchen scale is your best friend for consistent results.
If your frosting is soupy, the butter was likely too warm or the room is too hot for the buttercream to hold its shape. Fix this by placing the entire mixing bowl in the refrigerator for fifteen minutes, then re-whipping it until it regains its stiff peaks. You want a consistency that holds its shape on a spatula without sliding off.
Using clear imitation vanilla extract is a professional secret for achieving that specific nostalgic birthday flavor. While pure vanilla is delicious, the clear version provides the aroma often associated with high-end bakeries. This small choice can change the entire personality of your frosting from floral to classic sweet cream.
Applying a crumb coat is the most important step for a professional finish on any stacked dessert. This thin layer acts as a primer, ensuring that no colorful crumbs interfere with the final smooth application of buttercream. It takes extra time in the refrigerator, but the visual result is worth the patience.
Always use jimmies rather than nonpareils when mixing sprinkles directly into the batter to prevent color bleeding. Nonpareils are tiny hard balls that dissolve quickly, often turning a beautiful white batter into a muddy gray or green. Jimmies are elongated and hold their shape and color much better under the heat of the oven.
Frequently Asked Questions
Can I use all-purpose flour instead of cake flour?
While all-purpose flour will work in a pinch, the texture will be significantly heartier and less delicate. If you must use it, replace 2 tablespoons of flour from every cup with cornstarch and sift it three times to mimic the protein level of cake flour. This helps maintain some of the softness required for a successful layer cake.
Why did my sprinkles sink to the bottom of the cake pans?
Sprinkles usually sink because the batter is too thin or the sprinkles are too heavy for the structure. This recipe uses a thick buttermilk batter specifically designed to suspend the jimmies throughout the bake. Ensure you are not over-mixing, which can thin the batter, and use lightweight jimmies for the best distribution.
How do I store the finished cake to keep it fresh?
The frosted cake can be stored at room temperature in a cake carrier for up to four hours for immediate serving. For longer storage, keep it in the refrigerator for up to five days, but always bring it back to room temperature before eating. Cold cake often feels dry because the butter in the batter and frosting has hardened.
Can I make the cake layers in advance and freeze them?
Yes, these layers freeze beautifully when wrapped tightly in several layers of plastic wrap and aluminum foil. You can freeze them for up to three months and thaw them overnight in the refrigerator before assembling. Many bakers find that freezing the layers actually makes them easier to handle and level during the stacking process.
What is the best way to get a perfectly white frosting?
To get a stark white buttercream, use clear vanilla extract and beat the butter for at least five minutes before adding the sugar. This aerates the butter, turning it from yellow to ivory. You can also add a tiny, microscopic drop of violet food coloring to the finished frosting to neutralize any remaining yellow tones from the butter.
My cake layers are domed on top, how can I fix this?
Domed tops are a natural result of the cake rising in the oven, but they can be prevented by using even-bake strips around the pans. If your cakes still come out with a dome, simply use a long serrated knife to carefully slice off the rounded portion once they are cool. This creates a flat surface that is essential for stable stacking and even frosting layers.
Make It Yours
For a different flavor profile, try swapping the vanilla extract for almond extract in the cake batter for a nutty, cherry-like aroma. This subtle change creates a more sophisticated funfetti cake that guests will struggle to identify but will certainly enjoy. You can also add a teaspoon of lemon zest to the dry ingredients for a citrusy brightness that cuts through the rich frosting.
If you prefer a different texture, you can experiment with professional frosting techniques by using a Swiss meringue buttercream instead of the traditional American version. Meringue-based frostings are less sweet and have a silkier mouthfeel that pairs beautifully with the sturdy layers of this recipe. This variation is excellent for outdoor events where a more stable frosting might be required.
Transform this into a chocolate version by replacing half a cup of the cake flour with high-quality Dutch-processed cocoa powder. You still get the fun of the sprinkles, but with a deep, earthy chocolate base that many find irresistible for birthdays. Layering this with a chocolate ganache filling adds a rich element that takes the recipe in a completely new direction.
Bringing the Wow to the Table
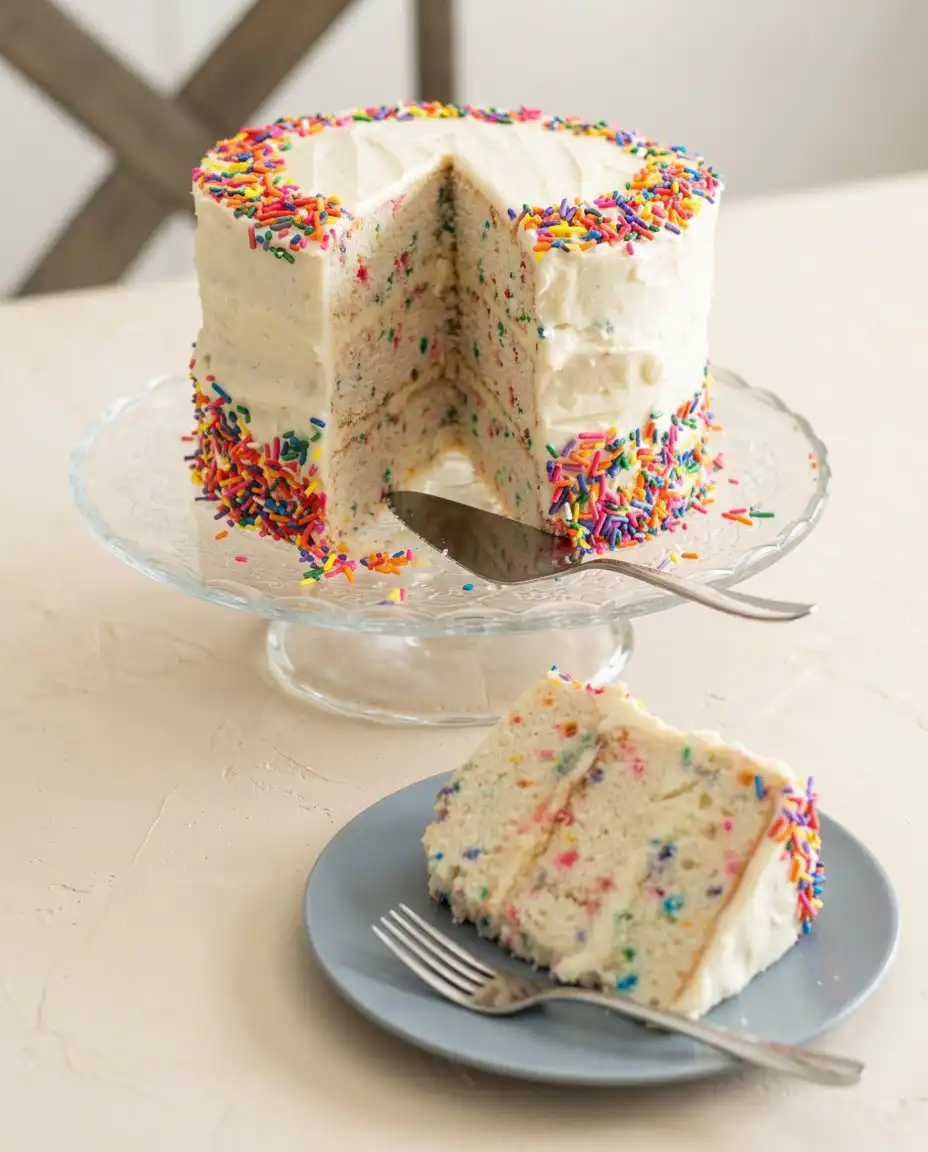
When you are ready to serve this masterpiece, use a long, thin knife dipped in hot water and wiped dry to get clean slices. This prevents the frosting from sticking to the blade and tearing the delicate crumb as you cut through the layers. Each slice should showcase the even distribution of sprinkles and the clean lines of the buttercream filling.
Pair a generous slice with a cold glass of milk or a light, sparkling cider to balance the sweetness of the vanilla. For a more formal event, you can garnish each plate with a few extra sprinkles or a dollop of fresh whipped cream. This cake is a staple at birthday cake celebrations because it appeals to guests of all ages with its classic flavor.
If you are serving this at an outdoor party, keep the cake in a shaded area until the very moment of slicing. The butter-based frosting is delicious but can become soft if left in direct sunlight or high heat for too long. Presenting it on a simple white pedestal allows the colors of the sprinkles to be the star of the show.
One Last Note
Baking this Funfetti Birthday Layer Cake is more than just a kitchen task; it is about creating a moment of joy for someone special. The combination of a classic vanilla base with the whimsical pop of color makes it a favorite for any occasion that deserves a little extra attention. I hope you find as much pleasure in the process of creaming the butter and folding in the sprinkles as you do in seeing the final results. Simple cake, unforgettable flavor is always the goal when we step into the kitchen to celebrate.
Do not be afraid to experiment with the extracts or the types of sprinkles you use to make this recipe your own. This classic vanilla butter cake foundation is meant to be played with and adapted to your specific tastes. Once you master the basic technique of the crumb coat and the creaming process, you will be able to tackle any layer cake with confidence. One smart addition, all the wow is what transforms a simple afternoon of baking into a lasting memory for your guests.