You can bake a gorgeous, decadent dessert using one bowl and basic pantry staples without dragging out a heavy stand mixer.

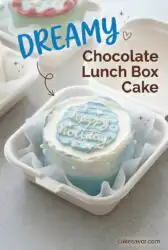
This Chocolate Lunch Box Cake is the ideal answer to your sweet cravings when you want something special but have limited time. You can whip up these miniature layers in the quiet moments before bed or while your morning coffee brews. It offers a rich, deep cocoa flavor paired with a silky vanilla frosting that feels like a bakery treat. This is a Tuesday night cake baked between dinner and bedtime that requires minimal effort but delivers maximum joy. We are talking about simple ingredients, honest flavor.
These tiny desserts, also known as bento cakes, have taken the baking world by storm because they are sized beautifully for two people. You do not need professional decorating skills or fancy kitchen gadgets to make them look charming. They fit neatly into standard takeout containers, making them a sweet gift for a friend or a delightful weekend treat. Preparing them is a relaxing process that brings the cozy warmth of a bakery right into your home.
Originating from South Korea, these miniature bento creations became popular because they offer a personal, customizable dessert experience without the waste of a massive sheet cake. They represent a shift toward thoughtful, intimate celebrations where the focus is on quality and personal touch. Whether you are celebrating a small promotion, an anniversary, or even surviving a long week, these small treats make the occasion feel special. The compact size encourages playful designs and heartfelt handwritten messages that bring a smile to anyone who opens the lid.
Why This Chocolate Lunch Box Cake Is a Keeper
Prep: 30 min · Serves: 2 · Difficulty: Easy
- Bakes quickly in small pans.
- Requires only basic pantry ingredients.
- Fits neatly in portable takeout boxes.
- Cleans up quickly with minimal dishes.
- Delivers a rich, moist chocolate crumb.
You will master this miniature treat on your very first try.
Finding a reliable recipe that fits your busy schedule can be a challenge. That is why we share practical baking guides on Cake Savor to keep your kitchen running smoothly. This miniature dessert proves that beautiful baking does not have to take all day.
Many traditional recipes demand hours of chilling, stacking, and meticulous frosting. This scaled-down version cuts through the fuss while keeping the rich taste you crave. It is a wonderful project for a rainy afternoon or a quick weeknight baking session.
Baking in miniature is also incredibly satisfying because the cakes bake and cool in a fraction of the time required for a full-sized layer cake. You can go from measuring your flour to enjoying a fully decorated dessert in under two hours. It is a low-stress baking project for busy parents, students, or anyone who wants a quick sweet treat without the hassle of a massive cleanup.
Get The Full Cake Recipe
Print
Chocolate Lunch Box Cake
- Total Time: 1 hour 55 mins
- Yield: 2 cakes
- Diet: Vegetarian
Description
This adorable Chocolate Lunch Box Cake is sized beautifully for two people and features a deep chocolate flavor paired with a smooth vanilla buttercream. Perfect for a cozy weekend baking project or a sweet gift for a friend.
Ingredients
- 1 cup all-purpose flour (130g)
- 1 cup granulated sugar (200g)
- 1/3 cup dark or Dutch-processed cocoa powder (30g)
- 1 tsp baking powder (4g)
- 3/4 tsp baking soda (5g)
- 1/2 tsp fine salt (3g)
- 1/2 cup hot water (120g)
- 1/2 cup buttermilk, room temperature (120g)
- 1/4 cup vegetable or canola oil (55g)
- 1 large egg, room temperature (56g)
- 1 tsp vanilla extract (4g)
- 1 cup unsalted butter, room temperature (226g)
- 1 tsp vanilla extract (for frosting) (4g)
- 1/4 tsp fine salt (for frosting) (2g)
- 3 cups powdered sugar (375g)
- 1/2 cup heavy whipping cream, room temperature (120g)
- gel food coloring
Instructions
- Prep the Oven and Pans. Preheat your oven to 350°F (175°C). Grease and line two 6-inch cake pans with parchment paper.
- Whisk Dry Ingredients. Sift or whisk together the flour, sugar, dark cocoa powder, baking powder, baking soda, and salt in a large bowl.
- Mix Wet Ingredients. Whisk the hot water, buttermilk, oil, egg, and vanilla in a separate bowl until fully combined.
- Combine Batter. Pour the wet ingredients into the dry ingredients and mix with a spatula only until incorporated.
- Bake the Layers. Divide the batter evenly between the prepared pans. Bake for 25-28 minutes or until a toothpick inserted in the center comes out with a few moist crumbs.
- Cool and Torte. Let the cakes cool in the pans for 10 minutes, then flip onto wire racks to cool completely. Cut each layer horizontally to create four thin rounds.
- Make the Frosting. Beat the butter on medium speed for 30 seconds until smooth. Add vanilla and salt, then slowly mix in the powdered sugar, adding the heavy cream halfway through. Whip on low until smooth and fluffy.
- Assemble and Decorate. Stack and frost the layers on a square of parchment paper. Chill the cake for 10 minutes after a crumb coat, then apply the final layer of frosting. Pipe your message on top and place the cake inside an 8-inch takeout box.
Notes
- Ensure all cold ingredients like buttermilk and eggs are at room temperature before mixing to guarantee a uniform batter.
- Use a digital kitchen scale to weigh your cake pans as you fill them so they bake evenly and to the same height.
- Chill the cake layers in the freezer for 20 minutes before assembling to make stacking and frosting much easier.
- If you prefer a less sweet frosting, make a batch of Swiss meringue buttercream instead of American buttercream.
- Prep Time: 30 mins
- Cook Time: 25 mins
- Category: Cakes
- Method: Baking
- Cuisine: American
Pantry Lineup

Gathering your ingredients beforehand makes the baking process smooth and enjoyable. These simple kitchen staples work together to create a light, tender crumb and a rich frosting.
- All-Purpose Flour: This serves as the structural backbone of our cake, providing enough strength to hold the rise without making the crumb heavy or dense. Measuring it accurately by spooning and leveling, or using a kitchen scale, guarantees your cake remains light and fluffy.
- Granulated Sugar: Beyond adding sweetness, sugar plays a vital role in locking in moisture and tenderizing the crumb. It interferes with gluten development during mixing, which helps guarantee a soft, melt-in-your-mouth texture in every bite.
- Dark Cocoa Powder: This ingredient provides the deep, intense chocolate flavor and beautiful dark color to the cake layers. Using a high-quality Dutch-processed variety guarantees a smooth taste without any harsh acidic notes.
- Buttermilk: The natural acidity in this liquid reacts with the baking soda to create a light, airy rise. It also contributes a subtle tang that balances the sweetness and keeps the crumb incredibly tender.
- Hot Water: Pouring hot liquid into the batter helps bloom the cocoa powder, releasing its full aromatic potential. It thins the batter just enough to guarantee a moist texture after baking.
- Vegetable Oil: Unlike butter, oil remains liquid at room temperature, which keeps the cake soft for several days. It provides reliable moisture without competing with the rich chocolate flavor.
- Unsalted Butter: This forms the creamy base of our sweet American buttercream frosting. Using room temperature butter allows it to whip up fluffy and smooth without leaving lumps.
- Heavy Cream: Adding a splash of cream to the frosting makes it silky and easy to spread over the delicate layers. It softens the sugar and creates a luxurious mouthfeel.
| Ingredient | Why It Matters |
|---|---|
| Dark Cocoa Powder | Blooms with hot water for an intense chocolate base |
| Buttermilk | Reacts with leaveners to create an incredibly soft crumb |
| Vegetable Oil | Keeps the miniature layers moist for days at room temperature |
| Unsalted Butter | Whips into a smooth, pipeable frosting base |
| Heavy Cream | Thins the sweet buttercream to a spreadable consistency |
Accurate measurements are the secret to baking success, especially when working with smaller volumes. Weighing your flour and cocoa powder on a digital scale prevents dry, heavy layers. Taking a few extra seconds to prep your ingredients guarantees a beautiful result.
From Bowl to Oven

Step 1: Prep the Pans and Oven
Start by preheating your oven to 350°F (175°C) so it reaches the right temperature before your batter is ready. Lightly grease two six-inch cake pans with non-stick spray and line the bottoms with parchment paper circles. This extra step prevents the delicate layers from sticking when you flip them. Setting up your workspace now makes the transition from mixing to baking smooth and neat. Having your pans ready to go prevents the batter from sitting too long, which can weaken the leavening agents.
Step 2: Whisk the Dry Ingredients
In a large mixing bowl, combine the all-purpose flour, granulated sugar, dark cocoa powder, baking powder, baking soda, and fine salt. Use a sturdy whisk to stir them together until the mixture is uniform in color with no streaks of white flour remaining. Sifting the cocoa powder beforehand helps remove any stubborn lumps that might resist mixing. This dry base acts as the foundation for your rich chocolate batter. Making sure everything is evenly distributed at this stage prevents large pockets of baking soda or salt in your finished cake.
Step 3: Combine the Wet Ingredients
Measure the hot water, room temperature buttermilk, vegetable oil, egg, and vanilla extract into a separate bowl or large measuring cup. Whisk these liquid components vigorously until the egg is fully incorporated and the mixture is smooth. Gradually pour these wet ingredients into your dry mixture, stirring gently with a spatula only until the batter comes together. Overmixing at this stage can develop gluten, which results in a tough, dense texture rather than a soft crumb. The batter will look relatively thin, but this is exactly what you want for a moist cake.
Step 4: Bake Your Chocolate Lunch Box Cake Layers
Divide the smooth chocolate batter evenly between your prepared six-inch pans to make sure they rise to the same height. Place them on the center rack of your oven and bake for twenty-five to twenty-eight minutes. You will know they are done when a toothpick inserted into the center comes out with a few moist crumbs attached. Let the pans cool on a wire rack for ten minutes before gently turning the cakes out to cool completely. The kitchen will fill with a rich, comforting chocolate aroma as the layers finish baking.
Step 5: Mix the Sweet Buttercream
Beat the room temperature unsalted butter in a clean bowl for thirty seconds until it is smooth and creamy. Add the vanilla extract and salt, then gradually mix in the powdered sugar one cup at a time on low speed. Pour in the heavy cream halfway through to help the ingredients blend together smoothly. Continue whipping until the frosting is light, fluffy, and holds its shape when lifted with a spatula. If the frosting feels too thick to spread, add another splash of cream a teaspoon at a time.
Step 6: Torte and Stack the Layers
Cut each cooled cake layer horizontally using a long serrated knife to create four thin, even rounds. Place a square of parchment paper onto a flat surface, then lay down your first cake layer. Spread a thin, even layer of vanilla buttercream over the top using a small offset spatula. Stack the next layer on top, repeating the process until you have two separate two-layer cakes ready for their outer coating. Torting the layers this way creates a beautiful contrast of cake and cream in every single slice.
Step 7: Frost and Decorate
Cover the outside of each cake with a thin layer of buttercream to lock in the crumbs, then chill them in the freezer for ten minutes. Apply a thicker final coat of frosting, smoothing the sides with a bench scraper for a clean look. Tint any remaining buttercream with gel food coloring and scoop it into small piping bags. Pipe a sweet message or simple borders on top, then carefully lift the parchment to slide the cakes into their boxes. This final step transforms your simple layers into a personalized work of edible art.
Easy-Baker Notes

Using room temperature ingredients is essential for achieving a uniform batter. Cold buttermilk or eggs can cause the fat in the recipe to seize, leading to an uneven bake. Set these ingredients on the counter about an hour before you plan to start. If you are in a rush, you can warm cold eggs quickly by placing them in a bowl of warm water for five minutes.
If your cake layers sink in the middle after baking, here is why and how to fix it. This common issue usually happens when the oven door is opened too early, releasing heat, or if the baking soda is expired. Always test your leaveners for freshness and keep the oven door closed until the final few minutes of baking. If a sink does occur, you can easily level the top with a serrated knife to make it flat again.
Using a digital kitchen scale to weigh your filled pans guarantees that your layers are identical. This step prevents one cake from baking faster than the other, saving you from dry edges. It is a simple habit that makes a massive difference in your baking consistency. It also takes the guesswork out of dividing your batter, making the process much more relaxing.
If you enjoy working with delicate, soft textures, you might also love learning about the white velvet cake story for your next weekend project. That recipe uses similar techniques to produce a crumb that melts in your mouth. Sticking to simple methods always yields the best results. It is a great way to expand your baking repertoire without feeling overwhelmed by complex steps.
When preparing your boxes, make sure the parchment paper is cut slightly larger than the container base. This extra paper acts as a built-in sling, allowing you to lower the decorated cake into the deep box without smudging the sides. For a visual guide on this assembly method, check out this helpful lunch box cakes tutorial to perfect your technique. It will save you from accidental smudges and keep your work looking pristine.
One bowl, one pan, no fuss is our favorite way to bake, and keeping your frosting tools simple fits that philosophy beautifully. You do not need a massive collection of piping tips to make these look adorable. A simple round tip or even a plastic bag with the corner snipped off works beautifully for writing messages. Keep your designs simple and clean for that classic, charming bento style.
Chilling your cake layers in the freezer for twenty minutes before stacking makes them much easier to handle. Cold cake is firmer and releases fewer crumbs, which makes applying your frosting a breeze. It also helps the buttercream set quickly as you spread it, preventing the layers from sliding around. This simple step saves you a lot of frustration during the assembly process.
Frequently Asked Questions
What is a lunch box cake?
A lunch box cake, also known as a bento cake, is a miniature dessert that originates from South Korea. It is typically around four inches in diameter and is served inside a small takeout container. These cakes are designed to be highly portable, charmingly decorated, and sized beautifully for one or two people. They have become incredibly popular for their cute aesthetic and personal size.
What size is a bento lunch box cake?
Most traditional bento cakes are four inches in diameter, but this recipe uses six-inch layers to fit standard eight-inch square takeout boxes. The tapered bottom of these containers fits a six-inch cake beautifully without any sliding. This slightly larger size makes it easier to write messages and decorate the borders. It is the ideal size for sharing with a friend or partner.
How many people does a lunch box cake feed?
A six-inch lunch box cake comfortably feeds two to three people, making it ideal for date nights or small celebrations. If you cut modest slices, you can stretch it to feed four. It offers the right amount of dessert without leaving you with days of leftovers. This makes it a great option for small households.
Can you make lunch box cakes from a box mix?
Yes, you can use a box mix, but making it from scratch takes very little extra time and tastes far superior. This scratch recipe uses simple pantry staples that you likely already have on hand. Plus, the homemade crumb is much more stable for torting and stacking into thin layers. You will taste the difference in the rich chocolate flavor.
What kind of box do you use for lunchbox cakes?
These cakes are typically packaged in eco-friendly sugar cane or bagasse clamshell containers that measure eight inches square. You can easily find these online or at local restaurant supply stores. Lining the box with greaseproof parchment paper keeps the container clean and adds a rustic charm. It makes the presentation feel like a special gift.
How do you keep lunchbox cakes moist?
Using vegetable oil instead of butter in the cake batter is the best way to preserve moisture. Additionally, wrapping the cooled cake layers tightly in plastic wrap before assembling helps lock in their natural hydration. Once frosted, the buttercream acts as a protective barrier that keeps the crumb soft for days. You can also brush the layers with a simple syrup if needed.
What frosting works best for mini lunch box cakes?
A sturdy American buttercream or Swiss meringue buttercream works best because they hold their shape at room temperature. This recipe features a classic vanilla buttercream that is easy to tint with gel food coloring and smooths down beautifully. It provides a stable canvas for writing detailed messages or piping borders. It is also sweet enough to balance the deep cocoa.
Can you freeze these cakes after decorating them?
Yes, you can freeze the fully decorated cakes for up to a month. Place the cake in its box, wrap the entire container tightly in plastic wrap, and store it in the freezer. When you are ready to serve, thaw it in the refrigerator overnight. This prevents condensation from ruining your beautiful piped messages.
Simple Swaps
You can easily swap the vanilla buttercream for a rich chocolate version to create a double chocolate treat. Simply replace half a cup of the powdered sugar with high-quality cocoa powder and add an extra splash of heavy cream. This adjustment satisfies deep chocolate cravings and pairs beautifully with the moist cake layers. It is an excellent option for true chocolate lovers who want an intense flavor profile.
Adding a fruit filling between the layers is another wonderful way to customize this dessert. Spread a thin layer of raspberry jam or strawberry compote over the buttercream before stacking the next cake round. If you love elegant floral designs, reading the chocolate rosette cake story will give you gorgeous inspiration for decorating your mini creations. The combination of rich chocolate and tart fruit is always a crowd-pleaser.
Infusing the cake batter with coffee is a fantastic trick to make the chocolate taste even richer. Replace the hot water with freshly brewed hot coffee or add a teaspoon of espresso powder to the dry ingredients. The coffee flavor remains subtle while highlighting the deep cocoa notes of the cake. It adds a sophisticated depth of flavor that makes your homemade cake taste like it came from a high-end bakery.
Slice & Serve
Presenting these miniature creations is half the fun of baking them. Keep the cake right on its parchment paper square when placing it inside the takeout box to maintain that rustic, bakery-style aesthetic. You can tie a wooden fork to the inside lid of the container with a piece of colorful baker’s twine for a thoughtful touch. This presentation makes the cake feel like a special, hand-crafted gift before the box is even opened.
These treats are ideal for outdoor picnics, casual birthday gifts, or a cozy evening at home. Pair a rich slice of this chocolate cake with a hot cup of black coffee or a cold glass of milk to balance the sweet buttercream. If you are hosting a larger gathering, you can serve these alongside other individual desserts like those found in the brown butter chocolate chip cookie cake story for a fun dessert table. It allows guests to enjoy different flavors without needing to slice a massive cake.
Because these cakes are highly portable, they make wonderful surprises to drop off on a friend’s doorstep. The sturdy box protects the frosting during transit, making sure your hard work arrives looking beautiful. Just keep the box flat during transport to prevent the cake from sliding. Adding a small personalized note on the lid of the box completes this sweet gesture perfectly.

Bake It Soon
Baking does not have to be a complicated, all-day event to feel special. This simple recipe proves that basic pantry ingredients can come together quickly to create something truly memorable. The next time you want a fun kitchen project, whip up these miniature cakes and share them with someone you love. It is a wonderful way to bring a little bit of joy into an ordinary day.
If you enjoyed making this recipe, you might also like reading the vanilla pound cake story for another classic, straightforward dessert. We love seeing your beautiful creations, so please share your baking triumphs with us. Let us know how your decorating turned out in the comments below. Hearing about your kitchen adventures always makes our day brighter.
Connect with our baking community on Pinterest, Facebook, TikTok, and Telegram for more easy recipes and tips. We are always sharing new ways to make baking fit into your busy life. Happy baking, and we hope you enjoy every single bite of this delicious creation.


