I remember the first time I sliced into a cake and saw a perfect gradient of color staring back at me; it was like a little secret hidden under the frosting. That moment changed everything for my baking because I realized that a few drops of color could turn a simple sponge into a total showstopper. There is something so joyful about sharing a bake that looks like a sunset or a calm ocean, and today, I am showing you exactly how to do it.

This recipe is all about that stunning visual pop paired with the tropical warmth of coconut and the bright zing of lemon zest. We are using coconut milk in the batter to keep things incredibly moist and tender, while the lemon provides that refreshing hit of flavor that keeps you coming back for another bite. It is a simple bake that looks high-effort, which is my absolute favorite way to treat my friends and family.
The Simple Magic of Gradients
You are going to fall in love with this cake because it brings a massive amount of “wow” factor without requiring you to be a professional pastry chef. The beauty of an ombre cake is that it tells a story with every slice, moving from deep, vibrant tones to soft, delicate hues. It is the ultimate way to celebrate a special occasion while keeping the actual baking process fun and approachable.
Beyond the looks, the flavor profile is a total winner. The creamy coconut milk creates a crumb that is rich and soft, almost like a hug in cake form. When you add the lemon zest into the frosting, it cuts through the sweetness and adds a fresh, aromatic layer that makes the whole dessert feel light and airy. It is the kind of recipe that makes you feel like a creative artist in the kitchen, and trust me, the smiles you get when you serve this are worth every single minute.
Print
Ombre Cake
- Total Time: 1 hour
- Yield: 8 servings
- Diet: Vegetarian
Description
This stunning Ombre Cake features moist coconut sponge layers infused with a refreshing lemon zest frosting. Its eye-catching gradient design and tropical flavor profile make it a sophisticated yet approachable dessert for any celebration.
Ingredients
- Softened butter
- Granulated sugar
- Large eggs
- All-purpose flour
- Baking powder
- Full-fat coconut milk
- Gel food coloring (yellow and blue)
- Icing sugar
- Coconut aroma
- Fresh lemon zest
- Fresh blueberries
- Edible flowers
Instructions
- Cream the softened butter and granulated sugar together for 3 to 5 minutes until pale and fluffy.
- Incorporate eggs one at a time, beating well after each addition to maintain a smooth emulsion.
- Sift flour and baking powder, then alternate adding them with coconut milk into the batter, mixing until just combined.
- Divide the batter into three equal portions and tint them with varying amounts of food coloring to create a gradient.
- Bake in a preheated oven at 180°C (350°F) for 25 to 30 minutes or until a toothpick comes out clean.
- Whip softened butter with icing sugar until voluminous, then stir in the coconut aroma and lemon zest.
- Stack the cooled layers from darkest to lightest with frosting in between, then coat the exterior and decorate with berries and flowers.
Notes
For the cleanest gradient, weigh your mixing bowls before adding the batter to ensure each layer is exactly the same size. Always use room temperature ingredients to prevent the batter from curdling and to achieve the fluffiest frosting texture.
- Prep Time: 30 mins
- Cook Time: 30 mins
- Category: Dessert
- Method: Baking
- Cuisine: American
The Flavor Stars

To make this masterpiece, we are using a collection of simple ingredients that work together to create a huge flavor pop. The real secret here is the combination of fat and acid, which keeps the cake sturdy enough to layer but light enough to melt in your mouth.
- Softened Butter: This is the base of our cake and our frosting. Using room-temperature butter allows it to trap air during creaming, which gives the cake its lift and the frosting its silky texture.
- Coconut Milk: This is our liquid gold. It adds a subtle tropical sweetness and a wonderful fat content that makes the cake much more moist than regular dairy milk.
- Lemon Zest: The zest of a fresh lemon is where all the essential oils live. It provides a bright, citrusy punch that pairs beautifully with the coconut.
- Yellow and Blue Food Coloring: By mixing these two primary colors, we can create a range of greens and teals. This is where you get to be creative with your gradient!
- Fresh Blueberries: These offer a tart, juicy contrast to the sweet buttercream and look absolutely stunning against the cake colors.
- Edible Flowers: A few simple blossoms on top make this cake look like it came straight from a high-end boutique bakery.
The Simple Process
Step 1: Cream the Butter and Sugar
Start by placing your softened butter and granulated sugar into a large mixing bowl. Use an electric hand mixer or a stand mixer to beat them together for about 3 to 5 minutes. You want the mixture to look pale, light, and very fluffy, as this builds the structure for a great cake.
Step 2: Add the Eggs
Incorporate your eggs one at a time, beating well after each addition. This helps maintain the emulsion so your batter stays smooth. If the mixture looks like it might curdle, just add a tablespoon of your measured flour to bring it back together.
Step 3: Mix in Dry Ingredients and Coconut Milk
Sift the flour and baking powder together. Gradually add the dry ingredients to the butter mixture, alternating with the coconut milk. Start and end with the flour to keep the batter stable. Mix until just combined—be careful not to overwork it, or the cake will be tough!
Step 4: Create the Ombre Layers
Divide your batter into three equal portions in separate bowls. Leave the first bowl plain (or add a tiny drop of yellow for a sunny base). In the second bowl, add a small drop of blue and yellow to make a light teal. In the third bowl, add more blue and yellow to create a deep, vibrant forest green or dark teal. This creates the gradient pop we are looking for.
Step 5: Bake to Perfection
Pour each colored batter into its own greased and lined cake tin. Bake in a preheated oven at 180°C (350°F) for about 25 to 30 minutes. You will know they are ready when a toothpick inserted into the center comes out clean and the tops spring back when lightly touched.
Step 6: Whip Up the Frosting
While the cakes cool completely, beat the soft butter with the icing sugar until it is white and voluminous. Stir in the coconut aroma and the fresh lemon zest. This frosting should be stiff enough to hold its shape but soft enough to spread easily over your beautiful layers.
Step 7: Assemble and Decorate
Place the darkest layer on your serving plate, spread a layer of frosting, and top with the medium layer. Repeat with the lightest layer on top. Cover the entire cake in a smooth coat of coconut-lemon frosting, then top with fresh blueberries and delicate flowers for that final aesthetic touch.
Pop It Up

To get the best results, always use gel-based food coloring rather than liquid ones. Gel colors are much more concentrated, so you only need a tiny bit to get a vibrant pop of color without changing the consistency of your batter. Also, make sure your cake layers are completely cold before you even think about frosting them; otherwise, that delicious coconut buttercream will slide right off! If you want to see another example of how colors can change a bake, take a look at our lemon rainbow cake for more inspiration.
Make It Yours
You can easily switch up the color palette to fit any vibe you are going for. If you are feeling a romantic mood, try using shades of red and pink for a sunset look, which works fantastically with the coconut base. For a really fun twist, you could even swap the lemon zest for orange zest to give it a deeper, warmer citrus flavor. If you want to see a different monochromatic style, check out our pink cake which uses similar layering techniques with a completely different color story.
Simple Serving

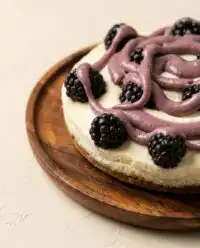
This cake is a star on its own, but serving it with a side of extra fresh berries really brings out the brightness of the lemon. I love to plate each slice with a small dollop of whipped cream or a scoop of coconut sorbet for an extra cooling effect. If you are hosting a tea party, this cake pairs wonderfully with a floral herbal tea or even the berry notes in our purple cake recipe.
Keep Popping
I hope you have as much fun making this Ombre Cake as I did! It is such a wonderful way to show off your simple creativity and prove that you don’t need a million tools to make something beautiful. Once you master the gradient technique, you can start experimenting with all sorts of colors, like the vibrant hues in our green cake. For more inspiration and to see this recipe in action, come say hi on Instagram, Pinterest, or Facebook. Happy baking, and keep making those flavors pop! For more detailed techniques on layering, you can also look at this original inspiration.


