Slowing down on a quiet afternoon does not have to mean waiting an hour for a warm dessert to rise in the oven.

This Chocolate Lava Mug Cake is the answer when you need a rich dessert without washing several large bowls and cake pans. This quick microwave recipe delivers a tender crumb and a warm, molten center in a few short minutes. It is the type of simple baking that brings instant warmth to your kitchen table on a quiet Sunday afternoon. By using simple pantry staples and a single favorite mug, you can enjoy a decadent cocoa treat whenever the craving strikes.
Why This Chocolate Lava Mug Cake Belongs in Your Recipe Box
Prep: 10 min · Serves: 1 · Difficulty: Easy
- Only requires pantry staples you already own
- Ready in less than twenty minutes total
- Cleanup is simple with just one mug
- Bakes beautifully without a traditional oven
- Delivers a warm and gooey chocolate center
This is the quick dessert you will turn to on every quiet evening. It brings the same deep, comforting flavor of a slow-baked easy chocolate cake straight to your microwave.
Get The Full Cake Recipe
Print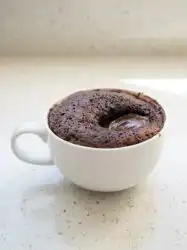
Chocolate Lava Mug Cake
- Total Time: 12 mins
- Yield: 1 serving
Description
Enjoy a rich, molten chocolate dessert in minutes using this simple microwave-ready recipe. Perfect for satisfying sudden cravings, this single-serve treat features a tender cocoa crumb and a warm, gooey center without the need for an oven.
Ingredients
- 4 tablespoons all-purpose flour
- 2 tablespoons granulated sugar
- 2 tablespoons unsweetened cocoa powder
- 1/4 teaspoon baking powder
- 1 pinch salt
- 3 tablespoons whole milk
- 2 tablespoons melted unsalted butter
- 1 egg
- 1/4 teaspoon vanilla extract
- 2 tablespoons semi-sweet chocolate chips
- 1 tablespoon water
Instructions
- Whisk dry ingredients. Combine flour, sugar, cocoa powder, baking powder, and salt in a 12-ounce microwave-safe mug until uniform.
- Stir wet ingredients. Add melted butter, milk, egg, and vanilla extract to the mug, stirring until the batter is smooth and well-combined.
- Add chocolate center. Drop the chocolate chips into the center of the batter without stirring them in.
- Add moisture layer. Carefully drizzle the tablespoon of water on top of the batter without mixing it in.
- Microwave the cake. Cook on high for 90 seconds or until the edges are set but the center remains slightly shiny.
- Rest and cool. Allow the mug to stand for 5 minutes before eating to let the molten center thicken slightly.
Notes
- Use a 12-ounce mug to provide enough space for the cake to rise without overflowing.
- Avoid overmixing the batter to ensure the finished cake remains tender rather than rubbery.
- Monitor the cake closely as microwave wattages vary significantly between different appliances.
- Let the melted butter cool slightly before adding to the egg to prevent premature scrambling.
- Prep Time: 10 mins
- Cook Time: 2 mins
- Category: Dessert
- Method: Microwave
- Cuisine: American
Pantry Basics
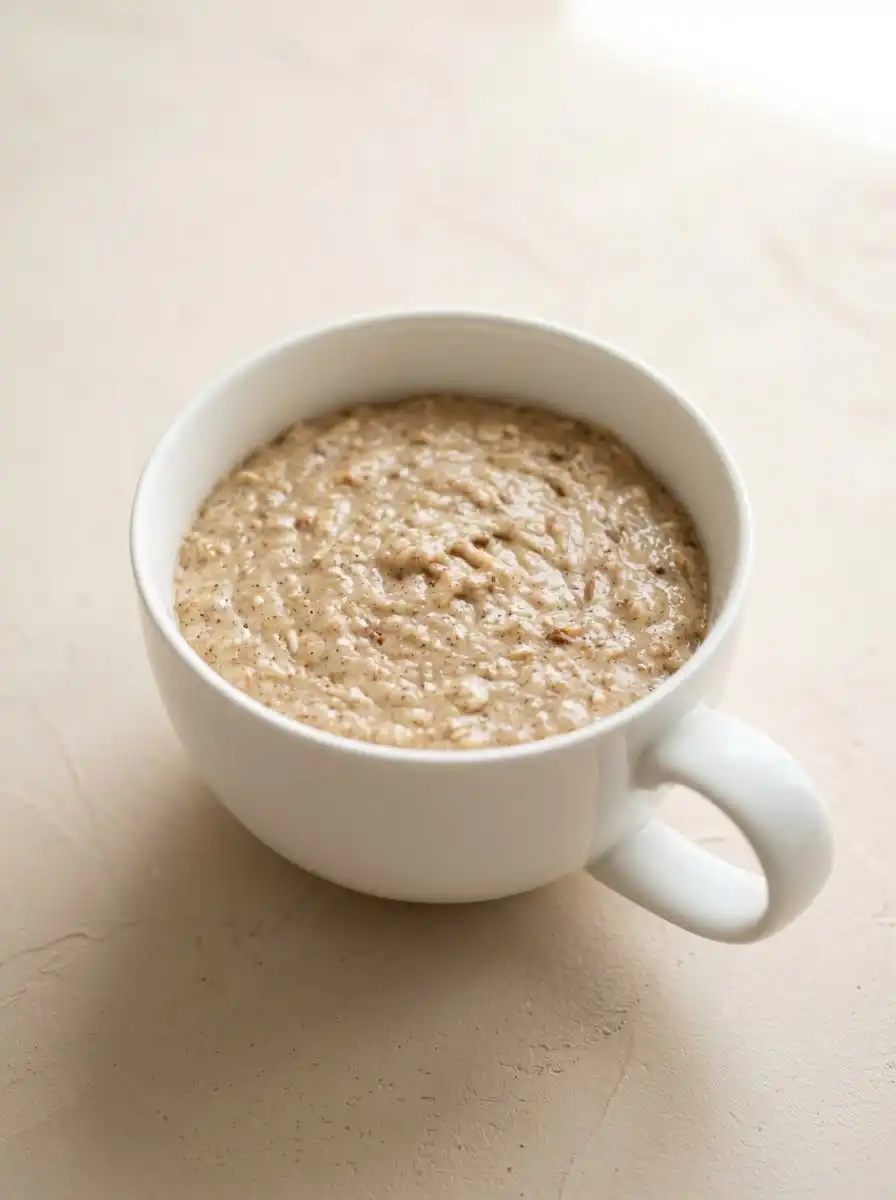
Preparing a warm treat should never feel like a chore or require a special trip to the local grocery store when you are craving comfort. This Chocolate Lava Mug Cake delivers no fuss, honest flavor with every bite. Each simple ingredient works in harmony to build a soft, tender crumb with a decadent, molten core that rivals any traditional oven-baked dessert.
- All-Purpose Flour: This standard pantry staple forms the delicate structure of our quick microwave cake. It provides the essential starch that holds the crumb together without making the texture too heavy or dense. By measuring it carefully with a spoon rather than scooping directly from the bag, you keep the crumb wonderfully tender.
- Granulated Sugar: A sweet touch is necessary to balance the natural bitterness of the unsweetened cocoa powder. It dissolves smoothly into the wet ingredients, helping to retain moisture and keep the cake soft as it cooks. Without this sweetness, the deep cocoa flavor would feel too sharp for a comforting evening dessert.
- Cocoa Powder: Using a good unsweetened cocoa powder gives this quick dessert its deep, rustic chocolate character. It delivers a rich, honest chocolate flavor that tastes like a traditional cake baked from scratch in a grandmother’s kitchen. It is the key to achieving that classic, dark appearance we all love.
- Baking Powder: Our baking powder is what makes the batter rise up beautifully in the microwave in seconds. It creates tiny air pockets within the batter, keeping the crumb light and airy rather than flat and heavy. A small amount goes a long way in helping your cake keep a soft, sponge-like quality.
- Unsalted Butter: Melting a small amount of butter adds a rich flavor and keeps the cake crumb incredibly soft. It provides the fat needed to coat the flour proteins, which prevents a rubbery or tough texture. It gives every bite a comforting, buttery edge that melts in your mouth.
- Whole Milk: Adding a splash of milk provides the essential liquid to bind the dry ingredients together. It hydrates the flour and cocoa powder to create a thick, smooth batter that flows easily into the bottom of your mug. Room temperature milk works best to keep the butter from seizing up as you stir.
- Fresh Egg: An egg acts as the ultimate binder and structure-builder for our microwave dessert. It helps the cake rise evenly while adding a comforting richness and a tender density to every single bite. It keeps the ingredients from separating during the rapid cooking process.
- Semi-Sweet Chocolate Chips: Placing these chips in the center of the batter creates the signature molten lava pocket. They melt slowly during cooking to form a thick, velvety chocolate sauce that flows when you insert your spoon. They provide that luxurious chocolate surprise right when you reach the center.
| Ingredient | Why It Matters |
|---|---|
| Cocoa Powder | Provides the rich, deep chocolate base without any fuss |
| Melted Butter | Keeps the crumb tender and prevents a rubbery texture |
| Chocolate Chips | Melts into a thick, molten pocket right in the center |
| Baking Powder | Gives the cake its gentle rise in the microwave |
| Fresh Egg | Binds the ingredients and creates a rich, soft texture |
The Simple Method
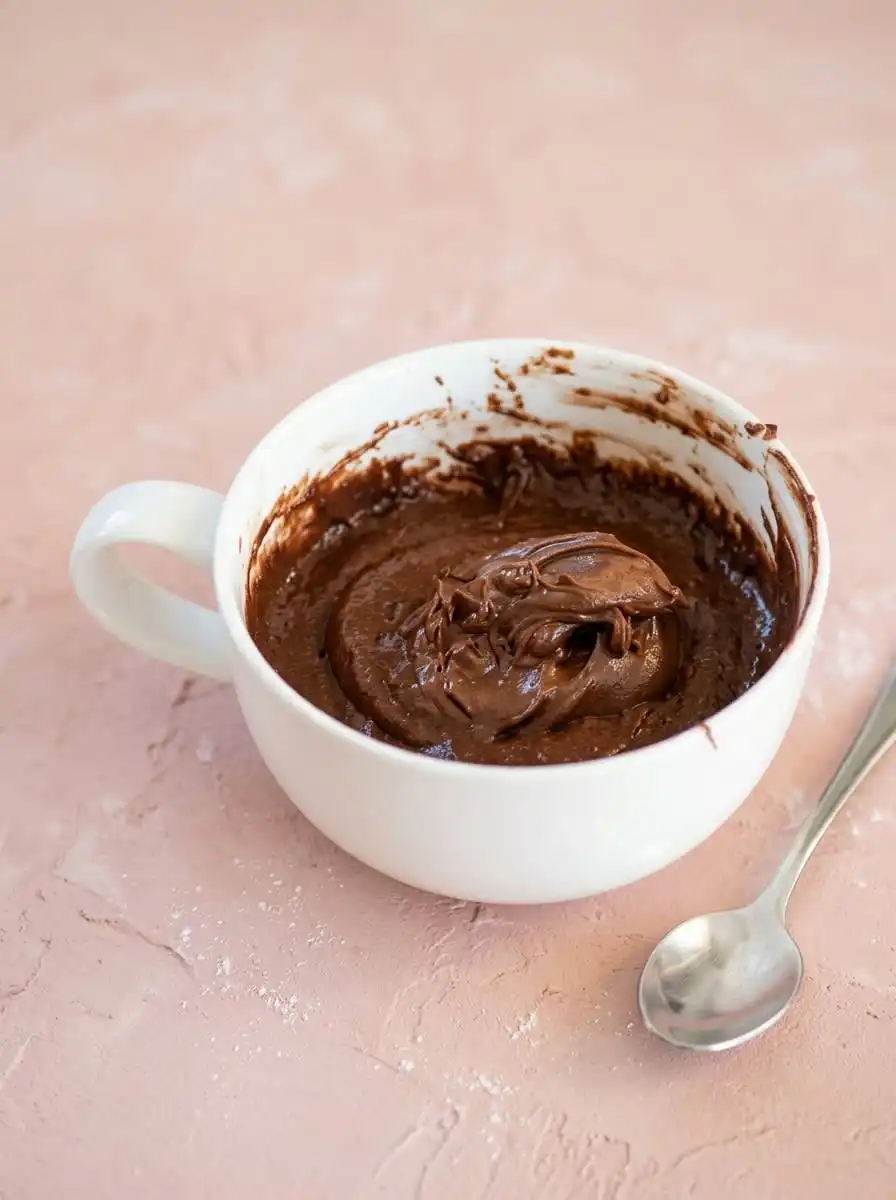
Step 1: Whisk the Dry Staples
Gather your favorite heavy ceramic mug and a standard kitchen fork on a clean counter. Measure your flour, sugar, cocoa powder, baking powder, and a tiny pinch of salt directly into the bottom of the mug. Whisk these dry items together thoroughly with the fork until the mixture is uniform and light brown, making sure no small clumps of cocoa remain. Taking a moment to combine these dry staples thoroughly prevents any pockets of flour from hiding in the finished cake.
Step 2: Stir in the Wet Ingredients
Pour the melted butter, whole milk, the fresh egg, and a splash of pure vanilla extract into your dry mixture. Use your fork to stir everything gently, making sure to scrape the bottom corners where dry flour likes to hide. The batter should look thick, smooth, and smell deeply of sweet vanilla and chocolate as you whisk it. Do not overmix the batter once it is combined, as too much stirring can make the finished cake tough.
Step 3: Insert the Chocolate Chips
Drop the semi-sweet chocolate chips directly into the center of your prepared chocolate batter. Do not stir them throughout the mug; allow them to sit in a tight, cozy cluster right in the middle. They will sink slightly on their own during the cooking process and melt together to form the molten lava core. Having them clustered in the center makes sure that every spoonful from the middle of the mug is rich and gooey.
Step 4: Keep Your Chocolate Lava Mug Cake Moist
Drizzle the single tablespoon of water directly on top of the chocolate batter. Do not stir this water into the mixture; let it sit quietly on the surface like a small puddle. This little splash creates the necessary steam during cooking, which prevents your Chocolate Lava Mug Cake from drying out. It is the secret trick that keeps the center beautifully molten while the edges bake to a tender crumb.
Step 5: Microwave to Gentle Perfection
Place your mug in the center of the microwave and cook on high power for about ninety seconds. Watch through the window as the batter rises warmly toward the rim of your favorite mug like a small soufflé. The edges of the cake should look firm and set, while the very center remains slightly wet and shiny to the touch. If the center still looks completely liquid, cook in ten-second increments until it is barely set.
Step 6: Rest and Cool
Let the hot mug sit undisturbed on your kitchen counter for five full minutes before eating. The cake will settle slightly as it cools, and the molten center will thicken into a rich, velvety chocolate sauce. A simple kitchen towel draped nearby keeps the steam gently contained as it rests, allowing the flavors to meld beautifully. Enjoying it warm is the best way to experience the comforting contrast of the soft crumb and gooey core.
Plain-Kitchen Notes
Always choose a heavy ceramic mug that holds at least twelve ounces of liquid to give your batter room to grow. If you use a mug that is too small, the batter will spill over the sides during the quick rise, leaving a messy microwave and a sunken cake. A generous mug gives the batter plenty of room to expand safely and rise up beautifully without any spills.
Measuring your flour with a light hand is key to a soft crumb in any quick microwave dessert. If you scoop directly from the bag with your measuring cup, you will pack too much flour in, making the cake dry and heavy. Use a spoon to fluff the flour and gently fill your measuring cup instead to keep the texture light and airy.
If your mug cake is rubbery or chewy, here is why and how to fix it. This common issue happens when you cook the cake for too long or use too much egg white in your batter. To fix this next time, reduce your microwave cooking time by fifteen seconds and make sure your ingredients are at room temperature before mixing.
Keep a close eye on the wattage of your microwave because every kitchen appliance cooks slightly differently. A standard microwave takes about seventy seconds, but a lower wattage oven might need up to two full minutes to set. It is always safer to undercook slightly than to overbake this delicate treat, as the residual heat will continue to cook the center.
For an even richer chocolate flavor, you can try using a different style of chocolate in the core of your cake. You can learn more about how different chocolates melt by reading our guide on the classic chocolate mug cake to find your favorite blend.
Be sure to melt your butter gently and let it cool slightly before mixing it into your batter. Pouring hot butter directly onto your fresh egg can cook the egg whites prematurely, resulting in tiny cooked bits throughout your finished dessert. Letting it sit on the counter for a minute is a simple step that keeps your cake smooth.
Substitute an equal amount of mild vegetable oil if unsalted butter is not in your fridge. While oil does not provide the same rich, buttery flavor, it keeps the crumb incredibly moist and tender even on the second day, and some say it tastes even better the next day. This is a great alternative when you want a quick sweet treat without the extra step of melting butter.
Frequently Asked Questions
How do I get the center to be gooey instead of dry?
The secret to a gooey center is avoiding overcooking and adding a splash of water on top of the batter. The water creates steam that keeps the chocolate chips from drying out as they melt in the microwave. Always stop the microwave while the center still looks slightly wet and shiny, as it will continue to thicken as it cools on your counter.
Why is my mug cake rubbery or chewy?
A rubbery texture is usually caused by overmixing the batter or overcooking the cake. When you stir flour too much, you develop gluten, which makes the finished crumb tough and dense. Stir your ingredients just until they are combined, and cook the cake in short bursts to avoid over-baking.
Can I make a mug cake without eggs?
Yes, you can easily omit the egg for a slightly lighter texture that is still delicious. Simply add an extra tablespoon of milk or a tablespoon of applesauce to keep the batter moist and bound together. The cake will still rise beautifully thanks to the baking powder, resulting in a soft crumb.
What happens if I bake it in the oven instead?
If you prefer to use a traditional oven, you can bake this batter in an oven-safe ramekin. Place the ramekin on a baking sheet and bake at 350 degrees Fahrenheit for about twelve to fifteen minutes. Keep a close watch on it so the center remains soft and molten while the edges set.
How do you make a vegan or gluten-free mug cake?
To make this recipe vegan, use plant-based milk, melted coconut oil, and an egg alternative like applesauce. For a gluten-free option, substitute the all-purpose flour with a high-quality gluten-free baking blend. Both variations cook in the microwave as quickly as the original and deliver a wonderful chocolate flavor.
What kind of mug is best for this recipe?
A standard ceramic coffee mug that holds twelve to fourteen ounces is ideal for this quick dessert. Avoid using narrow or travel mugs, as they do not allow the heat to distribute evenly during the cooking process. A wide, microwave-safe mug keeps the cake cooking beautifully from the outer edges to the molten center.
Can I store the leftovers for the next day?
While this quick treat is best enjoyed warm, you can cover the mug with plastic wrap and store it on the counter overnight. It will lose some of its molten texture as it cools, but a quick ten-second warm-up in the microwave will soften it back up. It makes a wonderful companion for your morning coffee on a quiet morning.
Easy Switch-Ups
You can swap the chocolate chips in the center for a large spoonful of creamy peanut butter. This creates a salty, rich core that pairs beautifully with the sweet chocolate crumb as it melts. It offers a wonderful twist on the traditional molten center that you might find in a larger, oven-baked chocolate lava cake 2 made for a family gathering.
If you enjoy cozy, rustic flavors, stir a pinch of ground cinnamon and a dash of espresso powder into your dry ingredients. The espresso powder does not make the cake taste like coffee; instead, it deepens the natural cocoa flavor, making it taste like it sat in a bakery window all morning. This simple addition brings a touch of warmth to a dark winter evening and pairs wonderfully with a warm cup of tea.
For a sweeter and creamier contrast, you can drop three or four white chocolate chips into the center of the dark batter. As the microwave cooks the cake, the white chocolate melts into a beautiful, milky pocket that contrasts wonderfully with the deep cocoa crumb. It is a simple twist that feels special without adding any extra preparation steps to your evening.
At the Kitchen Table
There is something wonderful about eating a warm cake straight from the mug while sitting at the kitchen table on a quiet afternoon. To make it feel a bit more special, you can dust the top with a light coating of powdered sugar. The sugar dissolves slightly into the warm crumb, creating a beautiful sweet crust that looks like a dusting of winter snow. It is an easy way to make a quick microwave treat feel like a special occasion.
If you want to dress it up for company, serve the mug alongside a cold scoop of homemade vanilla bean ice cream. The cold ice cream melts slowly into the warm cake, blending with the chocolate sauce to create a rich creaminess. It delivers all the comforting luxury of a traditional lava cake recipe with only a fraction of the kitchen work. You can also drop a fresh raspberry on top for a bright splash of color.
You can also serve this quick treat with a warm cup of black coffee or a cold glass of milk. The bitterness of the coffee balances the deep sweetness of the cocoa beautifully, making it the excellent companion for a late-night snack. Sharing a mug with a loved one on a Sunday evening is an easy way to bring comfort to your home without any fuss.

Keep This One Close
Baking does not always need to be a grand, day-long event to bring comfort to your home. Sometimes, a single mug, a simple fork, and a few minutes are all that is required to create a sweet memory at the end of a busy day. This simple recipe proves that honest flavors and basic pantry staples can come together to make something truly satisfying. It is the kind of recipe that is easily shared and passed down through generations of busy home bakers.
We hope you keep this recipe handy for those quiet moments when you need a little warmth in a hurry. You can find more visual tips and a quick step-by-step guide by looking through our chocolate mug cake story online. It is a wonderful way to share the simple joy of baking with friends who might also need a quick chocolate treat. Keeping these simple methods close guarantees you are always ready to bake.
If you enjoyed this simple microwave bake, please share your thoughts and kitchen creations with our community. You can follow along with us and find more rustic desserts on our Pinterest and Facebook pages. We also love sharing quick video guides on our TikTok channel and posting daily inspiration on our Telegram group. Happy baking, and may your kitchen always feel like home.