If you have ever felt intimidated by professional bakery displays, this recipe replaces that worry with a clear path to success.

This Mango Drip Cake relies on a light sponge and fresh fruit to do the heavy lifting for you. You do not need fancy equipment or a pastry degree to create something this beautiful on a Tuesday night. It is the kind of baking that fits your life, even when you only have an hour.
What Makes This Mango Drip Cake Shine
Prep: 60 min · Serves: 12 · Difficulty: Medium
This recipe makes professional looking desserts doable for any home baker.
- Light sponge creates a tender and airy texture
- Fresh mango adds natural sweetness to every bite
- Professional drips made without expensive specialized tools
- Minimal mixing bowls for a much quicker cleanup
- Reliable results that fit into a busy schedule
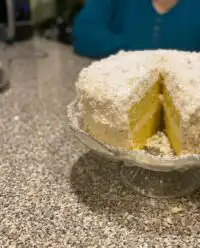
This is the cake my family requests every single summer. You can find more inspiration with this cake with fruit for your next gathering.
Get The Full Cake Recipe
Print
Mango Drip Cake
- Total Time: 1 hour 30 mins
- Yield: 12 servings
Description
This Mango Drip Cake features a light, airy sponge layered with fresh fruit and whipped cream. It is a stunning, professional-looking dessert that is surprisingly simple to assemble for any occasion.
Ingredients
- Large Eggs
- Hot water
- Flour
- Corn Starch
- Baking powder
- Heavy Whipping Cream
- Powdered sugar
- Vanilla extract
- Alphonso Mangoes
- White Chocolate
- Gelatin
Instructions
- Prep the pan. Preheat your oven to 350 degrees F and grease the base of a 9-inch springform pan, lining it with parchment paper.
- Whisk the eggs. Beat the room temperature eggs with hot water on high speed for ten minutes until the mixture is thick and ribbons when lifted.
- Fold dry ingredients. Sift the flour, corn starch, and baking powder together, then gently fold them into the egg mixture in three batches using a wide spatula.
- Bake the sponge. Transfer the batter to the pan and bake for 25 to 30 minutes, then cool completely on a wire rack.
- Whip the cream. Beat the chilled heavy cream with powdered sugar and vanilla extract until stiff peaks form.
- Assemble the layers. Slice the cooled cake into three layers, spreading mango puree and mango-studded whipped cream between each tier.
- Apply the drips. Heat the mango puree with gelatin and white chocolate, then use a squeeze bottle to create drips along the chilled cake edges.
- Add final decorations. Pipe cream puffs around the top perimeter and place a fresh mango ball in the center of each puff before serving.
Notes
- Ensure eggs are at room temperature to achieve the best volume for your sponge.
- Keep the cake thoroughly chilled before applying the drip to ensure it sets properly.
- Use a serrated knife and mark the sides with toothpicks to ensure perfectly even cake layers.
- If your whipped cream starts to separate, add a splash of cold cream and whisk gently to restore the texture.
- Prep Time: 60 mins
- Cook Time: 30 mins
- Category: Dessert
- Method: Baking
- Cuisine: Tropical
Pantry Lineup

Most of the ingredients for this recipe are already waiting in your kitchen. You will find that a few fresh mangoes and some heavy cream are the only items you need to pick up from the store. The combination of simple pantry basics like eggs and flour creates a base that allows the fruit flavor to really stand out.
- Large Eggs: These are the foundation of your sponge and provide the necessary lift without heavy chemical leaveners.
- Alphonso Mangoes: Known for their smooth texture and intense sweetness, these make the most flavorful filling and decorations.
- Corn Starch: Adding a small amount to your flour softens the crumb and results in a more delicate texture.
- Heavy Whipping Cream: A high fat content is necessary to create a stable frosting that holds its shape between layers.
- White Chocolate: Mixing this into the puree helps the decorative drips set with a beautiful shine on the cold cake.
| Ingredient | Why It Matters |
|---|---|
| Eggs | Provide the structural lift and airy crumb |
| Mango Puree | Delivers the concentrated tropical flavor and color |
| Corn Starch | Softens the flour for a tender sponge |
| Heavy Cream | Creates a stable and light frosting base |
| White Chocolate | Helps the mango drip set with a shine |
Step-by-Step (Promise It’s Quick)

Step 1: Prep the Pan and Oven
Start by heating your oven to 350 degrees F and preparing your 9-inch springform pan. You only need to grease the base and line it with a parchment paper circle to prevent sticking later. Avoid greasing the sides of the pan because the sponge needs to grip the edges as it climbs and rises.
Step 2: Whisk the Eggs to Ribbon Stage
Crack your room temperature eggs into a large bowl and add the hot water before starting your mixer. Whisk at high speed for about ten minutes until the mixture becomes thick, pale, and holds a ribbon shape when the whisk is lifted. This stage is crucial because it incorporates the air that makes the cake light.
Step 3: Fold in the Dry Ingredients
Sift the flour, corn starch, and baking powder together before gently adding them to your egg mixture in three separate batches. Use a wide spatula to fold the dry ingredients in with a large circular motion, making sure to scrape the bottom of the bowl. This method keeps the air bubbles intact while incorporating all the flour evenly.
Step 4: Bake and Cool the Sponge
Transfer your batter to the pan and bake for approximately 25 to 30 minutes until the top feels soft and springs back when touched. Let the cake cool in the pan for a few minutes before running a spatula around the edge to loosen it. Invert it onto a wire rack and peel away the parchment paper so it can cool completely before slicing.
Step 5: Prepare the Whipped Cream Frosting
Place your mixing bowl and whisk in the freezer for fifteen minutes to get them very cold before you start the frosting. Beat the chilled heavy cream until soft peaks form, then slowly add the powdered sugar and vanilla extract. Continue whisking until the peaks are stiff and the cream holds its shape well enough for piping.
Step 6: Assemble the Tropical Layers
Slice your cooled cake into three even layers and place the sturdiest one on your serving plate or cake stand. Spread a layer of mango puree followed by a generous portion of the mango-studded whipped cream. Repeat this process with the second layer, making sure the fruit chunks are distributed evenly for a level finish.
Step 7: Create the Mango Drip Cake Effect
Heat your remaining mango puree and stir in the gelatin and white chocolate until the mixture is completely smooth and liquid. Transfer the cooled mixture to a squeeze bottle and carefully release small amounts along the top edge of the chilled cake. The cold surface will help the drips slow down and set as they travel toward the bottom.
Step 8: Add the Final Fruit Decorations
Use a piping bag to add 12 to 16 cream puffs around the top perimeter of your beautiful creation. Place a fresh mango ball, scooped with a melon baller, into the center of each cream puff for a polished look. Remove any parchment strips from the base and let the cake sit in the refrigerator until you are ready to serve.
Easy-Baker Notes

Always use room temperature eggs when you start your sponge because they incorporate air much more efficiently than cold ones. If you forget to take them out of the fridge, place them in a bowl of warm water for five minutes. This small step makes a massive difference in the height of your finished cake layers.
If your whipped cream starts to look grainy or separated, do not worry because it is an easy fix. Add a tablespoon of liquid heavy cream and whisk it by hand for a few seconds to smooth the texture back out. You can also look at this lemon drizzle cake for other ideas on how to manage delicate batters and toppings.
Make sure your cake is completely cold before you attempt the drip technique or the fruit puree will run all the way off the sides. A cold cake acts like a brake for the chocolate mixture, helping it set in those beautiful, thick droplets. You can learn more about how to make mango cake to understand how different temperatures affect the assembly process.
When slicing the mango for the filling, try to keep the cubes of fruit uniform in size to avoid an uneven cake surface. Smaller cubes are easier to spread and won’t create large bumps that make the top layer tilt. This helps the overall stability of the dessert as you stack the three sections of sponge.
If the cake top feels wobbly or hard after the initial baking time, it likely needs another five minutes in the oven. A finished sponge should feel like a soft pillow that returns to its original shape when you press down lightly. If it stays indented, the middle is still underdone and needs more time to set its structure.
Use a long, serrated knife to cut your layers and go slowly to keep the thickness consistent all the way through. You can mark the heights with toothpicks around the outside of the cake to act as a guide for your blade. This ensures your Mango Drip Cake looks level once it is fully assembled on the stand.
Frequently Asked Questions
What is drip cake made of?
A drip cake is usually made of a standard layered cake finished with a liquid topping that runs down the sides. For this recipe, we use a mixture of mango puree, white chocolate, and a little gelatin to create a stable and colorful drip. The chocolate helps the liquid set quickly so it does not pool at the bottom of the stand.
How to bake a drip cake?
Baking a drip cake involves creating stable sponge layers and a firm frosting base that can support the liquid topping. The most important part of the process is chilling the frosted cake thoroughly before you apply the drips. This ensures the topping slows down and thickens as it moves, creating that iconic bakery-style appearance.
How to make a mango cake?
To make a mango cake, you combine a light sponge with fresh mango chunks and a flavored cream filling. You can use Alphonso mangoes for the best color and sweetness, layering them between slices of cake. The final touch involves decorating the outside with extra fruit and a mango-based glaze or drip for maximum flavor impact.
What kind of mango is best for cake?
Alphonso mangoes are the gold standard for baking because they have a non-fibrous texture and a very deep flavor. They provide a bright yellow color that looks beautiful in the filling and the decorative drips. If you cannot find fresh ones, frozen Alphonso chunks or canned puree from an international grocery store work perfectly well.
Can I make this cake a day in advance?
Yes, you can bake the sponge layers a day ahead and keep them wrapped tightly in plastic wrap at room temperature. The assembled cake also keeps well in the refrigerator for up to three or four days. Just make sure to store it in a cake carrier so the whipped cream does not absorb any other smells from the fridge.
Why is my whipped cream not getting thick?
Whipped cream often fails to thicken if the bowl, whisk, or the cream itself are not cold enough. Make sure to chill your equipment in the freezer for at least fifteen minutes before you begin whisking. If the cream still won’t hold peaks, you may need to use a brand with a higher fat content or add a stabilizer.
Simple Swaps
You can easily trade the mango for fresh strawberries or raspberries if you want a different fruit profile for your next event. Simply puree the berries and strain the seeds to create a smooth liquid for the drip and the filling layers. This strawberry cake 3 is a great example of how to handle fresh berries in a layered format.
For a tropical twist that feels like a vacation, try adding half a cup of toasted shredded coconut to the whipped cream filling. You can also replace the vanilla extract in the sponge with coconut extract to deepen that island flavor. This variation pairs beautifully with the fresh mango chunks and adds a nice bit of texture to every slice.
If you prefer a more decadent version, use a dark chocolate ganache for the drips instead of the white chocolate and mango mixture. The bitter notes of the chocolate provide a wonderful contrast to the bright sweetness of the tropical fruit and the light cream. This version is especially popular for evening celebrations or adult birthday parties where a richer flavor is appreciated.
Easy Serving Ideas
This dessert is the centerpiece of any table, so it looks best when served on a simple white pedestal or a wooden cake board. The bright yellow drips provide enough decoration that you do not need much else to make the presentation look complete. A few sprigs of fresh mint can add a nice touch of green contrast to the fruit on top.
When you are ready to slice the cake, dip your knife in warm water and wipe it clean between every single cut. This helps the knife glide through the cream and fruit without dragging the filling into the sponge layers. You might also enjoy serving this alongside a chocolate fruit cake to give your guests a variety of fruit-based dessert options.
This cake is light enough for a weekend brunch but special enough for a milestone birthday celebration in the garden. Serve each wedge with a small dollop of extra whipped cream on the side for a restaurant-style presentation. It pairs beautifully with a cold glass of prosecco or a simple cup of Earl Grey tea in the afternoon.

The Wrap-Up
Baking should be a joy that fits into your actual life, rather than a chore that takes over your entire weekend. This recipe proves that you can achieve a sophisticated and beautiful result with just one pan and a few fresh ingredients. Whether you are baking for a special guest or just because it is Tuesday, this cake is always a winner.
I hope you find as much happiness in sharing this fresh strawberry cake or this mango version as I do with my own family. Simple can be spectacular when you focus on honest flavors and straightforward techniques. One bowl, one pan, no fuss is the best way to keep your kitchen a happy place while making something delicious.
If you decide to try this recipe, please share your results and tag us so we can see your beautiful creations. You can find more easy baking inspiration and community tips on our social channels below.


