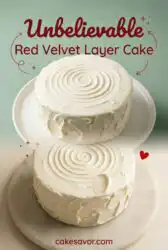
We all know a good cake satisfies, but a wow cake makes the room quiet, and the bridge between them in this red velvet layer cake is a splash of rich, nutty melted butter.

Making a classic Red Velvet Layer Cake at home often feels like a test of patience, but it really comes down to one smart addition, all the wow. By blooming the cocoa in hot milk and melted butter, we coax out a deep, toasty cocoa flavor that balances the sweet tang of the cream cheese frosting. It is a simple step that transforms a traditional southern staple into a deeply aromatic dessert. You will love how the crumb stays incredibly soft and light without losing its structural integrity.
Why the Red Velvet Layer Cake Flavor Pop Works
Prep: 60 min · Serves: 12 · Difficulty: Medium
This simple recipe turns a classic cake into an unforgettable dessert.
- A deeply tender, velvety crumb texture.
- Bold cocoa notes from hot butter blooming.
- Tangy buttermilk undertones in every bite.
- Fluffy cream cheese frosting made effortlessly.
- Easily customized with simple pantry spices.
If you have ever made a standard red velvet cake and found it dry, this method completely solves that problem by keeping every layer exceptionally soft.
Get The Full Cake Recipe
Print
Red Velvet Layer Cake
- Total Time: 1 hour 40 mins
- Yield: 12 servings
Description
This exquisite red velvet layer cake features a tender, velvety crumb infused with deep cocoa notes bloomed in hot butter. Finished with a rich, tangy cream cheese frosting, this classic dessert is the perfect centerpiece for any special occasion.
Ingredients
- All-purpose flour
- Baking soda
- Baking powder
- Salt
- Granulated sugar
- Cocoa powder
- Eggs
- Vegetable oil
- Whole milk
- White vinegar
- Vanilla extract
- Gel paste red coloring
- Unsalted butter
- Powdered sugar
- Cream cheese
Instructions
- Prepare the pans. Coat two eight-inch round cake pans with butter and parchment paper, then preheat the oven to 330ºF (165ºC).
- Whisk dry ingredients. Combine flour, baking soda, baking powder, salt, sugar, and cocoa powder in a large bowl until the mixture is uniform.
- Mix wet elements. Whisk eggs, oil, milk, vinegar, vanilla, and red coloring in a separate bowl until deep crimson and well combined.
- Combine the bases. Gently fold the liquid mixture into the dry ingredients using a spatula until a smooth, thick paste forms.
- Bloom the cocoa. Heat milk and butter until simmering, then gradually whisk into the batter to unlock deep chocolate flavors.
- Bake the layers. Divide batter into pans and bake for 35 to 40 minutes, or until the tops spring back when lightly touched.
- Prepare the frosting. Beat softened butter, powdered sugar, salt, and cream cheese with an electric mixer until fluffy and velvety.
- Assemble and frost. Layer the cooled cakes with frosting, coat the exterior, and chill briefly before serving.
Notes
- Ensure all cold ingredients are brought to room temperature before beginning to ensure a smooth batter.
- Use a kitchen scale to measure flour accurately to avoid a dry or dense cake crumb.
- Chill the frosting in the refrigerator for twenty minutes if it becomes too soft during application.
- Wrap cooled cake layers in plastic wrap before frosting to keep them moist during the cooling process.
- Prep Time: 60 mins
- Cook Time: 40 mins
- Category: Dessert
- Method: Baking
- Cuisine: Southern
The Flavor Lineup

Selecting the right components is the key to creating a memorable crumb for your Red Velvet Layer Cake. We combine standard pantry items with a few specific choices to build a cake that is exceptionally tender and balanced.
- All-Purpose Flour: Provides the essential structure of the layers without making them dense or tough.
- Melted Butter: Adds a rich, toasty depth of flavor that cooking oil alone cannot achieve.
- White Vinegar: Reacts with the leavening agents to produce a light, airy rise in the oven.
- Cocoa Powder: Lends a subtle, warm chocolate flavor that defines classic red velvet recipes.
- Gel Paste Red Coloring: Delivers a deep crimson hue without introducing unnecessary liquid to the batter.
- Whole Milk: Heated with butter to bloom the cocoa and hydrate the dry ingredients evenly.
- Cream Cheese: Creates a thick, tangy frosting that cuts through the sweetness of the sugar.
| Ingredient | Why It Matters |
|---|---|
| Melted Butter | Adds rich depth and keeps the layers soft |
| White Vinegar | Activates the baking soda for a light rise |
| Cocoa Powder | Lends a warm, subtle chocolate flavor |
| Gel Paste | Delivers a beautiful crimson shade easily |
| Cream Cheese | Balance and tanginess for the sweet layers |
Building the Flavor

Step 1: Prep Your Pans and Pre-heat
Before mixing any batter, prepare your baking pans to prevent your Red Velvet Layer Cake from sticking. Coat the bottoms of two eight-inch round cake pans with a thin layer of softened butter and line them with parchment paper. Heat your oven to 330ºF (165ºC) so it reaches the correct temperature before the batter is ready. This moderate baking temperature helps the layers rise evenly without forming dome tops.
Step 2: Whisk the Dry Base
In a spacious mixing bowl, combine the all-purpose flour, baking soda, baking powder, salt, and granulated sugar. Add the cocoa powder, which provides that classic, delicate chocolate background note. Whisk these dry ingredients thoroughly until the mixture is uniform in color and texture. Aerating the dry base now guarantees there will be no pockets of soda or salt later.
Step 3: Mix the Wet Elements
In a separate bowl, whisk together the eggs, oil, milk, white vinegar, vanilla extract, and red food coloring. The vinegar is crucial here as it reacts with the cocoa and leavening agents to create a soft texture. Whisk until the liquid is a uniform, deep crimson shade and the eggs are completely broken down. It should smell pleasantly sweet and floral from the vanilla.
Step 4: Combine Wet and Dry
Pour the crimson wet mixture into the bowl with your aerated dry ingredients. Use a whisk or a rubber spatula to gently fold the two mixtures together until a smooth paste forms. Do not overmix at this stage, but make sure all dry flour pockets are fully integrated. The batter will look thick, brilliant, and incredibly fragrant as the vanilla and cocoa begin to merge.
Step 5: Assemble the Red Velvet Layer Cake Batter
In a small saucepan over medium heat, warm your milk and melted butter until the liquid starts simmering very gently. Carefully pour a third of this hot liquid into your thick cake batter, stirring gently until it is fully incorporated. Add the remaining hot milk and butter mixture, whisking until the batter is smooth and pourable. The hot liquid blooms the cocoa powder, unlocking a much deeper chocolate flavor.
Step 6: Bake Until Springy
Divide your Red Velvet Layer Cake batter evenly between the two prepared eight-inch pans, aiming for about 695 grams per pan if you are using a kitchen scale. Slide them into the preheated oven and bake for 35 to 40 minutes. You will know they are done when the tops bounce back gently under light pressure. A toothpick inserted into the very center should come out clean with only a few moist crumbs.
Step 7: Whip the Tangy Frosting
While the layers cool completely on a wire rack, prepare the classic cream cheese frosting. Cream the softened butter, powdered sugar, and a pinch of salt together in a clean bowl using an electric mixer. Beat on medium-high speed for about five minutes until the mixture looks pale, light, and fluffy. Add the cream cheese and continue whipping until the frosting is smooth and velvety.
Step 8: Assemble and Decorate
Place your first cooled layer on a cake stand and spread a generous scoop of frosting over the top with a spatula. Position the second layer on top, then coat the entire cake with a thin layer of frosting to seal in any stray crumbs. Chill the cake in the refrigerator for fifteen minutes to set this crumb coat. Once firm, apply the remaining frosting in rustic swoops and decorate with toasted cake crumbs if desired.
Small Tweaks, Big Wow

To achieve a velvety crumb that melts in your mouth, use a digital scale to weigh your ingredients rather than relying on cup measurements. Flour is easily packed down, which can result in dry, dense layers that do not rise correctly.
If your cream cheese frosting turns soupy or runny during the whipping process, do not panic. This usually happens when the butter or cream cheese is too warm, or if you whip the frosting too long after adding the cheese. Pop the entire bowl into the refrigerator for twenty minutes, then beat it briefly on medium speed to restore its thick, spreadable structure.
The secret to a beautifully balanced frosting is using cream cheese that is slightly cool, not fully warm. Let your block of cream cheese sit on the counter for only fifteen minutes before whipping. This minor adjustment prevents the cheese from breaking down and releasing excess moisture into your sugar mixture.
Blooming your cocoa powder in hot liquid is a technique that transforms simple batters. If you want to see how this step compares to other baking methods, you can read more about the baking science of acid and cocoa to understand how flavor compounds respond to heat and acidity.
Always allow your layers to cool completely before you attempt to slice or frost them. A warm cake will melt the fat in the cream cheese frosting, causing your layers to slide apart. If you are short on time, wrap the cooled layers in plastic wrap and chill them in the freezer for thirty minutes to make assembly much easier.
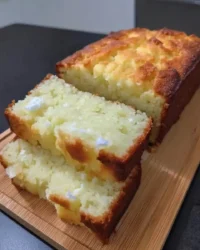
If you want to practice your scratch-baking skills with other classic recipes, try mastering our simple chocolate cake recipe which uses a similar liquid-blooming method to achieve maximum flavor depth.
Frequently Asked Questions
Can I use this recipe for red velvet cupcakes?
Yes, you can easily bake this batter as cupcakes. Divide the batter into lined muffin tins, filling each cup about three-quarters full. Bake them at 330ºF (165ºC) for 18 to 20 minutes, checking with a toothpick to make sure they are fully baked.
Can I bake it with 9-inch cake pans instead of 8-inch pans?
You can use nine-inch pans, but the layers will be slightly thinner. Reduce the baking time to 28 to 32 minutes to prevent the cake from drying out. Keep a close eye on the oven and test the center early.
How much of this recipe should I make for a 6-inch cake?
To make a smaller six-inch cake, you can cut all the ingredient quantities exactly in half. This will give you enough batter for two thick six-inch layers. Bake them for approximately 25 to 30 minutes at the same temperature.
Why don’t you use cake flour for this red velvet cake?
All-purpose flour paired with white vinegar and cornstarch-free cocoa powder creates a crumb that is structured yet tender. Cake flour can sometimes make this specific oil-and-butter batter too delicate, causing the layers to sink. Our method guarantees a sturdy slice that still feels light.
Can I make this recipe with a stand mixer?
You can certainly use a stand mixer with the paddle attachment on low speed to combine the batter. However, we recommend whisking the dry and wet ingredients by hand to prevent overmixing. Save the mixer for whipping the cream cheese frosting until it is light and fluffy.
Do all the ingredients need to be at room temperature?
Having your eggs and milk at room temperature helps them emulsify smoothly into the batter. If they are too cold, they can cause the melted butter to seize and form tiny solid clumps. Room temperature ingredients yield a much smoother, more uniform cake batter.
How should I store the finished cake to keep it fresh?
Store the assembled cake in an airtight container in the refrigerator for up to five days. Because the frosting contains dairy, it must remain chilled. For the best flavor and texture, let slices sit at room temperature for fifteen minutes before serving.
Swap Your Spice
For an aromatic flavor pop, add half a teaspoon of ground cardamom to your dry ingredient bowl. This sweet, resinous spice blooms beautifully in the hot milk and butter mixture, giving the crimson layers a sophisticated, warm depth that pairs beautifully with the tangy cream cheese.
If you love a rich, layered dessert, you can easily adapt these flavors into a decadent red velvet cheesecake by swirling a portion of the cake batter into a sweet cream cheese base before baking. It is a wonderful way to play with textures while keeping those classic, comforting flavor notes intact.
Another simple tweak is exchanging the classic vanilla extract for high-quality almond extract in the batter. A single teaspoon of almond extract provides an elegant cherry-like undertone that naturally complements the cocoa flavor. It is one of those hidden additions that makes your guests stop and ask what makes the cake taste so unique.
Bringing the Wow to the Table
This beautiful Red Velvet Layer Cake makes a striking centerpiece for any celebration or holiday gathering. Serve thick slices on vintage dessert plates to highlight the bright red color contrast against the white frosting. Pair each serving with a cup of hot black tea or a dark roast coffee to balance the rich sweetness of the cream cheese.
If you want to offer a variety of options at your dessert table, consider serving this alongside our refreshing lemon velvet cake. The bright, citrusy notes of the lemon layers provide a beautiful counterpoint to the warm cocoa depth of the red velvet layers. Your guests will love having two distinct, beautiful textures to choose from.
For an extra touch of elegance, scatter fresh raspberries or pomegranate seeds around the base of the cake stand before serving. The tart fruit complements the tangy frosting and adds a beautiful, natural shine to your presentation. Keep the slicing knife warm by dipping it in hot water and wiping it dry between slices for clean, professional cuts.

Your Turn to Riff
Baking a cake from scratch is all about playing with flavors and making the recipe your own. Whether you stick to the classic version or add a touch of cardamom, the process should feel like a fun kitchen experiment. Gather your ingredients, warm up your oven, and enjoy the wonderful aroma of chocolate blooming in hot butter.
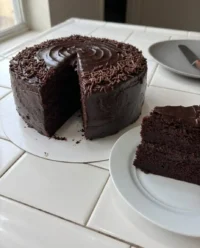
If you are looking for another classic recipe to add to your weekend baking rotation, check out our rich devils food cake for a deeper chocolate experience. It is a fantastic option for bakers who love a soft crumb and bold cocoa flavor.
We would love to see how your beautiful creation turns out. Share your baking photos and connect with our community of passionate home bakers on Pinterest, Facebook, TikTok, and Telegram. Happy baking!

