I still remember the scent of my grandmother’s kitchen on a Sunday afternoon, where a dusty bottle of rose water sat beside the vanilla extract, waiting for a special cake.

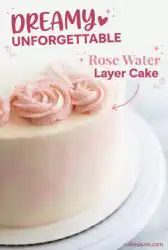
A Rose Water Layer Cake is more than a dessert; it is a quiet celebration of straightforward ingredients and gentle floral notes. This cake is light and fluffy, relying on familiar pantry staples to create a crumb that is soft yet sturdy enough for a thick buttercream frosting. You will find that the flavor of this Rose Water Layer Cake settles beautifully overnight, making it a reliable choice for a busy weekend or a family gathering.
Why This Rose Water Layer Cake Stayed in the Family
Prep: 45 min · Serves: 12-14 · Difficulty: Medium
This floral dessert brings old-fashioned charm to your kitchen table.
- Tender crumb that stays soft for days
- Familiar vanilla base with floral warmth
- Forgiving method using basic kitchen bowls
- Elegant choice for any floral cake occasion
- Reliable results with standard cake pans
This is the cake that waits on the counter for whoever stops by on a Sunday afternoon.
Get The Full Cake Recipe
Print
Rose Water Layer Cake
- Total Time: 1 hour 8 mins
- Yield: 12-14 servings
Description
This elegant rose water layer cake features a tender, vanilla-infused crumb layered with a silky buttercream. Its subtle floral aroma and soft texture make it a beautiful centerpiece for afternoon tea or special family gatherings.
Ingredients
- 1 cup unsalted butter, softened
- 2 cups granulated sugar
- 1 cup sour cream
- 1 tsp vanilla extract
- 4 large egg whites, room temperature
- 3 cups all-purpose flour
- 1 tbsp baking powder
- 1/2 tsp salt
- 1/2 cup milk
- 1/2 cup water
- 1 tbsp rose water
- 1/2 cup vegetable shortening
- 4 cups powdered sugar
Instructions
- Prepare oven and pans. Preheat your oven to 350°F and grease three eight-inch cake pans, lining the bottoms with parchment paper.
- Cream butter and sugar. Beat the butter and sugar in a large bowl for 3-4 minutes until pale and fluffy.
- Blend moisture bases. Mix in the sour cream and vanilla extract until the batter is uniform and smooth.
- Incorporate egg whites. Add the room temperature egg whites in two batches, mixing thoroughly after each addition.
- Combine dry and liquid. Whisk flour, baking powder, and salt, then alternately add dry ingredients and the milk/water mixture to the bowl.
- Divide the batter. Pour equal amounts of batter into the three prepared pans and smooth the tops evenly.
- Bake the layers. Bake for 21-23 minutes until a toothpick inserted into the center comes out with only a few moist crumbs.
- Cool the cake. Allow layers to rest in pans briefly before turning them out onto wire racks to cool completely.
- Prepare the frosting. Beat butter and shortening until smooth, then gradually incorporate powdered sugar and rose water.
- Assemble the cake. Level the cooled cakes, stack them with frosting in between, and cover the exterior with the remaining buttercream.
Notes
- Ensure all ingredients, especially eggs and butter, reach room temperature before mixing to prevent curdled batter.
- Measure flour by spooning it into the measuring cup and leveling it off with a knife to avoid a dense, dry cake.
- Sift the powdered sugar before making the frosting to achieve a silky smooth finish without any lumps.
- Chill the buttercream for 15 minutes if it becomes too soft for piping rosettes.
- Store the cake under a dome to maintain freshness, and serve at room temperature for the best flavor and texture.
- Prep Time: 45 mins
- Cook Time: 23 mins
- Category: Dessert
- Method: Baking
- Cuisine: American
Simple Ingredients

Baking this cake requires nothing more than what you likely have on your kitchen shelf. We use room temperature ingredients to make sure the batter comes together smoothly without any lumps. The rose water provides a nostalgic aroma that reminds me of old recipe cards, while the sour cream keeps the crumb from drying out too quickly.
- Unsalted Butter: Using butter at room temperature allows it to cream with the sugar properly, creating tiny air pockets for a light cake.
- Sour Cream: This adds moisture and a subtle tang that balances the sweetness of the rose water frosting.
- Egg Whites: We use only the whites to keep the cake layers pale and airy, similar to a traditional cloud-like sponge.
- Rose Water: This is the heart of the flavor, offering a delicate scent that should be measured carefully so it does not overwhelm the vanilla.
- Shortening: In the frosting, this helps the buttercream hold its shape even on a warm afternoon in the South.
- All Purpose Flour: A plain, reliable flour provides the structure needed for a tall, three-layer stack.
| Ingredient | Why It Matters |
|---|---|
| Sour Cream | Adds moisture and prevents a dry texture |
| Egg Whites | Keeps the cake light and the color pale |
| Rose Water | Provides the signature floral scent and flavor |
| Butter | Creates a rich flavor and a tender crumb |
| Baking Powder | Acts as the primary leaven for a tall rise |
The Simple Method

Step 1: Prep Your Pans and Oven
Before you start mixing, set your oven to 350°F and prepare three eight-inch cake pans. I always line the bottoms with parchment paper circles and grease the sides well to make sure the layers slide out without a struggle. Having your pans ready prevents the batter from sitting and losing its lift while you hunt for a kitchen towel.
Step 2: Cream the Butter and Sugar
In your largest mixing bowl, beat the softened butter and sugar together for at least three to four minutes. You are looking for a pale color and a texture that looks like thick, fluffy clouds. This step is where you build the foundation of a light cake, so do not rush through it.
Step 3: Add the Moisture Bases
Once the butter is ready, mix in the sour cream and vanilla extract until the mixture is uniform. The sour cream might look a little thick at first, but it will blend in beautifully to create a rich base. Scrape the sides of your bowl with a wooden spoon or spatula to include every bit of the ingredients.
Step 4: Incorporate the Egg Whites
Add your room temperature egg whites in two separate batches, mixing well after each addition. You want to see the batter become smooth and slightly glossy before you move on to the dry ingredients. If the whites are too cold, they might cause the butter to clump, so patience is key here.
Step 5: Mix the Dry and Liquid Components
Whisk your flour, baking powder, and salt in one bowl, and combine your milk and water in a small measuring cup. Adding these in stages—half the flour, then the milk, then the rest of the flour—helps keep the batter stable. Mix until the flour just disappears to avoid making the cake tough or bread-like.
Step 6: Divide and Level the Batter
Pour the batter evenly into your three prepared pans, using a spoon to smooth the tops so they bake flat. I often give the pans a gentle tap on the counter to release any large air bubbles that might be hiding inside. This helps the Rose Water Layer Cake bake with a consistent, even crumb from edge to center.
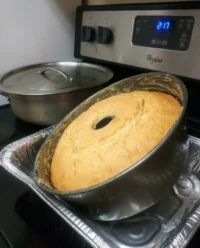
Step 7: Bake Your Rose Water Layer Cake To A Golden Finish
Slide the pans into the center of the oven and bake for about 21 to 23 minutes. You will know they are done when a wooden toothpick inserted into the middle comes out with only a few moist crumbs attached. The kitchen will start to smell like warm vanilla and sweet flowers as the cake finishes its time in the heat.
Step 8: Cool the Layers Completely
Let the cakes rest in their pans for just a few minutes before turning them out onto wire cooling racks. Removing the parchment paper while the cake is still slightly warm is usually easier, but you must let them cool entirely before frosting. A warm cake will melt your buttercream, which is a mistake that is hard to fix once it starts.
Step 9: Prepare the Rose Buttercream
Beat the butter and shortening together until the mixture is smooth and free of any lumps. Slowly add the powdered sugar and rose water, mixing on a low speed until the sugar is incorporated so it does not fly out of the bowl. Add a splash of milk or water a tablespoon at a time until the frosting is thick enough to hold a peak but soft enough to spread.
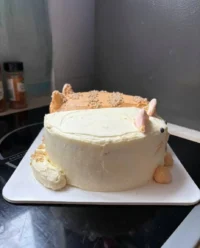
Step 10: Assemble and Decorate Your Layers
Level the cooled cakes with a long knife if they have domes, then stack them with a generous layer of frosting in between. Use the remaining frosting to cover the top and sides, adding a touch of pink color for a watercolor effect if you feel like it. A few piped rosettes on top give the cake a finished look that belongs under a glass dome.
Grandmother’s Tips

Always make sure your butter and eggs are truly at room temperature before you begin. If you try to cream cold butter, it will never trap the air needed for a light crumb, and cold eggs can cause the batter to break or curdle. I usually set my ingredients out on the counter at least an hour before I plan to start baking.
When you measure your flour, use a spoon to fill the measuring cup and then level it off with the back of a knife. Packing the flour down into the cup will result in too much flour, leading to a heavy and dry cake that lacks the softness of a classic vanilla butter cake. This small change in technique makes a massive difference in the final texture of your bake.
If your cake layers are browning too quickly on the edges while the middle is still wet, your oven temperature might be running a bit hot. You can try lowering the heat by twenty-five degrees or placing a sheet of foil loosely over the tops of the pans. For more details on heat management, you can refer to reliable baking temperatures from trusted kitchen sources.
For the smoothest frosting, sift your powdered sugar before adding it to the butter and shortening. This removes the tiny hard lumps that often hide in the bag and can clog your piping tips or leave streaks in your finish. It takes an extra minute, but it is the secret to a professional look without any fancy equipment.
If your buttercream feels too soft to pipe rosettes, place the entire bowl in the refrigerator for ten to fifteen minutes. The fats will firm up just enough to hold the shape of the piping tip without becoming too hard to squeeze. This is especially helpful during the humid summer months when the kitchen stays warmer than usual.
Storing this cake under a glass dome or a large inverted bowl helps keep the moisture locked in. Since this recipe uses shortening in the frosting, it holds up quite well at room temperature for a day or two. If you must refrigerate it, make sure to bring it back to room temperature before serving so the butter can soften again.
Frequently Asked Questions
Can I use rose syrup instead of rose water?
It is best to stick with rose water because syrup contains a high amount of sugar and a different concentration of flavor. If you use syrup, the cake or frosting may become too sweet and the floral note might not be as clear. Rose water is a distilled product that provides aroma without changing the sugar balance of the recipe.
How do I store leftovers to keep them fresh?
You should store the cake in an airtight container or under a cake dome at room temperature for up to two days. For longer storage, you can keep it in the refrigerator for up to five days, but be sure to let slices sit on the counter for twenty minutes before eating. This allows the butter in the cake and frosting to soften back to its intended texture.
Why did my cake layers sink in the middle?
Layers often sink if the oven door is opened too early in the baking process, causing a sudden drop in temperature before the structure has set. It can also happen if your baking powder is old and has lost its strength. Make sure to test your layers with a toothpick and only open the door when the timer is nearly finished.
Can I make the cake layers in advance and freeze them?
Yes, you can bake the layers, let them cool completely, and wrap them tightly in plastic wrap and foil. They will stay fresh in the freezer for up to a month. Thaw them in the refrigerator overnight while still wrapped to keep the moisture inside the sponge before you begin frosting.
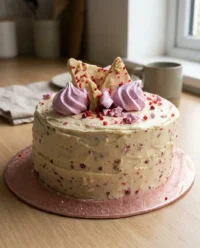
What is the best way to get the pink watercolor look?
After frosting the cake in a base layer of ivory, dab small spots of pink frosting around the sides using a small spoon or spatula. Take a flat edge, like a bench scraper or the side of a large knife, and gently swipe around the cake to smear the colors together. This creates a soft, marbled appearance without needing any professional decorating skills.
Is shortening necessary for the rose water buttercream?
Shortening helps provide stability and a whiter color to the frosting, which makes the pink accents pop. If you prefer to use only butter, you can substitute the shortening for an equal amount of unsalted butter. However, keep in mind that an all-butter frosting will be softer and may melt more easily in a warm room.
Family Variations
You can easily turn this into a Rose and Almond cake by swapping half of the vanilla extract for almond extract. The nutty aroma of the almond pairs naturally with the floral notes, creating a flavor that feels very traditional and sophisticated. This is a common swap in many Southern kitchens when a special occasion calls for a slightly different profile.
If you prefer a cake with a bit more tang, you can use the base logic from a perfect buttermilk vanilla cake and replace the milk and water with whole buttermilk. The acid in the buttermilk reacts with the leavening agents to create an even more tender texture. This version is especially good if you plan to serve the cake with fresh berries on the side.
For a fruity twist, consider adding a thin layer of strawberry or raspberry jam between the cake layers before you spread the rose water frosting. The tartness of the fruit cuts through the sweetness of the buttercream and highlights the floral scent of the rose water. It makes for a beautiful surprise when the first slice is cut and served to your guests.
At the Kitchen Table
Serving this cake is best done with a pot of hot tea or a light roast coffee that does not compete with the floral notes. I like to slice it into thin wedges to show off the three even layers and the delicate pink frosting. It is the type of dessert that feels right for a bridal shower, a birthday, or even a quiet Sunday afternoon when the family is all together.
If you are hosting a larger gathering, you might pair this with a strawberry prosecco cake 2 to give your guests a variety of flavors. The light fruitiness of the strawberry cake complements the floral aroma of the rose water without being too heavy. Place both cakes on glass stands of different heights to create a beautiful display on your sideboard.
For a final touch, you can garnish the plates with a few fresh, organic rose petals if you have a garden nearby. Just make sure the flowers have not been treated with any chemicals. A simple sprig of mint or a few fresh raspberries on the side of the plate also adds a nice bit of color and a fresh contrast to the rich buttercream frosting.

Keep This One Close
I hope this Rose Water Layer Cake finds a permanent home in your recipe box, just as it has in mine. It is a reminder that you do not need fancy tools or complicated techniques to make something that feels truly special. The combination of soft vanilla cake and fragrant rose water is a classic for a reason—it is simple, honest, and brings a bit of comfort to anyone who takes a bite.
When you bake this rose cake, take your time with the creaming of the butter and the cooling of the layers. These small moments of patience are what separate a good cake from one that people will talk about for years. If you enjoy this recipe, I would love to hear how it turned out in your kitchen and see the beautiful cakes you create for your own family.

