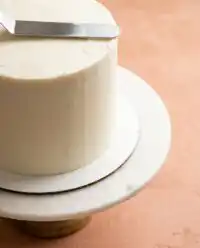
A good cake doesn’t need to be loud to get attention; it just needs a soft crumb and enough chocolate to make a quiet Sunday afternoon feel special.

There is a certain quiet satisfaction that comes from pulling a Two-Layer Marble Cake out of the oven. This recipe relies on the basics you already have tucked away in your pantry shelves. We don’t use fancy gadgets here, just a simple bowl and a wooden spoon to bring together the vanilla and chocolate swirls. This cake is meant for slow afternoons and kitchen table conversations with those you love.
Why This Two-Layer Marble Cake Stays in the Family
Prep: 60 min · Serves: 12 · Difficulty: Easy
- Uses basic pantry staples found in every kitchen.
- Forgiving layers that stay soft for several days.
- Requires only one standard square metal baking pan.
- Combines rich chocolate and vanilla in every bite.
- Tastes even better after resting in the fridge.
No fuss, honest flavor is what makes this a staple in my own home. You can always count on a chocolate layer cake to bring a smile to a friend who drops by for coffee. This is the recipe my family requests every single time we have a reason to celebrate.
Get The Full Cake Recipe
Print
Two-Layer Marble Cake
- Total Time: 5 hours 25 mins
- Yield: 12 servings
Description
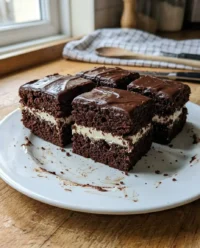
A classic, tender two-layer marble cake featuring a perfect swirl of vanilla and chocolate sponge cake. Filled with silky pastry cream and finished with a rich dark chocolate ganache, this indulgent dessert is perfect for special afternoons.
Ingredients
- 150g All-Purpose Flour
- 1 cup Sugar
- 1/2 cup Salted Butter, softened
- 2 Eggs, room temperature
- 1/4 cup Sour Cream
- 1 tsp Vanilla Bean Paste
- 1/4 cup Natural Cocoa Powder
- 1 tbsp Espresso or Coffee
- 1 tsp Baking Soda
- 1 tsp Baking Powder
- 1/2 tsp Salt
- 1/2 cup Milk
- 1/2 cup Heavy Cream
- 2 Egg Yolks
- 1 tbsp Corn Starch
- 150g 70% Dark Chocolate
Instructions
- Prep your ingredients. Preheat oven to 350°F, line a square baking pan with parchment paper, and ensure all butter and eggs are at room temperature.
- Mix base batter. Whisk flour, sugar, salt, baking soda, and baking powder, then beat in butter, eggs, vanilla, and sour cream until light and fluffy.
- Create chocolate batter. Remove 300g of vanilla batter and stir in cocoa powder and coffee until the color is uniform.
- Swirl the cake. Dollop vanilla and chocolate batters into the pan in a checkerboard pattern and smooth the top gently without over-mixing.
- Bake the cake. Bake for approximately 22 minutes, rotating the pan halfway through, until a tester comes out clean; cool on a wire rack.
- Cook pastry cream. Whisk sugar, starch, salt, milk, cream, yolks, and vanilla in a pot over medium-low heat until thick, then sieve and chill.
- Prepare chocolate filling. Heat cream and sugar until bubbling, pour over chopped chocolate, and whisk until glossy, then cool to room temperature.
- Assemble the layers. Slice the cake horizontally, place the bottom layer in the pan, spread with chocolate filling and half the pastry cream, then top with the second cake layer and remaining cream.
- Add chocolate ganache. Pour ganache made from heated cream and remaining chocolate over the top layer and spread evenly.
- Final chilling. Refrigerate for at least four hours before slicing with a warm, clean knife for professional results.
Notes
- Use a metal baking pan instead of glass for more predictable heat conduction and softer edges.
- Sieve your pastry cream if it appears lumpy to ensure a smooth, velvety texture.
- Measure your flour by weight rather than volume to prevent the cake from turning out dry or dense.
- Warm your knife in hot water and wipe it clean between each slice to keep the layers looking sharp.
- Store the finished cake in the refrigerator due to the dairy content in the pastry cream layers.
- Prep Time: 60 mins
- Cook Time: 25 mins
- Category: Dessert
- Method: Baking
- Cuisine: American
Simple Ingredients

Most of these items are sitting on your shelf right now, waiting to be turned into something wonderful. We use real salted butter and sour cream to ensure every bite of this Two-Layer Marble Cake is tender and rich. The addition of a little coffee helps the chocolate flavor stand out without making the cake taste like a morning brew.
- Salted Butter: This provides the fat needed for a soft crumb and a classic buttery edge.
- Sour Cream: A secret for keeping Southern cakes moist and adding a very slight, pleasant tang.
- Natural Cocoa Powder: This gives the chocolate swirls their deep color and honest cocoa flavor.
- Espresso or Coffee: Using a bit of liquid coffee blooms the cocoa for a richer chocolate experience.
- Vanilla Bean Paste: This adds those beautiful little specks and a deep floral aroma to the vanilla layers.
- Corn Starch: This is the thickening agent that makes our pastry cream silky and stable.
- 70% Dark Chocolate: Real chopped chocolate melts much smoother than bags of standard chips.
| Ingredient | Why It Matters |
|---|---|
| All-Purpose Flour | Provides the sturdy structure needed for stacking layers. |
| Baking Soda | Works with the sour cream to help the cake rise evenly. |
| Egg Yolks | Creates a rich and custard-like texture in the pastry cream. |
| Heavy Cream | Adds a velvety mouthfeel to the ganache and the fillings. |
The Simple Method

Step 1: Prep Your Ingredients
Before you start, make sure your butter is soft and your eggs are at room temperature. This ensures the batter comes together smoothly without any lumps of cold fat. Preheat your oven to 350 degrees and set your rack right in the middle where the heat is most even. Line your square pan with parchment paper so you can easily lift the cake out later.
Step 2: Mixing the Base Batter
In your favorite mixing bowl, whisk together the flour, sugar, salt, baking soda, and baking powder. Add in your soft butter, the eggs, vanilla, and that creamy sour cream. Beat these together for about two minutes until the batter looks light and fluffy. You want it to look pale and smooth, indicating enough air has been incorporated for a tender cake.
Step 3: Creating the Chocolate Batter
Scoop out about 300 grams of that beautiful vanilla batter into a separate smaller bowl. Stir in your cocoa powder and the brewed coffee or espresso until the color is deep and uniform. Use a wooden spoon to scrape the bottom to make sure no white streaks remain. This chocolate portion will provide the bold contrast against the sweet vanilla base.
Step 4: Swirling the Two-Layer Marble Cake
Using a spoon or a small scoop, dollop the vanilla batter into your lined pan in a checkerboard pattern. Fill those empty spaces with scoops of your dark chocolate batter until the bottom of the pan is covered. Gently smooth the top with the back of a spoon, but do not stir them together. Keeping the colors separate in the pan is what creates those beautiful swirls once the cake is sliced.
Step 5: Baking Until Golden
Slide the pan into the oven and bake for about twelve minutes before rotating the pan around. This ensures that the heat hits every side equally so one corner doesn’t get darker than the others. Bake for another ten minutes or until a wooden tester comes out clean from the center. Let it sit in the pan for ten minutes before lifting it out to cool on a wire rack.
Step 6: Cooking the Vanilla Pastry Cream
In a heavy pot, whisk together your sugar, starch, and salt before adding the milk and cream. Stir in the egg yolks and vanilla, then place the pot over a medium-low flame. Whisk constantly, making sure to hit the corners of the pot so the eggs don’t scramble. Once it thickens into a heavy custard, pour it through a sieve and let it chill in the fridge.
Step 7: Preparing the Chocolate Filling
Place your chopped dark chocolate in a bowl and set it aside while you heat the cream and sugar. Once the milk mixture starts to bubble softly, pour it right over the chocolate bits. Let it sit for a minute so the heat can do the work, then whisk until it is glossy and smooth. Cover the surface with plastic wrap so no skin forms as it cools to room temperature.
Step 8: Assembling the Layers
Cut your cooled square cake in half horizontally to create two thin, even layers. Place the bottom layer back into the pan and spread that rich chocolate filling all the way to the edges. Whip your chilled vanilla cream until it is smooth and spread half of it over the chocolate. Lay the second cake layer on top and finish with the remaining vanilla cream.
Step 9: Adding the Chocolate Ganache
Heat your remaining cream and pour it over the final portion of chopped chocolate to make a ganache. Whisk it slowly until it is shiny and pourable, then let it cool for about ten minutes. Pour this over the top layer of pastry cream and spread it gently with a spoon. This dark glaze provides a beautiful finish that keeps the moisture locked into the cake layers.
Step 10: Final Chilling and Slicing
Put the whole pan back into the fridge and let it rest for at least four hours, though overnight is better. This time allows the fillings to set up so you get clean, beautiful squares when you cut into it. Use a sharp knife dipped in warm water to make your slices. Wipe the blade clean between every single cut to keep the layers looking sharp and professional.
Grandmother’s Tips

Always use a metal pan rather than glass when baking this cake. Metal conducts heat more predictably, which helps the edges stay soft rather than becoming hard and crunchy. This is a trick passed down through generations of Southern bakers who relied on reliable results every Sunday.
If your pastry cream looks curdled or lumpy, do not worry or throw it out. Simply pour the warm cream through a fine-mesh sieve into a clean bowl. The mesh will catch the overcooked egg bits and leave you with a silky texture that melts in your mouth. You can find more advice on achieving the right consistency in our guide for red white blue marble cake preparation.
Measuring your flour by weight is the only way to ensure the cake isn’t dry. If you scoop directly from the bag with a cup, you often pack too much flour into the recipe. Use a small kitchen scale to get exactly 150 grams for a crumb that is consistently light and airy.
Temperature is your best friend when it comes to a smooth batter. Cold eggs can cause the butter to seize up, leading to a grainy texture in the finished bake. Set your eggs in a bowl of warm water for five minutes if you forgot to take them out of the fridge early.
To get the cleanest slices possible, keep your knife warm and slightly damp. A cold blade will drag through the ganache and pastry cream, mixing the colors together. Dip the knife in a tall glass of hot water and wipe it with a clean kitchen towel before every slice.
Store this cake under a glass dome or in an airtight container to keep the air away from the cut edges. Because of the dairy in the pastry cream, it must stay in the refrigerator. It actually tastes even better the next day once the flavors have had time to settle together.
Frequently Asked Questions
Can I use chocolate chips for the ganache?
It is best to avoid standard chocolate chips because they contain stabilizers that prevent them from melting smoothly. Instead, use a high-quality bar of 70% dark chocolate and chop it into small pieces by hand. This ensures your ganache is glossy and has a velvety texture that doesn’t crack when you slice the cake.
How long does this cake stay fresh in the fridge?
This cake will stay delicious for up to four days if kept in an airtight container in the refrigerator. In fact, many people find the flavor improves after twenty-four hours because the moisture from the cream softens the cake layers. Always keep it covered so it doesn’t pick up any other scents from your fridge.
Can I freeze a marble cake with pastry cream?
I do not recommend freezing this specific cake once it is fully assembled with the pastry cream layers. The cream filling can change texture and become watery or grainy once it thaws out. If you need to work ahead, you can bake and freeze the cake layers alone, then assemble the cream and ganache fresh before serving.
What if my cake layers break when I am stacking them?
Do not worry if the cake layers crack slightly because the pastry cream is very forgiving. Simply piece the cake back together in the pan like a puzzle and press down gently to seal the gaps. Once the cake chills and the fillings set, no one will ever know there was a break in the middle.
Can I use 2% milk instead of whole milk for the filling?
Whole milk is strongly preferred because the higher fat content is what gives the pastry cream its sturdy structure and rich mouthfeel. Using 2% or skim milk may result in a filling that is too soft to hold up the weight of the top cake layer. If you must use lower-fat milk, the cake might be a bit more difficult to slice cleanly.
Why did my chocolate and vanilla batters mix together too much?
This usually happens if the batter is stirred or swirled too vigorously after being dolloped into the pan. To keep the distinct colors, just smooth the top very lightly with a spatula without reaching deep into the batter. The natural rising of the cake during the baking process will create enough movement for a beautiful marble effect.
Simple Twists
For a little extra crunch, you can scatter a handful of toasted pecans over the middle chocolate layer. The nutty flavor pairs beautifully with the cocoa and adds a traditional Southern touch to the dessert. You might also try using this technique with a classic vanilla butter cake base if you prefer a simpler flavor profile.
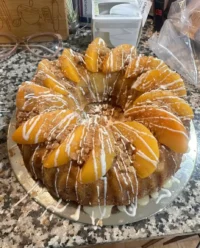
If you want a brighter flavor, try adding the zest of one large orange to the chocolate portion of the batter. The citrus oils provide a wonderful aroma that cuts through the richness of the heavy cream and dark chocolate. This marble layer cake technique allows for many different flavor combinations depending on what you have in your spice cabinet.
You can also swap the vanilla bean paste for almond extract in the pastry cream for a more traditional wedding-cake flavor. Just be careful with the amount, as almond extract is very strong and can easily overwhelm the delicate vanilla. Use only a half-teaspoon to keep the balance just right for your guests.
At the Kitchen Table
This cake is quite rich, so I like to serve it in modest squares alongside a cup of strong black coffee. The bitterness of the coffee balances the sweetness of the vanilla pastry cream and the depth of the dark chocolate ganache. It is the kind of dessert that invites people to linger at the table long after the meal is finished.
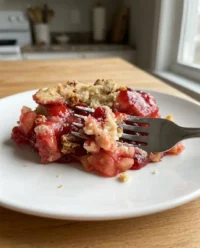
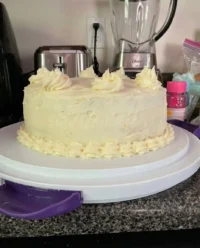
For a special occasion, you can serve each slice with a few fresh raspberries or a sliced strawberry on the side. The tartness of the fruit provides a lovely contrast to the heavy cream and buttery cake. If you are looking for a simpler option for a large crowd, you might also enjoy making a yellow cake recipe which is a bit quicker to assemble.
I always suggest taking the cake out of the fridge about ten minutes before you plan to eat. This allows the butter in the cake layers to soften just enough to give you that perfect tender crumb. Keep a stack of clean napkins nearby, as the ganache and cream make this a wonderfully indulgent treat that everyone will enjoy.

Keep This One Close
Baking for those you love is one of the simplest ways to show you care, and this cake is a testament to that. It doesn’t require any fancy decorating skills or expensive tools, yet it feels like a true gift when it is placed on the counter. The familiar flavors of chocolate and vanilla are a comfort that never goes out of style, much like a reliable chocolate cake recipe from an old family collection.
I hope this recipe finds a permanent home in your kitchen just as it has in mine. There is something special about a cake that survives through the years and continues to bring joy to every generation. Please take a moment to share your baking results with us or save this for your next family gathering.

