You do not need a professional degree, a massive industrial kitchen, or even a drawer full of specialized metal tools to make a cake that looks like a fine art painting.

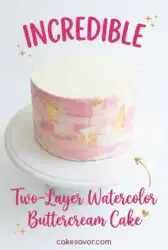
Every baker wants to serve something that causes a quiet hush of admiration when it hits the kitchen table. Making a Two-Layer Watercolor Buttercream Cake allows you to play with colors without needing the steady hand of a master decorator. This style is forgiving because the beauty lies in the soft, blended edges rather than rigid, stiff lines. You will find that these two layer cake designs are as much about the feeling of the work as they are about the final sweet slice.
What Makes It Comfort In A Two-Layer Watercolor Buttercream Cake
Prep: 45 min · Serves: 12 · Difficulty: Medium
- It turns a plain cake into art.
- No professional decorating training is required here.
- The soft colors look like morning clouds.
- Clean lines and smooth edges stay beautiful.
- Family and friends will admire your work.
This method turns any afternoon into a celebration of color and quiet kitchen joy. Using a perfect buttermilk vanilla cake as your base ensures the flavor is just as impressive as the exterior colors.
Get The Full Cake Recipe
Print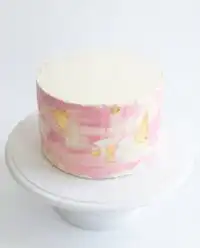
Two-Layer Watercolor Buttercream Cake
- Total Time: 1 hour
- Yield: 12 servings
- Diet: Vegetarian
Description
Create a stunning, art-inspired dessert with this watercolor buttercream technique. By blending soft hues directly onto your frosting, you can achieve a sophisticated, painterly finish that is both beautiful and impressively simple to execute.
Ingredients
- Unsalted butter, softened
- Powdered sugar
- Gel food coloring
- Vanilla extract
- Heavy cream
- 2 prepared cake layers
Instructions
- Prepare color palette. Divide frosting into small bowls, stir in desired gel colors, and mix until smooth to ensure harmonious shades.
- Apply base layer. Stack cake layers with frosting in between, then coat the entire exterior with a base layer of white buttercream using an offset spatula.
- Mix secondary colors. Adjust the consistency and vibrancy of your tinted frostings, ensuring they remain soft and pliable for easy application.
- Paint buttercream swatches. Use an offset spatula to place random, cloud-like dabs of tinted frosting across the sides and top of the base-coated cake.
- Smooth the finish. Hold an icing smoother against the cake while rotating the stand to gently blend the color patches into a soft, misty watercolor effect.
- Refine color blending. Touch up any areas showing too much base or muddy colors by adding small dots of fresh frosting and repeating the smoothing process.
- Chill the cake. Refrigerate the finished cake for at least fifteen minutes to allow the buttercream to set and firm up for easier serving.
Notes
- Work in a cool room to keep the buttercream from softening too much while you paint.
- Always keep your icing smoother clean by wiping it with a damp cloth after each rotation.
- If the frosting develops air bubbles, stir it by hand with a wooden spoon for several minutes to achieve a dense, silky texture.
- Use a knife dipped in hot water and wiped dry to get clean, crisp slices without smearing the colors.
- Prep Time: 45 mins
- Cook Time: 0 mins
- Category: Dessert
- Method: Decorating
- Cuisine: American
Pantry Basics
When you gather these items, remember that the quality of your butter is the foundation of the entire project. You want a frosting that is pale enough to take on color but sturdy enough to hold its shape as you smear and smooth the layers. Having your ingredients at room temperature will help everything come together without any lumps or fuss.
- Unsalted Butter: This provides the smooth canvas and rich flavor necessary for a traditional Southern buttercream frosting.
- Powdered Sugar: This provides the structure and sweetness that keeps the watercolor effects from running or melting off.
- Gel Food Coloring: These concentrated colors provide deep hues without thinning out the consistency of your carefully whipped frosting.
- Vanilla Extract: A splash of high-quality vanilla ensures that the cake tastes like home and brings a sense of comfort.
- Heavy Cream: A small amount helps to reach that spreadable, silky texture that moves easily under your offset spatula.
- Prepared Cake Layers: Starting with cooled, level rounds allows you to focus entirely on the artistic process of the watercolor design.
| Ingredient | Why It Matters |
|---|---|
| Gel Coloring | Keeps frosting thick and stable |
| Softened Butter | Creates a silky and smooth base |
| Powdered Sugar | Provides the necessary upright structure |
| Vanilla Extract | Adds a familiar and warm aroma |
| Heavy Cream | Adjusts the final spreading consistency |
The Simple Method
Step 1: Prepare Your Color Palette
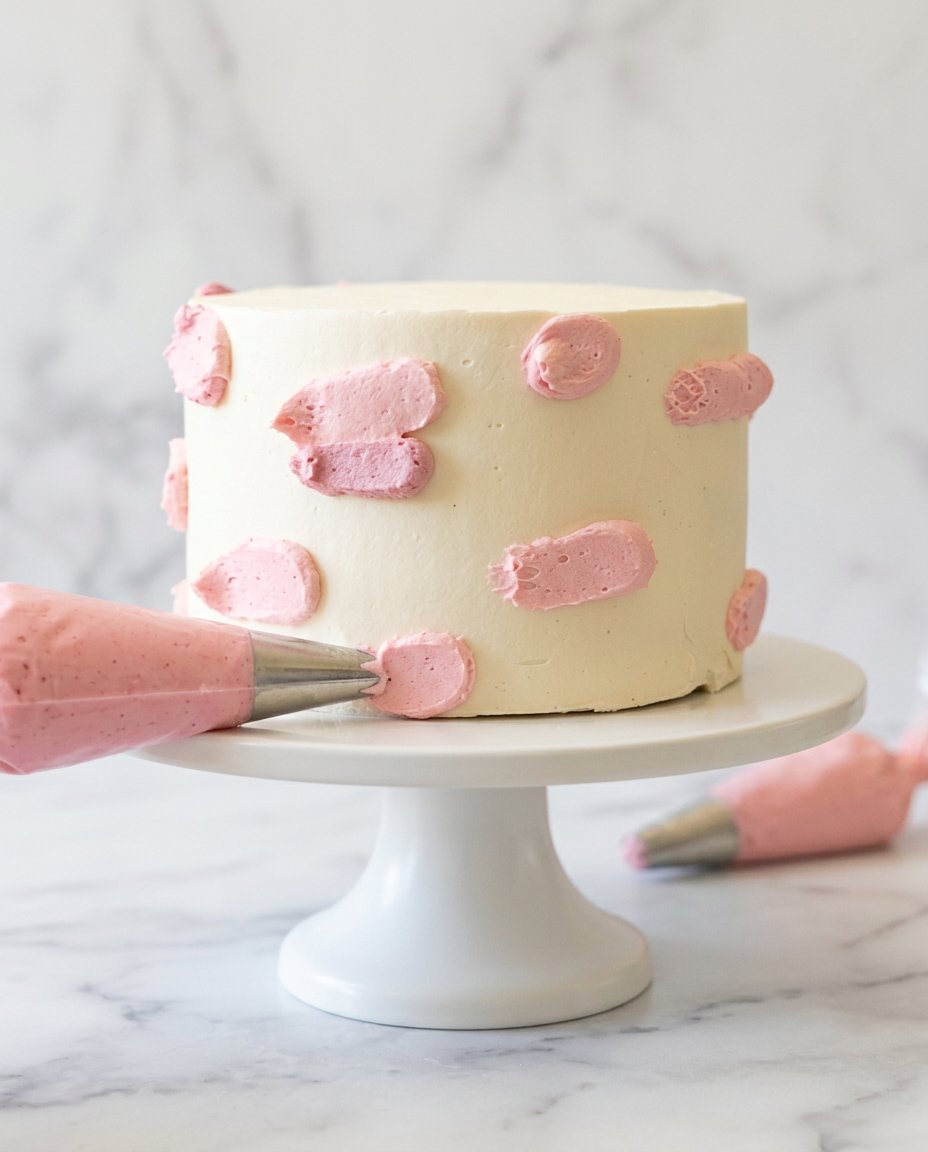
Begin by setting out three or four small bowls to hold your tinted frostings. You will want to reserve about two cups of your plain white or pale base frosting to cover the cake initially. Divide the remaining buttercream among the small bowls and add a tiny drop of gel coloring to each one. Stir slowly with a small spoon until the color is even and there are no streaks of plain white remaining. It is often helpful to choose colors that sit near each other on the color wheel so they blend harmoniously.
Step 2: Apply the Base Layer
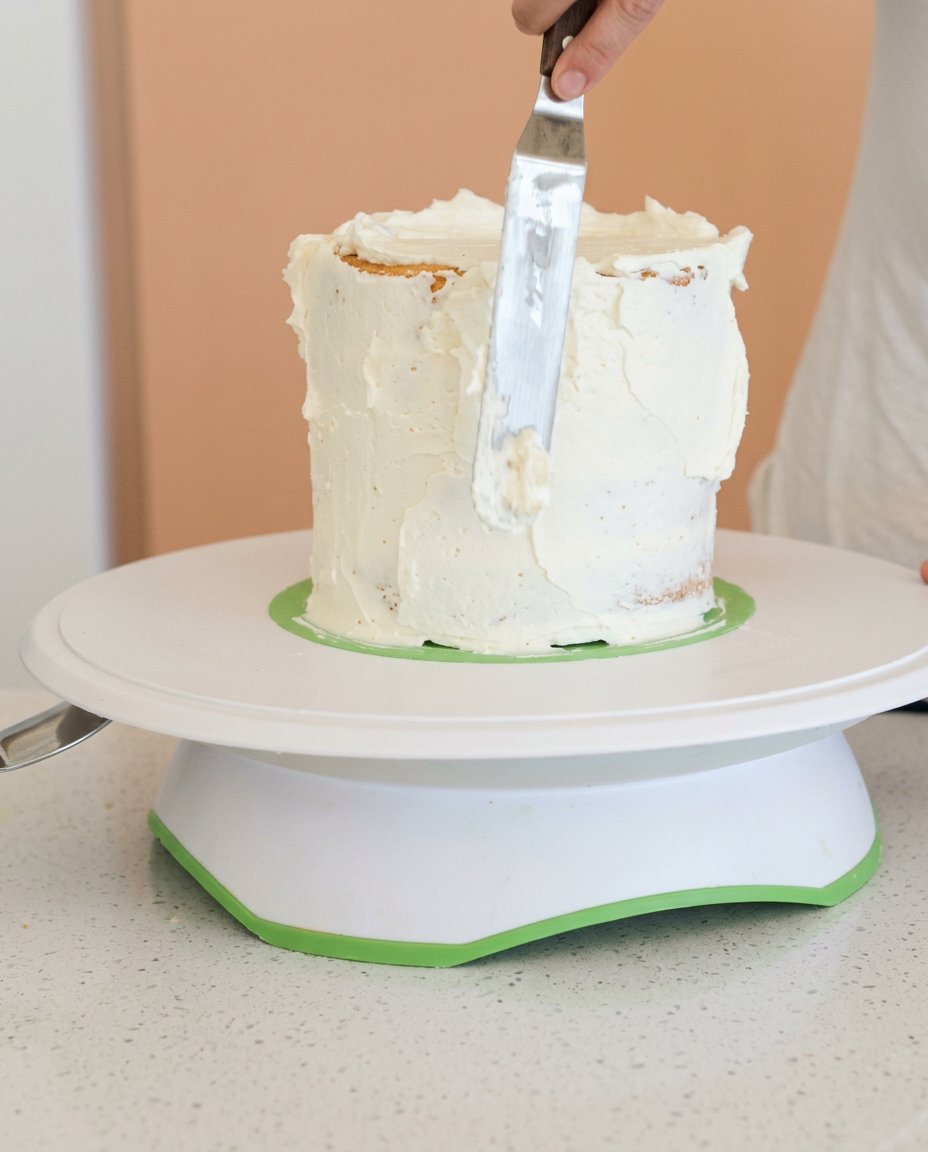
Place your first cake layer on the rotating stand and spread a thick, even layer of frosting across the top. Place the second layer on top and begin covering the entire exterior with your base color buttercream. Do not worry about making this layer flawless or perfectly smooth just yet. The goal is to create a solid foundation that hides the crumbs and provides a tacky surface for the colors. Use a light touch with your offset spatula to ensure the frosting stays where you put it without pulling at the cake.
Step 3: Mix the Secondary Colors
Check your tinted bowls to ensure the colors are exactly what you pictured in your mind. If a color seems too dark, you can add a little more of the plain white frosting to soften the tone. If it is too light, add another tiny drop of gel with a toothpick to deepen the shade. Ensure the buttercream is still soft and pliable; if it has become too stiff, a quick stir will bring it back to life. Having these colors ready to go at once prevents the base layer from crusting over before you can add the art.
Step 4: Paint the Buttercream Swatches
Using the tip of your offset spatula, pick up a small amount of your first tinted color and swipe it onto the side of the cake. These swipes can be random, like small clouds or paint strokes on a canvas. Continue this process with your other colors, spacing them out across the sides and top of the cake. You should see patches of bright color sitting on top of the plain base layer, looking a bit messy and uneven at this stage. This part of the process is where you can let your creativity lead the way without any fear of mistakes.
Step 5: Smooth Your Two-Layer Watercolor Buttercream Cake
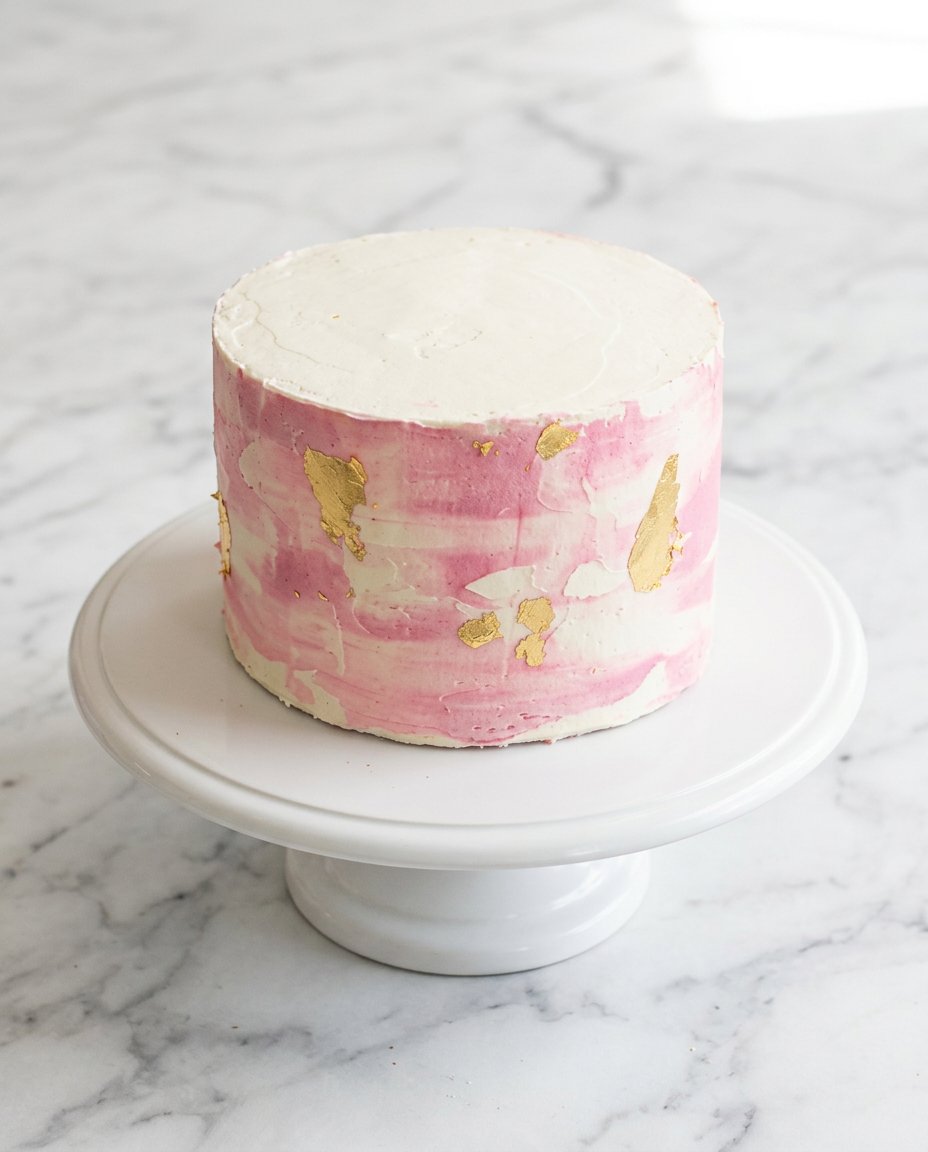
Hold your icing smoother or a straight-edged bench scraper against the side of the cake while it sits on the rotating stand. Begin to spin the stand slowly with one hand while keeping the smoother steady with the other hand. As the cake turns, the patches of color will begin to smear and blend into the base layer, creating a soft, misty look. Stop after one full rotation to see how the colors are merging and to wipe any excess frosting off your tool. It is better to go slow and do a few rotations than to press too hard and scrape all the color away.
Step 6: Refine the Color Blending
Look for any areas where the base frosting is showing through too much or where the colors have blended into a single muddy shade. You can add a few more small dots of color to these specific spots and then give the cake one more gentle spin. If the colors are blending too much, you can add a swipe of the original white frosting to brighten the design back up. This step requires a bit of patience and a gentle eye to know when the balance is exactly right. The goal is a look that feels natural and unhurried, much like a watercolor painting drying on paper.
Step 7: Chill the Finished Design
Once you are satisfied with the appearance of the sides and top, place the cake into the refrigerator for at least fifteen minutes. This chilling time allows the buttercream to set firmly, which locks the watercolor design in place and prevents it from smudging. It also makes the cake much easier to move from the rotating stand to a permanent cake plate or dome. You will notice the colors become even more beautiful as the frosting firms up and the surface takes on a matte finish. This is the moment where the cake truly becomes a centerpiece for your kitchen table.
Plain-Kitchen Notes
The temperature of your kitchen plays a huge role in how the buttercream behaves while you are smoothing it. If the room is too warm, the butter will begin to melt and the colors will run together into a single, blurry mess. If the room is too cold, the frosting may become stiff and difficult to spread without tearing the cake. I find it best to work in a cool area and move with a steady, unhurried pace.
When you are choosing your colors, think about the mood you want to create for your gathering. Soft blues and greens can feel like a quiet morning, while pinks and oranges mimic a sunset in the late afternoon. It is helpful to look at how to master watercolor buttercream techniques to see how different palettes can change the entire look. Keeping a color wheel nearby can help you avoid mixing colors that turn gray when they touch.
If you find that your buttercream is full of tiny air bubbles, use a wooden spoon to stir it by hand for several minutes. This manual stirring pushes the air out and creates the dense, creamy texture needed for a flawless watercolor finish. Stand mixers are great for whipping, but the final smoothing is often best done with the strength of your own arm. A quiet kitchen and a steady hand are your best tools for this part of the job.
Always wipe your icing smoother clean after every single rotation of the cake stand. If you leave old frosting on the tool, it will drag through the new colors and create unwanted streaks and lines. A clean tool ensures that every pass across the cake is fresh and helps the colors stay distinct rather than muddy. I keep a damp kitchen towel nearby just for this purpose so I can work quickly and cleanly.
If your base layer of frosting starts to pull away or show crumbs, you may have applied it too thinly. To fix this, simply add a bit more of the base color to the area and smooth it gently before adding your watercolor swipes. It is always better to have a little too much frosting than not enough when you are trying to create a smooth surface. This is a forgiving craft, and you can always add more to hide a small mistake.
Using a classic vanilla butter cake as your interior ensures that the structure is strong enough to handle the weight of the decorations. A flimsy cake will wobble as you try to smooth the sides, which can lead to an uneven finish. A sturdy, traditional recipe provides the backbone that allows the artistic exterior to shine. The weight of the cake helps keep the stand steady as you spin it.
Frequently Asked Questions
Can I use liquid food coloring for the watercolor effects?
Liquid coloring is generally not recommended because it can change the consistency of your buttercream and make it too runny. Gel coloring is much better because it provides intense color without adding extra moisture. If you only have liquid, use it very sparingly and be prepared to add a bit more powdered sugar if the frosting becomes soft.
How long can this watercolor cake sit out on the counter?
A buttercream cake can safely sit at room temperature for about two days, provided your kitchen is not too warm. The sugar in the frosting acts as a preservative for the butter and cream. I often think these cakes taste even better the next morning after the flavors have had time to settle together under the cake dome.
Can I freeze the cake after it has been decorated?
Yes, you can freeze the decorated cake, but you must be careful when thawing it to prevent condensation from ruining the colors. Place the cake in the freezer uncovered for an hour to harden the frosting, then wrap it tightly in plastic wrap. When you are ready to serve, thaw it slowly in the refrigerator before bringing it to room temperature.
What should I do if my colors start to look muddy?
Muddy colors usually happen when you overwork the buttercream with too many rotations of the cake stand. If this happens, stop smoothing immediately and let the cake chill in the refrigerator for a few minutes. You can then add a few fresh swipes of the original colors on top and do one final, very light pass with the smoother.
Do I really need a rotating cake stand for this recipe?
While a rotating stand makes the process much easier and more consistent, you can achieve a similar look using a simple lazy susan. If you have neither, you can manually turn the plate as you smooth, but it will be harder to get a perfectly even finish. The key is to keep the tool steady while the cake moves, rather than moving the tool around a still cake.
What is the best type of buttercream for watercolor designs?
A crusting American buttercream or a smooth Swiss Meringue buttercream both work wonderfully for this technique. The American version is a bit sturdier and easier for beginners to handle in a warm kitchen. Whichever you choose, ensure it is whipped until it is very pale so that your added colors remain true to their intended shades.
Simple Twists
You can change the flavor of your cake while keeping this beautiful decoration style exactly the same. For a richer taste, you might consider using a yellow cake chocolate frosting base and using different shades of brown and tan for a natural, earthy watercolor look. This creates a rustic feel that is perfect for an autumn afternoon or a casual family gathering.
Another lovely variation is to add a bit of texture to the watercolor effect using the back of a small spoon. Instead of smoothing the colors completely flat, you can leave small ridges and swirls that catch the light and add depth. This style feels a bit more modern but still maintains the soft, artistic spirit of the original design. It is a great way to hide any imperfections if you are still practicing your smoothing technique.
You might also try adding a few drops of metallic food paint or edible gold leaf to the blended areas. Just a few small specks of gold can make the cake look like something from a storybook without requiring much extra effort. This variation is especially nice for anniversaries or special birthdays where you want a little extra shimmer. It keeps the plain ingredients but adds a touch of celebration to the final presentation.
Slice & Serve
When it comes time to serve this cake, I like to use a sharp knife that has been dipped in hot water and wiped dry. This helps the blade glide through the chilled buttercream without dragging the colors into the cake layers. Each slice will show the beautiful contrast between the artistic exterior and the soft, tender crumb inside. It is a moment of pure Southern hospitality to offer a generous slice to anyone who happens to drop by the kitchen.
This cake is wonderful when paired with a simple pot of hot tea or a strong cup of coffee in the afternoon. The sweetness of the buttercream is balanced by the warmth of the drink, making it a perfect treat for a slow Sunday. You might even find inspiration in this classic two layer yellow cake chocolate frosting story when thinking about how to present your creation. A simple white plate is often the best choice so that the colors of the cake can be the main focus.
For a truly festive look, you can surround the base of the cake with fresh flowers or a simple linen napkin. The watercolor effect is so beautiful on its own that it does not need much extra decoration to look complete. It is the kind of cake that looks right at home under a glass dome on the kitchen counter, waiting for the next person to come along and cut a piece. Serving it with a smile and a cold glass of milk is the best way to share the comfort.
A Quiet Last Word
Baking a cake like this is about more than just the sugar and the flour; it is about the time you spend creating something beautiful for the people you love. The watercolor technique is a reminder that even in the kitchen, there is room for a bit of art and a lot of grace. I hope you find as much peace in the smoothing of the frosting as you do in the sharing of the first slice. It is a recipe that stays with you, much like a handwritten card tucked into a favorite book.
Keep this method close for those days when you want to make something special without the stress of complicated tools. Whether it is a birthday or just a quiet afternoon at home, a chocolate layer cake or a vanilla one decorated this way will always be a hit. Please share your own baking stories and pictures with us as you practice this technique. We would love to see how your colors come together at your own kitchen table.