If you have ten minutes of hands-on time and a single mixing bowl, you have everything you need to get this bubbly, golden-brown fruit dessert into the oven tonight.

This Peach Crisp is the ultimate answer to those weeknight cravings when you want something warm and comforting without the effort of a layered cake. It skips the fuss of rolling dough or chilling butter, relying instead on a simple pantry-staple topping that comes together in seconds. You get all the jammy, sweet goodness of summer fruit tucked under a crisp, buttery oat crust that feels like a warm hug in a bowl.
Why This Peach Crisp is a Keeper
Prep: 15 min · Serves: 6 · Difficulty: Easy
- One bowl makes cleanup remarkably fast.
- Pantry staples transform into golden topping.
- Fresh fruit provides natural seasonal sweetness.
- No fancy electric mixer is required.
- Warm cinnamon scent fills the kitchen.
This is the bake that disappears before the coffee pot is empty. When you are looking for a fruit-forward treat that feels more approachable than a peach cake, this recipe delivers every single time.
Get The Full Cake Recipe
Print
Peach Crisp
- Total Time: 45 mins
- Yield: 6 servings
Description
This easy-to-make Peach Crisp features a bubbly, jammy fruit filling topped with a buttery, cinnamon-spiced oat crust. It is a quick and comforting dessert that comes together in one bowl using simple pantry staples, perfect for satisfying sweet cravings anytime.
Ingredients
- 6 cups fresh peaches, sliced
- 1/2 cup granulated sugar
- 1 tablespoon cornstarch
- 1/2 teaspoon ground cinnamon
- 1 teaspoon fresh lemon juice
- 1 teaspoon pure vanilla extract
- 1 cup old-fashioned rolled oats
- 1 cup all-purpose flour
- 1 cup light brown sugar
- 1/2 cup unsalted butter, cubed and softened
- 1/4 teaspoon sea salt
Instructions
- Preheat and prep. Preheat your oven to 375°F and lightly grease a 1.5 to 2-quart baking dish.
- Mix dry topping. Combine brown sugar, flour, ground cinnamon, oats, and sea salt in a large bowl until uniform.
- Incorporate the butter. Rub the softened butter into the dry mixture using your fingertips until it resembles coarse crumbs.
- Season the peaches. Toss the sliced peaches with granulated sugar, cornstarch, salt, and cinnamon in a separate bowl.
- Add flavorings. Stir in the lemon juice and vanilla extract until the fruit is well coated.
- Assemble the crisp. Transfer the peach mixture to the prepared dish and sprinkle the oat topping evenly over the surface.
- Bake the dessert. Place in the oven for 30 minutes until the fruit is bubbling and the topping is golden brown.
- Cool before serving. Allow the crisp to set on a wire rack for at least 20 minutes to thicken the juices.
Notes
- Ensure your peaches are ripe but firm so they maintain their texture while baking.
- For a nuttier flavor, stir half a cup of chopped walnuts or pecans into the oat topping before baking.
- Do not press the topping down once added to the fruit, as loose layers crisp up more effectively.
- If you find the topping browning too quickly, tent the dish loosely with aluminum foil for the final ten minutes.
- Serving this warm with a scoop of vanilla ice cream helps balance the tartness of the stone fruit.
- Prep Time: 15 mins
- Cook Time: 30 mins
- Category: Dessert
- Method: Baking
- Cuisine: American
Pantry Lineup
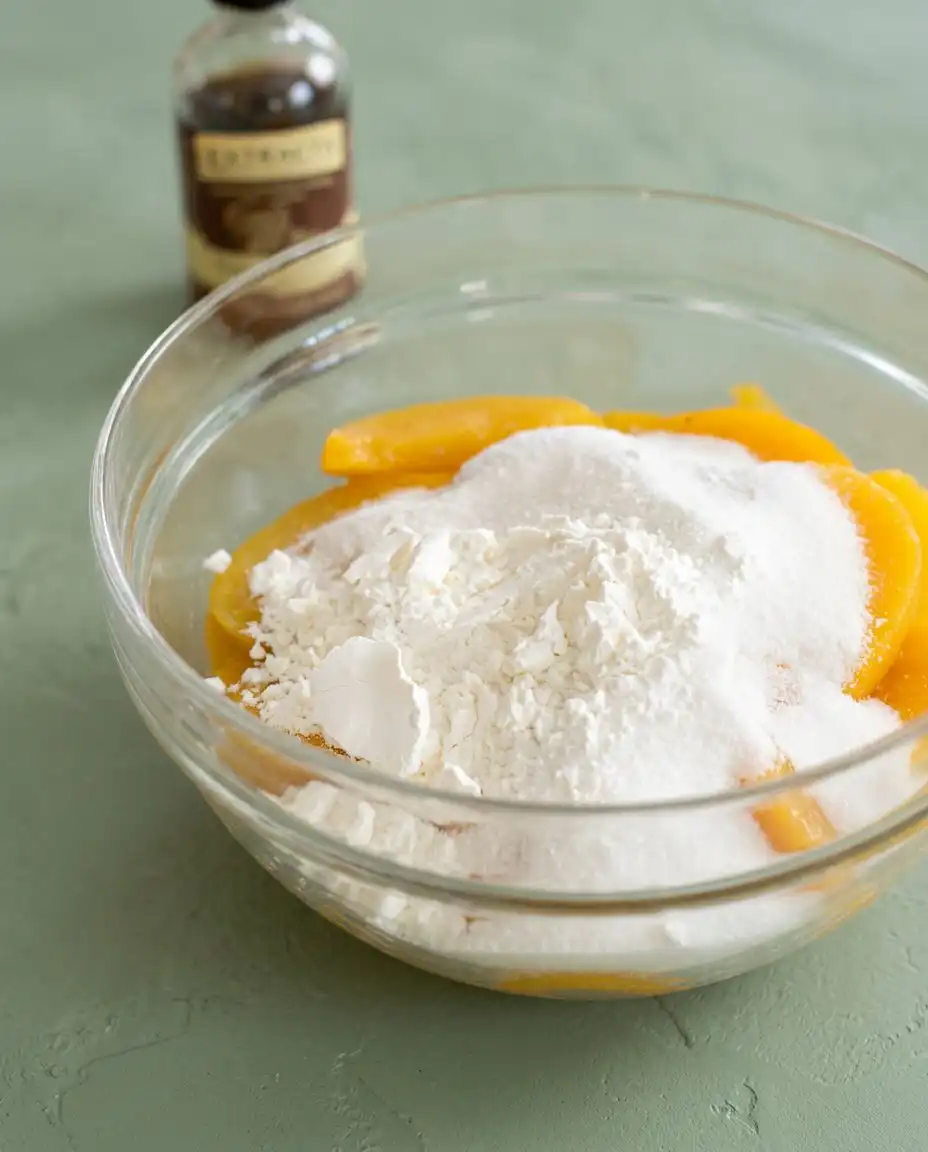
Gathering your supplies is the most time-consuming part of this process because the actual assembly happens in a flash. You likely already have the flour, sugars, and oats tucked away in your cupboards, waiting for a reason to be used. These components work together to create a contrast between the soft, yielding fruit and the textured, crunch-heavy topping that defines a classic dessert.
- Sliced Peaches: Use fresh, ripe fruit for the best texture and natural juice release during the baking process.
- Old-Fashioned Rolled Oats: These provide the essential structure and hearty crunch that makes the topping stand out.
- Unsalted Butter: Using room-temperature cubes allows you to incorporate the fat into the dry goods by hand easily.
- Light Brown Sugar: This adds a deep molasses note and helps the topping caramelize into a beautiful golden hue.
- Cornstarch: A small amount ensures the fruit juices thicken into a luscious sauce rather than staying watery.
- Pure Vanilla Extract: A splash of high-quality vanilla brings out the floral notes inherent in stone fruits.
- Fresh Lemon Juice: The acidity balances the sugar and prevents the peaches from tasting overly cloying.
| Ingredient | Why It Matters |
|---|---|
| Rolled Oats | Adds texture and chew to the crust |
| Cornstarch | Thickens the bubbling fruit juices |
| Brown Sugar | Creates a rich caramel flavor profile |
| Lemon Juice | Brightens the sweetness of the fruit |
| Cinnamon | Provides a warm and cozy aroma |
The Easy Method
Step 1: Prep Your Oven and Pan
Begin by preheating your oven to 375°F to ensure the heat is consistent the moment your dish slides onto the middle rack. Take a bit of butter or a light coating of spray and grease a 1.5 to 2-quart baking dish, focusing on the corners where fruit sugars like to stick. A standard 8×8 inch square pan works beautifully here, providing enough surface area for the topping to crisp up evenly.
Step 2: Combine the Dry Topping Base
In a large mixing bowl, whisk together your brown sugar, all-purpose flour, ground cinnamon, oats, and sea salt until the color is uniform. You want to make sure there are no large clumps of brown sugar remaining, as these can create sticky spots in the finished crust. The scent of the cinnamon hitting the sugar usually signals that the best part of the process has officially begun.
Step 3: Work in the Room Temperature Butter
Scatter the cubed, room-temperature butter across the top of your dry oat mixture and begin rubbing it in with your fingertips. You are looking for a texture that resembles coarse crumbs or wet sand, where the butter is fully coated but still holds small, distinct pieces. This manual process ensures the topping remains flaky and light rather than turning into a dense, oily paste.
Step 4: Slice and Season the Fruit
Transition to a medium mixing bowl to prepare the star of the show by adding your sliced peaches and granulated sugar. Sprinkle the cornstarch, salt, and extra cinnamon over the fruit, ensuring every slice gets a light coating of the thickening agents. The fruit should start to look slightly glossy as the sugar begins to draw out the natural juices from the peach skins.
Step 5: Add the Bright Finishing Touches
Pour the fresh lemon juice and the teaspoon of pure vanilla extract directly over the peach mixture and give it one final, gentle toss. The lemon juice acts as a flavor enhancer, cutting through the heavy sweetness and adding a necessary brightness to the profile. You will notice the aroma shift from purely sweet to a complex, floral scent that indicates the filling is ready.
Step 6: Layering Your Peach Crisp Filling and Topping
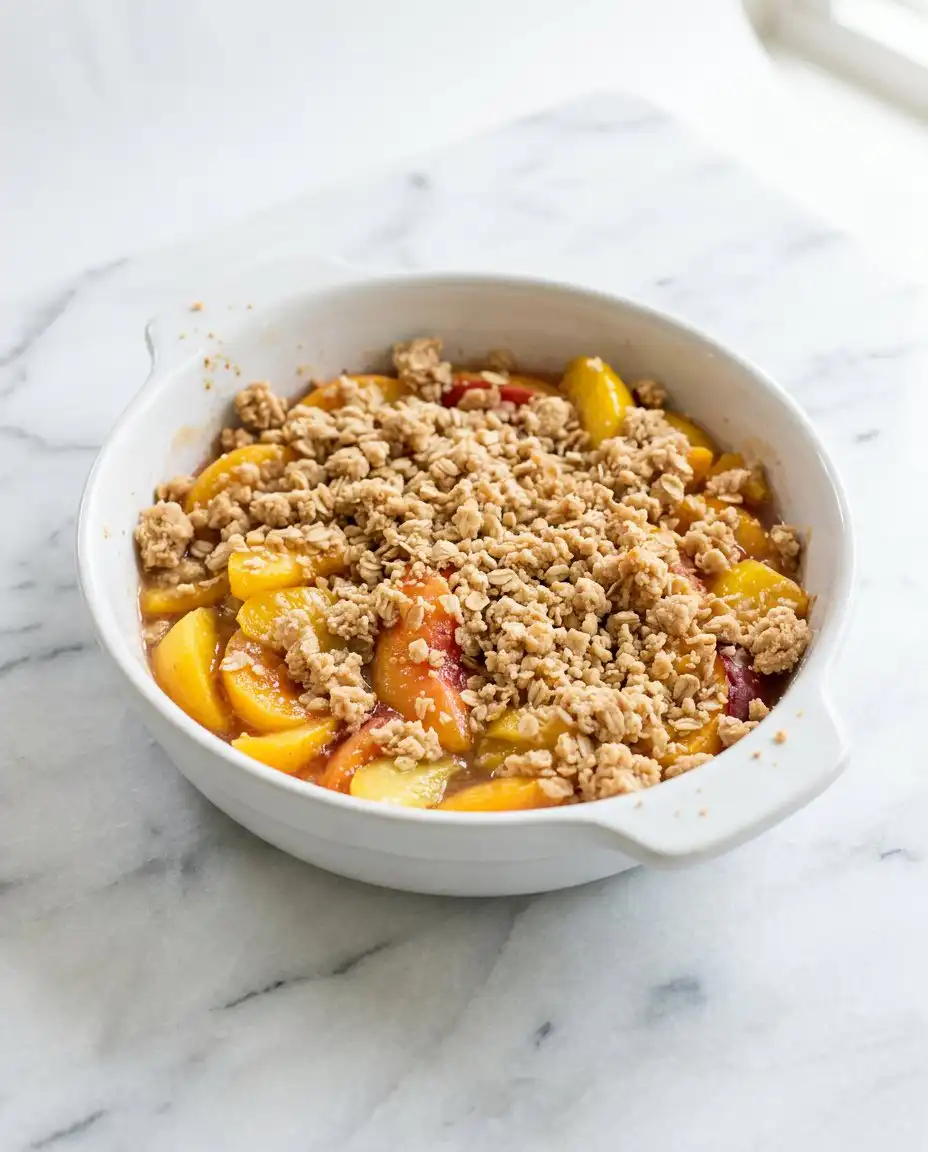
Transfer the seasoned peach mixture into your prepared baking dish, spreading it out so the slices lay relatively flat and even. Take your oat topping and sprinkle it generously over the fruit, making sure to cover the entire surface from edge to edge. Do not press the topping down; leaving it loose allows the heat to circulate, creating those signature crunchy nooks and crannies.
Step 7: Bake to Golden Perfection
Place the dish in the oven and bake for approximately 30 minutes, keeping an eye on the edges for a vigorous bubble. The topping should transform into a deep, toasted golden brown while the fruit juices thicken into a syrupy consistency. If the topping browns too quickly, you can loosely tent it with foil, though the oats usually handle the heat quite well.
Step 8: The Essential Cooling Period
Remove the dish from the oven and set it on a wire rack or a heat-safe surface to cool for at least 20 minutes before serving. This pause is vital because it allows the cornstarch to fully set the fruit juices, preventing the dessert from being soupy when scooped. The wait is the hardest part, but the reward is a perfectly balanced bite of warm fruit and crunchy topping.
Easy-Baker Notes
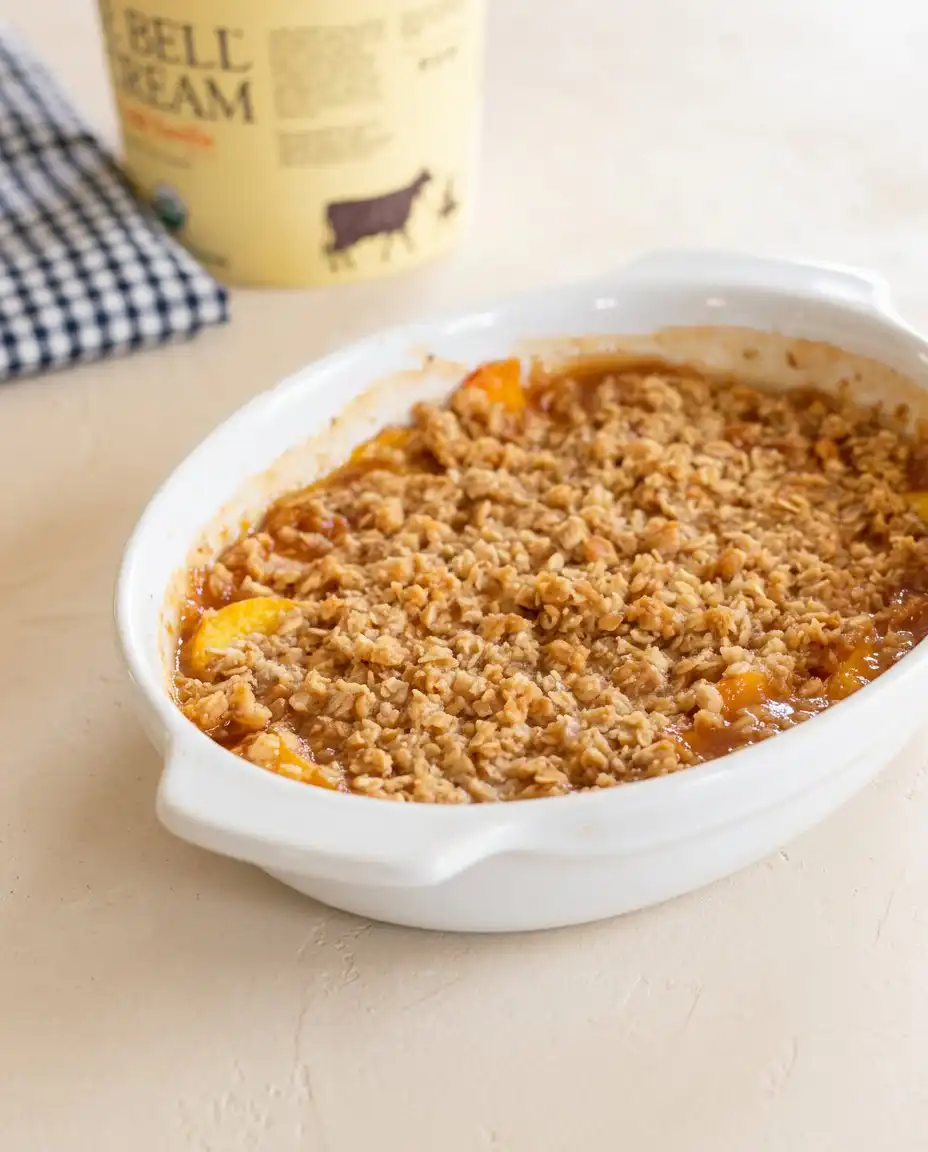
When choosing your fruit, look for peaches that give slightly when pressed but are not mushy, as these will hold their shape best during the high-heat bake. If your peaches are particularly juicy, you might consider adding an extra teaspoon of cornstarch to ensure the sauce reaches the desired thickness. Learning how to slice peaches efficiently can save you several minutes during the prep stage of this recipe.
Temperature is everything when it comes to the topping, so ensure your butter is soft enough to yield to your touch but not oily or melted. If the butter is too cold, you will struggle to incorporate it into the oats, resulting in a dry and powdery finish. Conversely, if it is too warm, the topping may spread and lose its distinct, crumbly texture that makes this dish so special.
If your topping stays pale and looks dry after the full baking time, it is usually because the butter was not worked into the flour and oats thoroughly enough. To fix this next time, ensure you see no white streaks of flour remaining in the bowl before you sprinkle the mixture over the peaches. For this batch, a quick drizzle of melted butter over the pale spots followed by three minutes under the broiler can often save the day.
For those who prefer a more traditional crust, comparing this texture to an old fashioned oven baked peach cobbler can help you decide which style fits your current mood. Both are wonderful, but the crisp offers a unique crunch that pairs beautifully with the softness of the baked fruit. Always keep your oats stored in a cool, dry place to prevent them from tasting stale in your finished bakes.
Do not peel the peaches unless you truly dislike the texture of the skins, as they add beautiful color and contain extra nutrients. The skins soften significantly in the oven and help keep the slices from disintegrating into a purée during the thirty-minute bake. If you find the skins are too tough, a quick blanch in boiling water followed by an ice bath will make them slip right off.
Frequently Asked Questions
Can I use canned peaches for this recipe?
Yes, you can use canned peaches if you drain them thoroughly and reduce the added sugar slightly to account for the syrup. Canned fruit is often softer, so the final texture will be more tender than when using fresh slices. Ensure you pat them dry with a paper towel to prevent the filling from becoming too watery during the bake.
How should I store leftovers?
Leftovers should be covered tightly and stored in the refrigerator for up to four days to maintain freshness. To regain the original crunch of the topping, reheat individual portions in the oven or a toaster oven rather than the microwave. The fruit flavor actually deepens after a night in the fridge, making it a great snack the next morning.
Is it possible to make this recipe gluten-free?
You can easily make this gluten-free by swapping the all-purpose flour for a one-to-one gluten-free flour blend and ensuring your oats are certified gluten-free. The texture remains remarkably similar to the original version because the oats provide most of the structural integrity for the topping. The cornstarch used in the filling is naturally gluten-free, so no change is needed there.
Why is my topping not crunchy?
A soggy topping usually happens if the fruit was exceptionally juicy or if the dish was covered while cooling, trapping steam. Make sure the oven is fully preheated so the topping begins to crisp immediately upon entering the heat. Using old-fashioned oats instead of quick oats also provides a more substantial crunch that resists softening.
Can I freeze a fruit crisp?
You can freeze the baked crisp for up to three months if it is wrapped securely in plastic wrap and aluminum foil. To serve, thaw it in the refrigerator overnight and then warm it in a 350°F oven until the fruit is bubbling again. The topping may lose some of its initial crispness, but a few extra minutes in the oven can help revive the texture.
What kind of oats work best for the topping?
Old-fashioned rolled oats are the best choice because they retain their shape and provide a hearty, chewy texture that contrasts with the fruit. Quick-cooking oats are thinner and tend to disappear into the flour mixture, resulting in a more powdery and less textured topping. Avoid using steel-cut oats, as they will remain too hard and gritty after the short baking time.
Simple Swaps
If you find yourself short on fresh produce, you can easily use frozen peach slices that have been thawed and drained well to prevent excess moisture. This adjustment makes the dessert accessible all year round, even when the local market shelves are empty of stone fruits. You might also enjoy experimenting with a peach dump cake if you are looking for an even more hands-off approach to fruit desserts.
Adding a half cup of chopped pecans or walnuts to the oat mixture provides an extra layer of earthiness and a satisfying snap to every bite. The nuts toast beautifully alongside the oats, releasing their natural oils and enhancing the overall aroma of the dish as it bakes. You can also swap the ground cinnamon for ginger or nutmeg if you want to lean into a more spiced, autumnal flavor profile.
For a different fruit experience altogether, try replacing half of the peaches with fresh blueberries or raspberries for a stunning color contrast and a tart pop. The berries release their juices quickly, creating a multi-colored sauce that looks beautiful when served in clear glass bowls. This versatility is why fruit crisps are a staple in my kitchen regardless of the season or the occasion.
Slice & Serve
There is nothing quite like a warm scoop of fruit crisp served alongside a generous dollop of cold vanilla bean ice cream. The way the frozen cream melts into the warm cinnamon sauce creates a decadent experience that feels far more complex than the ten minutes of prep would suggest. If you are serving this for a morning treat, a spoonful of Greek yogurt provides a tangy balance to the sweet peaches.
For a more communal experience, place the baking dish in the center of the table and let everyone help themselves to a portion while it is still warm. This casual style of serving fits the relaxed nature of the recipe and encourages second helpings. If you are looking for other effortless ways to serve fruit to a crowd, consider the slow cooker peach cobbler for your next gathering.
A drizzle of salted caramel sauce or a light dusting of powdered sugar can also add a touch of elegance to the presentation without much effort. The salt in the caramel highlights the sweetness of the peaches, while the sugar adds a finished look to the rustic topping. Whether it is a Tuesday night or a Sunday brunch, this dish always feels like the right choice for a simple yet spectacular ending.
Bake It Soon
Baking doesn’t have to be a complicated production that leaves you with a sink full of dishes and a headache. This recipe proves that a few simple pantry staples and some fresh fruit can create a dessert that is every bit as satisfying as a complex cake. I hope you find as much joy in the bubbling peach juices and the golden oat topping as my family does every time this hits the table.
If you find yourself craving more fruit-filled inspiration, you might enjoy trying the paula deen peach cobbler for a slightly different take on southern comfort. It is wonderful to have a rotation of recipes that fit into your busy life without requiring a trip to a specialty grocery store. Please share your results with me and let me know how your bake turned out.
Follow along for more simple baking ideas on our social channels: