You don’t need a fancy springform pan or a culinary degree to turn a handful of fresh peaches into a golden, caramelized masterpiece that looks like it came from a professional bakery.

This Classic Peach Upside Down Cake is the answer to that Tuesday night craving for something warm, buttery, and sweet. By baking the fruit right into a pool of brown sugar and butter, you create a built-in topping that shines once you flip the pan. It is a reliable recipe that relies on pantry staples and seasonal fruit to deliver a dessert that feels special without the stress. Every slice offers a tender crumb that balances the juicy sweetness of the fruit perfectly.
What Makes This Easy Classic Peach Upside Down Cake Shine
Prep: 20 min · Serves: 9 · Difficulty: Easy
- One square pan handles everything easily.
- Pantry staples make shopping quite minimal.
- Fresh peaches create a naturally sweet glaze.
- No heavy electric mixers required today.
- Standard loaf pan logic applies here.
This recipe makes baking feel doable even during your busiest work weeks. You can find more dependable sweets in my Classic Favorites collection for your next kitchen session.
Get The Full Cake Recipe
Print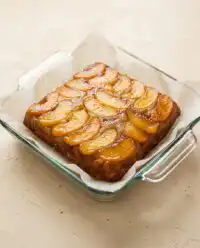
Classic Peach Upside Down Cake
- Total Time: 60 mins
- Yield: 9 servings
Description
This classic peach upside down cake features tender, golden sponge topped with caramelized fresh peaches. It is a straightforward, reliable dessert perfect for showcasing seasonal fruit with minimal effort.
Ingredients
- Fresh peaches
- Light brown sugar
- Ground nutmeg
- Unsalted butter
- All-purpose flour
- White sugar
- Egg
- Whole milk
- Baking powder
Instructions
- Prepare caramel base. Preheat your oven to 375 degrees F and melt butter in a square pan, then sprinkle evenly with brown sugar and nutmeg.
- Arrange the peaches. Place peach halves cut-side down into the sugar mixture, nesting them closely together.
- Cream butter components. Beat the softened butter and white sugar in a bowl until fluffy, then mix in the egg until combined.
- Combine the batter. Gradually stir the dry ingredients into the butter mixture, alternating with milk, until a smooth batter forms.
- Spread the batter. Gently pour and spread the batter over the arranged peaches, smoothing the top with a spatula.
- Bake the cake. Bake for 35 to 40 minutes until a toothpick inserted into the center comes out clean.
- Invert the cake. Cool the pan for five minutes, place a platter on top, and carefully flip the cake to serve.
Notes
- Ensure the butter and eggs are at room temperature to prevent the batter from curdling.
- Peel the peaches before slicing to achieve a uniform, melt-in-the-mouth texture in every bite.
- Always test your baking powder for freshness in hot water to ensure the cake rises properly.
- Work from the edges inward when spreading the batter to keep the fruit arrangement undisturbed.
- Prep Time: 20 mins
- Cook Time: 40 mins
- Category: Dessert
- Method: Baking
- Cuisine: American
Pantry Lineup
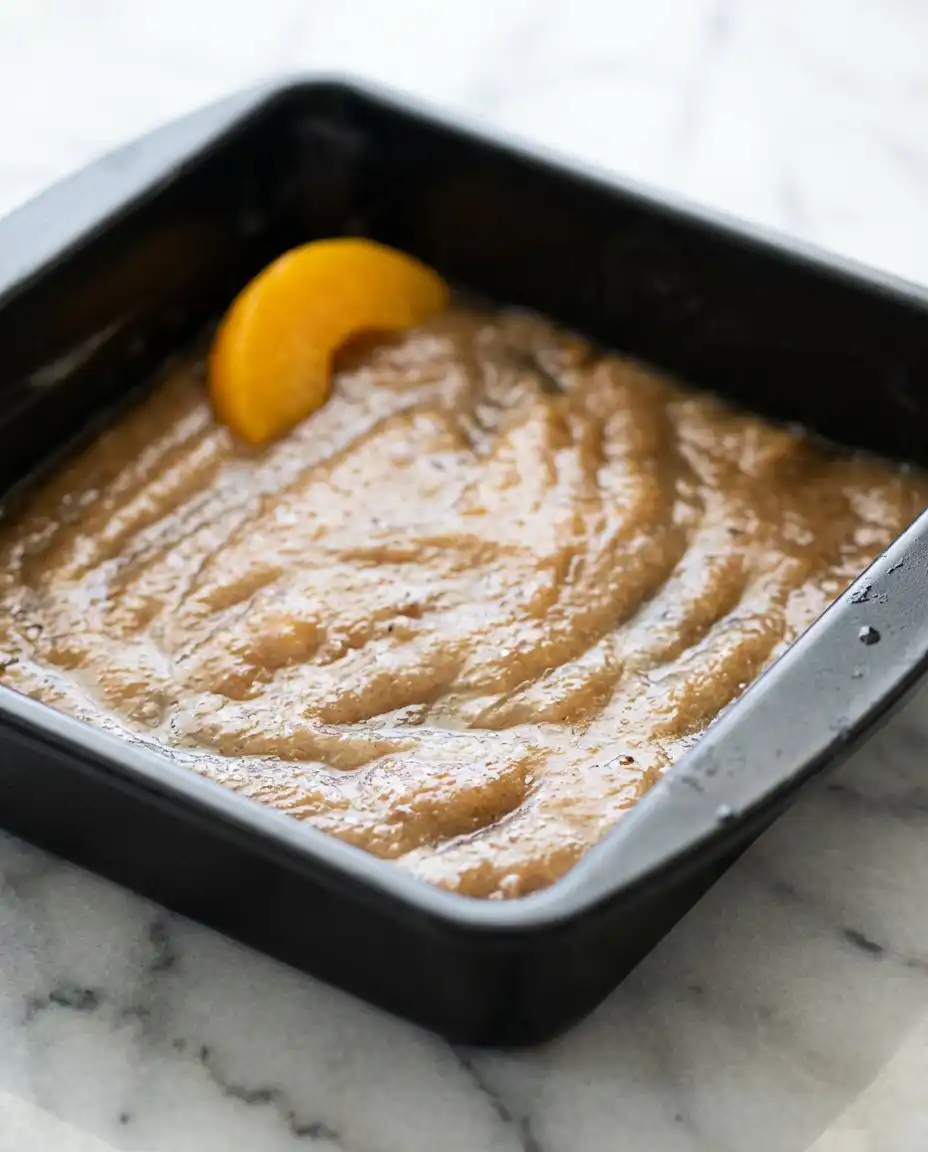
Finding the right balance for a Classic Peach Upside Down Cake starts with choosing fruit that is ripe but still firm enough to hold its shape under heat. You want peaches that smell like summer but do not turn into mush the moment they touch a warm pan. The batter uses standard kitchen basics to create a sturdy yet soft sponge that absorbs just enough of the fruit juice without becoming soggy.
- Fresh Peaches: Use fruit that gives slightly when pressed to ensure a deep, honey-like flavor after baking.
- Light Brown Sugar: This provides the molasses depth needed for the caramel base without overpowering the delicate fruit.
- Ground Nutmeg: A small amount adds warmth and complexity that makes the peaches taste more like a traditional cobbler.
- Unsalted Butter: High-quality fat ensures the sponge remains tender and the caramel topping stays smooth and rich.
- All-Purpose Flour: This provides the structural foundation that supports the heavy fruit layer during the final flip.
- Whole Milk: Adding fat through milk creates a creamy batter consistency that bakes into a velvety crumb.
| Ingredient | Why It Matters |
|---|---|
| Brown Sugar | Creates the sticky caramel coating |
| Nutmeg | Enhances the natural peach aroma |
| Baking Powder | Gives the sponge its light lift |
| Fresh Peaches | Provides the juicy topping layer |
From Bowl to Oven
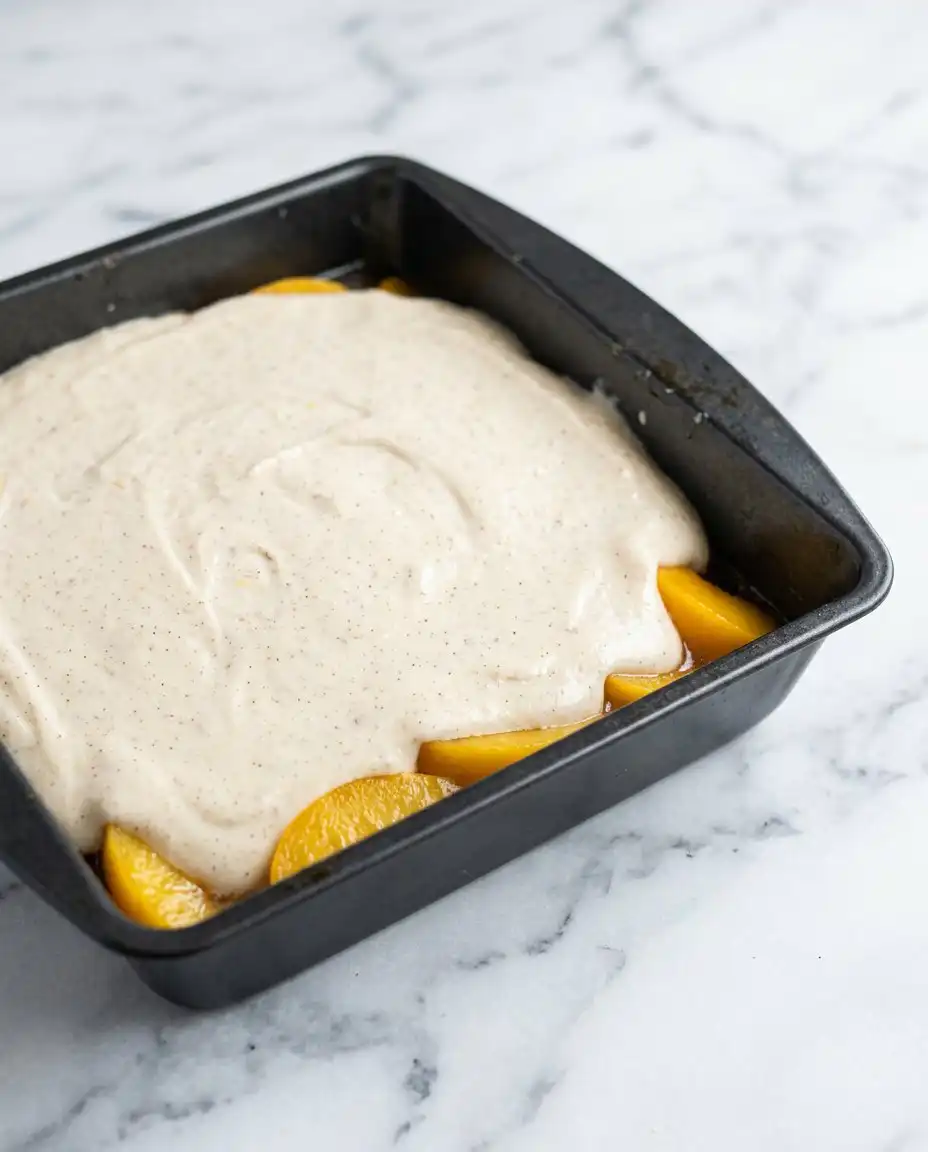
Step 1: Preparing the Caramel Base
Begin by preheating your oven to 375 degrees F while you melt the first portion of butter directly in your square pan. Once the butter is liquid and coats the bottom, sprinkle the brown sugar and nutmeg evenly over the surface until it looks like wet sand. This layer is what transforms into a glossy glaze as the cake bakes and the fruit juices mingle with the melting sugar.
Step 2: Arranging the Peaches
Place your peach halves into the sugar mixture with the cut sides facing down to ensure they sit flat against the bottom of the pan. You want them nestled closely together so that every slice of the finished cake gets a generous portion of fruit. The peaches should look like a golden mosaic once they are all tucked into their buttery bed.
Step 3: Creaming the Batter Components
In a large mixing bowl, beat together the softened butter and white sugar until the mixture appears pale and slightly fluffy. This process incorporates air that helps the sponge stay light rather than dense and heavy. Add the egg and continue beating until the mixture is cohesive and smells sweet and buttery.
Step 4: Spreading the Classic Peach Upside Down Cake Batter
Stir the dry ingredients together in a separate small bowl before adding them to your butter mixture in three parts, alternating with the milk. This technique prevents the flour from over-developing, which keeps the cake soft. Gently spread the thick batter over the arranged peaches, being careful not to disturb their placement as you smooth the top with a spatula.
Step 5: Baking and Testing for Doneness
Slide the pan into the center of your oven and bake for about 35 to 40 minutes or until the top is a deep golden brown. You can check for doneness by inserting a toothpick into the center of the sponge; it should come out clean or with a few moist crumbs. The kitchen will begin to smell like warm cinnamon and caramelized sugar as the cake nears completion.
Step 6: The Final Flip
Remove the pan from the oven and let it sit on a wire rack for exactly five minutes to allow the caramel to set slightly. Place a large serving platter over the top of the pan and, using oven mitts, quickly and confidently invert the cake. Lift the pan away slowly to reveal the glistening peaches and the warm syrup dripping down the sides of the golden sponge.
Easy-Baker Notes
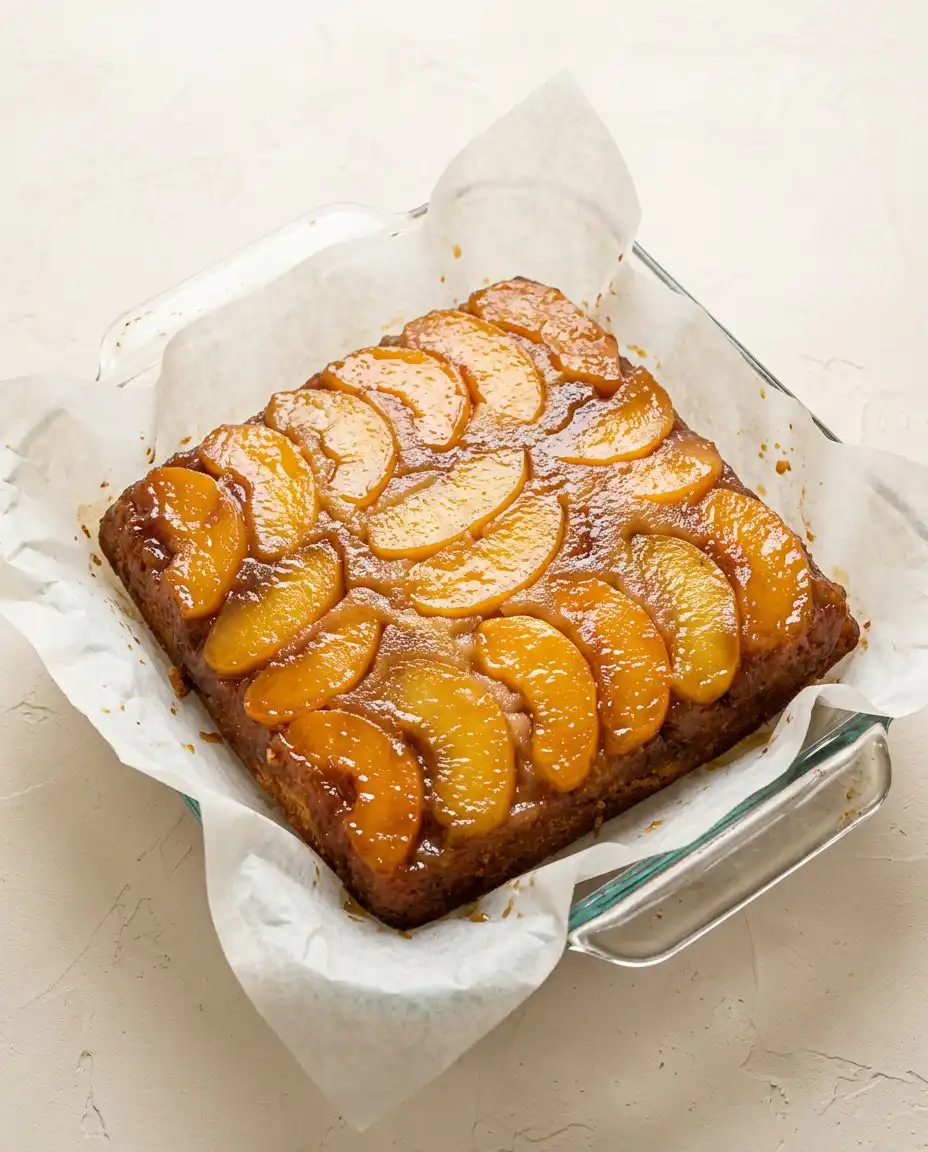
If your peaches stick to the pan during the flip, it often means the cake sat too long before being inverted or the sugar did not melt fully. To fix this, you can gently pry the fruit out with a small knife and tuck it back onto the cake while it is still warm; the glaze will act as a natural glue.
Always peel your peaches before slicing to ensure the topping has a smooth, melt-in-your-mouth texture rather than a chewy skin. You can learn more about how to peel peaches using a quick blanching method if you are working with a large batch of fruit.
For the most reliable results, ensure your butter and eggs are at room temperature before you start mixing the batter. This helps the emulsion stay smooth and prevents the batter from curdling when the liquids are added.
Check your baking powder for freshness by dropping a teaspoon into a small cup of hot water to see if it bubbles vigorously. Using old leavening agents is a common reason for a flat or dense cake that fails to rise around the fruit.
For more advice on working with seasonal produce, check out my guide on the Fruit & Garden section of the blog. This will help you master the art of fruit-based desserts without the stress of complicated techniques.
When spreading the batter, start from the edges and move toward the center to ensure the peaches stay in their original pattern. This prevents the fruit from sliding toward the middle of the pan during the baking process.
Frequently Asked Questions
Can I use frozen peaches for this recipe?
Yes, you can use frozen peaches if you thaw them completely and pat them dry with a paper towel first. Excess moisture from frozen fruit can make the caramel base too watery, which might prevent the cake from setting correctly. Aim for slices that are roughly the same thickness so they bake evenly under the batter.
How do I store the leftovers?
This cake is best served warm, but you can store leftovers in an airtight container at room temperature for up to two days. If your kitchen is particularly warm, it is better to keep the cake in the refrigerator to prevent the fruit from spoiling. Simply warm each slice in the microwave for ten seconds before serving to bring back that fresh-baked texture.
Why is my cake batter so thick?
The batter for an upside-down cake is naturally thicker than a standard sponge because it needs to support the weight of the fruit. If you find it difficult to spread, avoid adding more liquid, as this could lead to a soggy bottom once the fruit juices release. Use a wet spatula to gently nudge the batter to the corners of the pan.
Can I bake this in a round cake pan instead?
You can definitely use a 9-inch round cake pan if you do not have an 8-inch square one available. The baking time may vary slightly, so start checking for doneness a few minutes earlier than the recipe suggests. The circular arrangement of peaches can look quite elegant when inverted onto a round plate.
What if I do not have nutmeg?
Ground cinnamon or ginger are excellent substitutes that provide a similar warmth to the dish. Cinnamon will give the cake a more traditional ‘apple pie’ vibe, while ginger adds a subtle spicy kick that cuts through the sweetness of the peaches. You can also use a dash of vanilla extract in the batter if you prefer a cleaner flavor.
Can this cake be frozen for later?
While you can freeze this cake, the texture of the peaches may become slightly softer upon thawing. Wrap the cooled cake tightly in plastic wrap and then foil before placing it in the freezer for up to one month. Thaw it overnight in the refrigerator and warm it slightly before serving to the family.
Simple Swaps
You can easily swap the peaches for ripe plums or nectarines if that is what you have sitting on your counter. These stone fruits behave similarly in the oven and provide a slightly more tart flavor profile that pairs beautifully with the sweet nutmeg sponge.
If you find yourself in the middle of winter, you can use canned peach halves that have been thoroughly drained and patted dry. While the flavor is less intense than fresh fruit, it still makes for a wonderful Tuesday night treat. You can find more Cute & Quick Bakes here for those moments when you need a fast dessert solution.
Add a handful of fresh raspberries or blueberries between the peach halves for a pop of color and extra juice. The berries will burst during the baking process and create beautiful streaks of red or purple throughout the caramelized topping.
Slice & Serve
This cake is truly at its best when served warm, perhaps with a generous dollop of unsweetened whipped cream or a scoop of vanilla bean ice cream. The cold cream begins to melt into the warm caramel glaze, creating a sauce that is hard to resist. It makes a beautiful centerpiece for a weekend brunch or a casual dinner party with friends.
For a more formal presentation, you can garnish the platter with fresh mint leaves or a few extra slices of fresh peach. The greenery provides a lovely contrast to the golden hues of the caramelized fruit and the buttery sponge. If you are planning a larger celebration, look through my Party Cakes & Events category for more ideas on how to feed a crowd with ease.
A strong cup of black coffee or a light Earl Grey tea provides the perfect bitter balance to the sugary topping. Slicing the cake into thick squares ensures that everyone gets a substantial piece of the fruit and the soft crumb underneath.
The Wrap-Up
Baking doesn’t have to be a complicated production involving multiple bowls and hours of work. This recipe proves that you can create something truly beautiful and delicious using the simplest tools in your kitchen. Whether you are baking this on a quiet Tuesday or as a weekend treat, it is a cake that never fails to bring a little bit of sunshine to the table.
If you find yourself craving something a bit more decadent after mastering the fruit, try my Rich Chocolate Treats for a different flavor profile. I hope you find as much joy in the ‘flip’ as I do every time I make this. Please share your baking wins with me and let me know how your family enjoyed this seasonal classic.