A single, quiet splash of sweet almond extract transforms this classic vanilla layer cake, making the very first bite bloom with an unexpected, bakery-style depth.

Baking a Classic Vanilla Layer Cake from scratch should feel like a celebration, not a stressful science experiment. This version relies on a beautiful balance of fragrant vanilla bean paste and a whisper of almond extract to create a crumb that is wonderfully tender and aromatic. By layering this delicate sponge with a rich, silky homemade vanilla custard and smooth white chocolate buttercream, we build a spectacular dessert that feels both nostalgic and modern. It is the perfect centerpiece for birthdays, weekend projects, or any moment that calls for a sweet, memorable slice.
Why This Classic Vanilla Layer Cake Gets the Wow
Prep: 45 min · Serves: 12 · Difficulty: Medium
- Fragrant vanilla bean paste creates beautiful speckled layers.
- Sweet almond extract adds a secret bakery aroma.
- Silky custard filling brings a rich, creamy contrast.
- Dreamy white chocolate buttercream offers an elegant finish.
- Room temperature ingredients ensure a perfectly even rise.
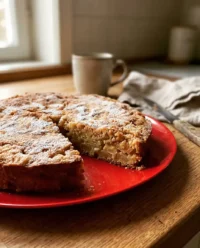
If you enjoy a simple yet elegant classic vanilla butter cake, this layered upgrade will blow you away with its rich custard and glossy finish.
This beautiful dessert will become your new favorite recipe for every happy occasion.
Get The Full Cake Recipe
Print
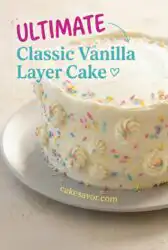
Classic Vanilla Layer Cake
- Total Time: 2 hours 30 mins
- Yield: 12 servings
- Diet: Vegetarian
Description
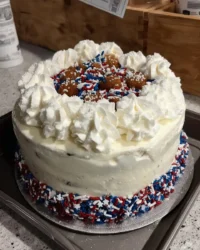
This elegant three-layer cake features a tender vanilla bean sponge infused with almond extract. It is filled with a silky homemade custard and encased in a rich, velvety white chocolate buttercream for a truly sophisticated dessert.
Ingredients
- All-purpose flour
- Baking powder
- Fine sea salt
- Unsalted butter, room temperature
- Granulated sugar
- Vanilla bean paste
- Almond extract
- Egg whites, room temperature
- Whole milk
- Vegetable oil
- Heavy cream
- Egg yolks
- Cornstarch
- Sweetened condensed milk
- White chocolate, melted
Instructions
- Prepare the pans. Preheat oven to 350°F (170°C), grease three nine-inch pans, and line them with parchment paper.
- Mix dry ingredients. Whisk together the flour, baking powder, and salt in a large bowl to ensure proper aeration.
- Cream butter and sugar. Beat butter and sugar on medium-high speed until the mixture is pale, fluffy, and ivory.
- Incorporate flavor and whites. Add vanilla bean paste and almond extract, then gradually mix in egg whites, scraping the bowl frequently.
- Combine batter ingredients. Alternately add the dry mixture and a blend of milk and oil to the butter, mixing until just combined.
- Bake the layers. Divide batter into pans and bake for thirty to thirty-four minutes until a toothpick inserted in the center comes out clean.
- Cool the cakes. Rest cakes in pans for ten minutes before inverting onto wire racks to cool completely.
- Simmer custard base. Heat milk, heavy cream, salt, and vanilla bean paste in a saucepan until tiny bubbles form at the edges.
- Thicken the custard. Temper egg yolks with the hot milk mixture, cook until thickened and glossy, then whisk in cold butter and chill.
- Whip the buttercream. Whip butter, vanilla, and salt until light, then beat in sweetened condensed milk and melted white chocolate until smooth.
- Assemble the cake. Layer the cake with custard, pipe a buttercream border, and finish by frosting the exterior of the chilled cake.
Notes
- Ensure all dairy and egg components are at true room temperature to prevent the batter from curdling.
- Use a digital kitchen scale for flour to maintain the delicate structural integrity of the sponge layers.
- If buttercream separates, gently warm the mixing bowl briefly to restore the emulsion before whipping again.
- Chill the fully assembled cake for at least two hours to ensure clean, bakery-quality slices.
- Prep Time: 45 mins
- Cook Time: 35 mins
- Category: Dessert
- Method: Baking
- Cuisine: French-inspired
Simple Ingredients + One Smart Add

Creating a spectacular cake starts with selecting high-quality pantry staples that work in harmony. By choosing a premium vanilla bean paste and adding a subtle dash of almond extract, we create a complex, deep flavor profile that tastes like it came from a high-end French pastry shop.
- Vanilla Bean Paste: This flavorful paste provides those beautiful dark specks and a deep, rounded flavor that standard extract alone cannot replicate.
- Almond Extract: Our sweet secret weapon that lends a subtle bakery-style aroma without overpowering the delicate vanilla notes.
- Egg Whites: Using only the whites keeps the sponge incredibly light, airy, and beautifully pale in color.
- Whole Milk: This ingredient adds the necessary fat and hydration to create a wonderfully soft and tender crumb.
- White Chocolate: Melted into the buttercream, it provides structure, a glossy finish, and a rich, buttery sweetness.
- Cornstarch: Essential for thickening our smooth homemade custard filling to the perfect pipeable consistency.
- Unsalted Butter: High-quality butter provides the rich foundation for both the delicate sponge and the silky frosting.
| Ingredient | Why It Matters |
|---|---|
| Vanilla Bean Paste | Delivers intense flavor and beautiful visual speckles. |
| Almond Extract | Adds a mysterious, professional bakery aroma. |
| Egg Whites | Ensures a pale color and a feather-light texture. |
| White Chocolate | Thickens and stabilizes the silky buttercream. |
| Cornstarch | Creates a thick, creamy, and sliceable custard filling. |
Building the Flavor

Step 1: Prepare the Cake Pans and Oven
Preheat your oven to 350°F (170°C) with an oven rack positioned in the center to guarantee even heat distribution. Lightly grease three nine-inch round cake pans with nonstick baking spray, then line the bottom of each pan with a parchment paper circle. Give the lined pans another quick spray of grease to make sure your delicate sponge layers release flawlessly after baking.
Step 2: Combine the Dry Baking Ingredients
In a large mixing bowl, combine your all-purpose flour, baking powder, and fine sea salt. Use a wire whisk to stir the mixture vigorously for at least thirty seconds, which helps aerate the flour and distribute the leavening agents evenly. Set this dry mixture aside so it is ready to be incorporated during the final mixing stage.
Step 3: Cream the Butter and Granulated Sugar
Place your room-temperature unsalted butter and granulated sugar into the bowl of an electric mixer fitted with the paddle attachment. Turn the mixer on medium-high speed and beat the ingredients together for about four to five minutes until the mixture turns pale ivory and fluffy. Scraping down the sides of the bowl with a flexible spatula halfway through this process makes sure that no unmixed pockets of sugar remain.
Step 4: Incorporate the Flavoring Extracts and Egg Whites
Add your vanilla bean paste and that magical splash of almond extract directly into the creamed butter, mixing for one minute to combine. With the mixer running on medium speed, gradually add the room-temperature egg whites in four separate additions, allowing each pour to fully blend before adding the next. Remember to scrape down the bottom of the bowl after each addition to maintain a smooth, uniform base.
Step 5: Mix the Batter for Your Classic Vanilla Layer Cake
Whisk the whole milk and vegetable oil together in a glass measuring cup until they are fully integrated. Alternately add the dry ingredients and the milk mixture to your creamed butter bowl, beginning and ending with the flour mixture. Mix on low speed after each addition only until the ingredients are just combined, preventing overworking the gluten so your final cake remains soft and tender.
Step 6: Bake the Sponge Layers to Golden Perfection
Divide your smooth vanilla batter evenly among the three prepared baking pans, using an offset spatula to smooth the tops. Transfer the pans to the preheated oven and bake for thirty to thirty-four minutes. You will know they are done when a toothpick inserted into the center comes out clean or with a few moist crumbs clinging to it.
Step 7: Cool the Sponge Cakes Safely
Allow the baked cakes to rest in their pans on a wire cooling rack for exactly ten minutes to let the structure set. Run a thin spatula around the outer edges of the pans to loosen the sides, then gently invert the cakes onto the racks. Peel away the parchment paper circles and let the layers cool completely before attempting to fill or frost them.
Step 8: Simmer the Vanilla Bean Custard Base
While your cakes are cooling, combine your whole milk, heavy cream, salt, and vanilla bean paste in a medium saucepan. Heat the liquid over medium heat, stirring occasionally, until it just reaches a gentle simmer. Tiny bubbles will begin to form around the edges of the pot, releasing a wonderful vanilla aroma throughout your kitchen.
Step 9: Temper and Thicken the Egg Custard
In a heat-safe bowl, whisk your sugar and cornstarch together, then beat in the egg yolks until smooth. Slowly drizzle about one-third of the hot milk mixture into the yolks while whisking constantly to temper the eggs. Pour this mixture back into the saucepan and cook over medium heat, stirring constantly, until thick, bubbly, and glossy before whisking in the cold butter and chilling the custard.
Step 10: Whip the Silky White Chocolate Buttercream
Place your room-temperature butter, vanilla paste, and salt into a clean mixer bowl fitted with the whip attachment. Whip on high speed for five to seven minutes until light, glossy, and ivory in color. Slowly add the sweetened condensed milk, then pour in the melted, slightly warm white chocolate, whipping on medium speed until the frosting is thick and spreadable.
Step 11: Assemble and Frost Your Masterpiece
Place your first cake layer on a cardboard round, then pipe a sturdy buttercream border around the top edge to create a barrier. Spread half of your chilled vanilla custard inside the border, place the second cake layer on top, and repeat the process. Finish with the third layer, apply a thin crumb coat of buttercream, chill the cake for twenty minutes, and then frost the exterior with the remaining white chocolate buttercream.
Small Tweaks, Big Wow

When baking delicate cakes, paying close attention to ingredient temperatures makes all the difference. Always make sure your egg whites, milk, and butter are at room temperature before you begin mixing. Cold ingredients will cause the batter to curdle, resulting in an uneven bake and a heavy, dense texture that ruins the fluffy crumb.
For a truly spectacular crumb, try to master how to bake a tender sponge cake by measuring your flour with a digital kitchen scale. Scooping flour directly from the bag with a measuring cup packs it down, adding up to twenty percent more flour than the recipe actually calls for.
If your buttercream begins to look separated or curdled while you are adding the sweetened condensed milk, do not panic. This usually happens when the butter is slightly too cold or the milk was added too quickly. To fix this, simply warm the bottom of your mixing bowl with a warm kitchen towel or a hair dryer on low heat for ten seconds, then whip on high speed until the emulsion comes back together beautifully.
If you want to achieve a cleaner look when slicing your finished masterpiece, chill the fully assembled cake for at least two hours beforehand. Warm custard and soft buttercream can slip when cut at room temperature. Using a long, sharp knife dipped in hot water and wiped dry between each cut will yield clean, bakery-quality slices.
To make your sponge layers even softer and more hydrated, try incorporating a perfect buttermilk vanilla cake technique by brushing the cooled sponge layers with a very light coating of simple syrup. This simple step locks in moisture and keeps your cake tasting fresh for several days, especially if you are making it ahead of time.
Frequently Asked Questions
What is the secret to a super moist vanilla cake?
The secret to keeping this cake incredibly moist lies in the combination of unsalted butter and a small amount of vegetable oil. While butter provides that classic rich flavor, the oil remains liquid at room temperature, keeping the crumb soft and tender for days. Additionally, using room-temperature ingredients prevents the batter from separating, which ensures a uniform bake.
Is cake flour better than all-purpose flour for vanilla cake?
While cake flour produces an ultra-fine, delicate crumb, this specific recipe is formulated using all-purpose flour to provide enough structure to support the heavy layers of homemade custard. All-purpose flour gives the cake a stable yet tender bite that holds up beautifully when sliced. Whisking the flour thoroughly aerates it, mimicking the lightness of cake flour without losing strength.
Why is my vanilla cake dry or dense?
A dry or dense cake is usually the result of overmeasuring the flour or overmixing the batter once the dry ingredients are added. Overmixing develops too much gluten, which traps excess air and then collapses during baking, resulting in a heavy texture. To prevent this, always weigh your ingredients with a scale and mix only until the flour is just incorporated.
What is the difference between white cake and vanilla cake?
White cakes are made using only egg whites to maintain a snowy, pale appearance and a light, airy texture. Traditional vanilla cakes often contain whole eggs or egg yolks, which add a golden hue and a richer, custard-like flavor. This recipe combines the best of both worlds by using egg whites for a pale sponge, while incorporating a rich egg yolk custard between the layers.
Should ingredients be at room temperature?
Yes, having your butter, milk, and egg whites at room temperature is absolutely critical for a successful cake batter. When ingredients are at the same temperature, they emulsify smoothly, trapping tiny pockets of air that expand in the oven to create a light rise. Cold ingredients will cause the batter to curdle and bake unevenly.
Can I make the custard filling ahead of time?
Absolutely, you can easily prepare the vanilla bean custard up to two days in advance. Simply store it in an airtight container in the refrigerator with a sheet of plastic wrap pressed directly against the surface to prevent a tough skin from forming. Give it a vigorous whisk before assembling your cake to restore its smooth consistency.
Swap Your Spice
If you want to change up the flavor profile of this recipe, try swapping the vanilla bean paste in the cake layers for sweet ground cardamom. Cardamom blooms beautifully in the butter during the creaming stage, offering a warm, slightly citrusy, and exotic aroma that pairs wonderfully with the sweet white chocolate buttercream.
For an elegant floral twist, you can replace the small splash of almond extract in the batter with a few drops of high-quality orange blossom water. This creates a delicate, fragrant sponge that feels incredibly sophisticated. If you enjoy experimenting with different flavor profiles, check out our classic vanilla cake recipe for more inspiring ideas on how to customize your bakes.
Another delicious option is to transform this recipe into a toasted coconut dream cake. Simply fold half a cup of finely shredded toasted coconut into the batter just before baking, and use coconut milk in place of whole milk. The sweet coconut texture pairs beautifully with the rich, creamy vanilla custard filling.
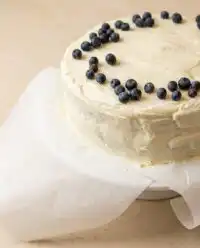
Bringing the Wow to the Table
When it comes to presenting this beautiful creation, simplicity is your best friend. Place the fully frosted cake on a vintage ceramic cake stand to let its towering structure take center stage. To add a touch of seasonal beauty, garnish the base of the stand with fresh, unsprayed edible flowers or a few sprigs of fresh rosemary.
This cake pairs wonderfully with a warm cup of lightly spiced black tea or a clean, pour-over coffee. The bitterness of the coffee cuts through the rich sweetness of the white chocolate buttercream, balancing your palate after each bite. If you are hosting a larger gathering, consider offering a slice of this cake alongside our classic yellow cake recipe to give your guests a delicious variety of options.
For an extra touch of indulgence, serve each slice with a spoonful of tart raspberry coulis. The bright acidity of the berries offers a perfect contrast to the creamy custard and rich white chocolate frosting, making each bite feel fresh and exciting.

Your Turn to Riff
Baking a beautiful layer cake is one of the most rewarding projects you can undertake in your home kitchen. This recipe is designed to give you a reliable, sturdy foundation while leaving plenty of room for your own creative flavor additions. Whether you stick to the classic vanilla bean and almond combination or decide to experiment with your own spice swaps, the process of building these layers is pure joy.
If you want to see a step-by-step visual guide of this beautiful baking process, be sure to check out our classic vanilla bean layer cake story for more inspiration. We love seeing how you make these recipes your own, so please share your beautiful kitchen creations with our community.
Save this recipe for your next big celebration, and do not forget to share your baking journey with us on our social channels. You can find more tips, tricks, and gorgeous baking inspiration on our Pinterest and Facebook pages. Happy baking, and enjoy every sweet bite.
