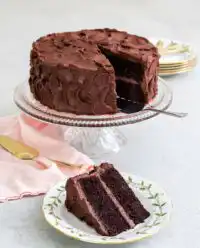
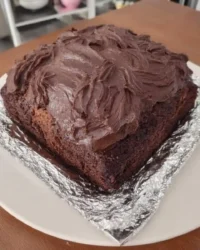
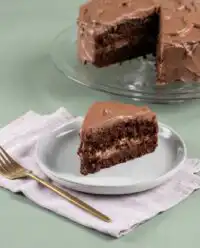
A small chocolate cake sits on my counter under a glass dome, waiting for a neighbor to drop by for a cup of coffee and a quiet chat on Sunday afternoon.

Baking treats in small batches brings a unique kind of warmth to a quiet kitchen, especially when the aroma of cocoa fills the air. These cozy Mini Chocolate Layer Cakes are meant for sharing with someone special, or keeping all to yourself when you need a quiet moment of comfort. You do not need any fancy tools or multiple pans to bring this sweet treat to life on your kitchen counter.
This recipe relies on humble pantry staples that you likely already have on hand in your cupboards. The gentle crumbs of this cake pair beautifully with a cold glass of milk or a hot cup of black coffee. It is the type of humble dessert that reminds us that baking does not have to be a grand or complicated affair.
With a single bowl and a hand whisk, you can create a masterpiece that feels like a warm hug from grandmother. This cake is forgiving and familiar, making it perfect for beginners and seasoned bakers alike. It is proof that simple, honest ingredients still work wonders when treated with care.
What Makes Our Mini Chocolate Layer Cakes Pure Comfort
Prep: 15 min · Serves: 1 · Difficulty: Easy
Sometimes you want a rich dessert without baking a massive cake that takes up the entire kitchen counter. Making small cakes allows us to enjoy a sweet treat without worrying about wasting left-over slices. This little cake brings all the joy of a traditional bakery dessert straight to your small table. It is the perfect recipe for a quiet Sunday afternoon when the radio is playing softly in the background.
- Simple ingredients you already have in pantry.
- Quick to bake in small loaf pans.
- Perfected portion sizes for small-batch lovers.
- Rich chocolate taste packed in every bite.
- Easy to assemble with simple wooden spoon.
If you are looking for other cozy recipes, you might also enjoy making our classic easy chocolate cake on a lazy weekend. This miniature recipe is designed to bring you maximum joy with minimal cleanup at the end of the day. This is the recipe my family requests every single weekend.
Get The Full Cake Recipe
Print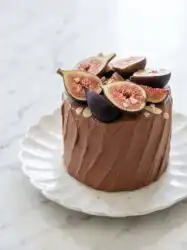
Mini Chocolate Layer Cakes
- Total Time: 40 mins
- Yield: 2 mini cakes
- Diet: Vegetarian
Description
These delightful mini chocolate layer cakes are the perfect small-batch treat for a cozy afternoon. With a tender, moist crumb and a light whipped cream frosting, they offer a comforting, café-quality dessert experience without needing fancy equipment.
Ingredients
- 1/4 cup hot water
- 1/2 tsp instant espresso granules
- 3 tbsp unsweetened cocoa powder
- 1/4 cup whole milk
- 2 tbsp flavourless oil
- 1/2 cup all-purpose flour
- 1 tsp cornstarch
- 1/4 tsp baking soda
- 1/4 tsp baking powder
- Pinch of salt
- 1 large egg
- 1/3 cup granulated sugar
- 1/2 cup heavy whipping cream
- 1 tsp sugar (for frosting)
- 1 tsp cocoa powder (for frosting)
Instructions
- Prepare the oven. Preheat your oven to 340°F (170°C) and line two four-inch cake tins with parchment paper, greasing the sides lightly with oil.
- Bloom the cocoa. Whisk the hot water, espresso granules, and cocoa powder together in a bowl until smooth and lump-free, then let it cool slightly.
- Mix liquid ingredients. Stir the milk and oil into the cooled chocolate mixture until fully emulsified and glossy.
- Whisk dry ingredients. In a separate bowl, whisk together the flour, cornstarch, baking soda, baking powder, and salt.
- Beat egg mixture. In a clean bowl, vigorously whip the egg and granulated sugar until the mixture is pale, frothy, and falls in a ribbon-like stream.
- Combine the batter. Fold the egg mixture into the chocolate liquid, then stir in the dry ingredients until just combined.
- Bake the cakes. Divide the batter between the prepared tins and bake for 25 minutes or until a wooden toothpick inserted into the center comes out clean.
- Cool and layer. Allow cakes to cool completely before leveling the tops with a knife and slicing each into two horizontal layers.
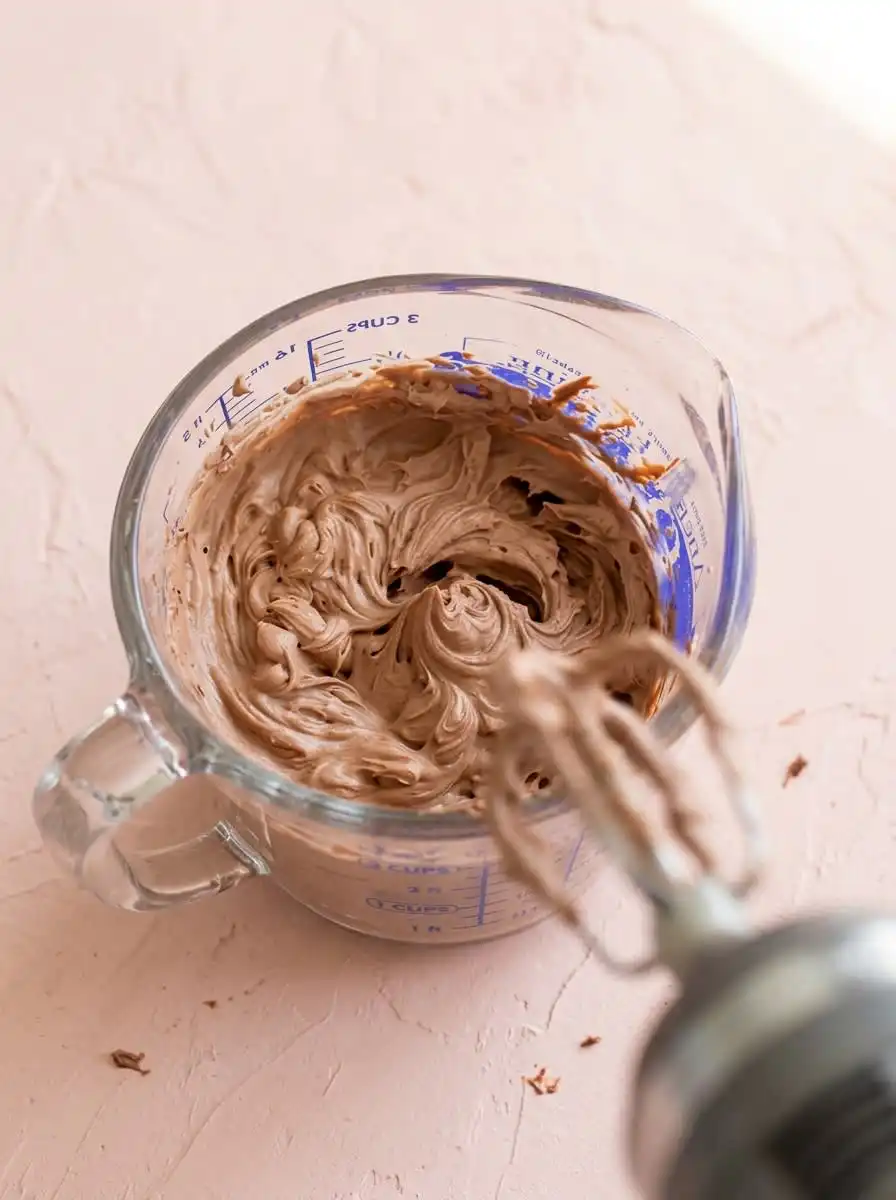
- Frost and serve. Whip the cold cream, sugar, and cocoa until medium-stiff peaks form, then spread between layers and top as desired.
Notes
- Ensure all liquid ingredients are at room temperature to prevent the batter from splitting during the emulsification process.
- For the cleanest slices, refrigerate the cooled cake layers for at least thirty minutes before cutting them horizontally.
- Do not overmix the batter once the flour is added to ensure the cake remains light and tender rather than dense.
- Using a kitchen scale to measure the flour provides the most consistent results compared to using a measuring cup.
- Prep Time: 15 mins
- Cook Time: 25 mins
- Category: Dessert
- Method: Baking
- Cuisine: American
Pantry Basics
Making Mini Chocolate Layer Cakes requires only basic pantry ingredients that keep your baking straightforward and stress-free. There is no need for a special trip to the store when the craving for chocolate strikes. Each pantry item plays a specific role in keeping the cake tender and deeply flavorful.
- Instant Espresso Granules: These dry granules do not make the cake taste like coffee at all. Instead, they work behind the scenes to make the chocolate taste deeper and far more rich. You can use any brand you have in your pantry.
- Cocoa Powder: We use standard unsweetened cocoa powder to build a solid chocolate base. It gives the cake its classic dark color and comforting, nostalgic aroma as it bakes.
- Flavourless Oil: Using oil instead of butter keeps the cake crumb incredibly soft and tender for days. It guarantees the dessert stays moist even if you save a slice for tomorrow morning.
- Cornstarch: A small spoonful of cornstarch softens the all-purpose flour. This little trick mimics cake flour, giving you a delicate crumb that melts in your mouth.
- Whipping Cream: This serves as the rich base for our simple chocolate frosting. When whipped with cocoa and sugar, it creates a cloud-like texture that pairs perfectly with the cake.
- Large Egg: One room-temperature egg holds the batter together and provides structure. It helps the cake rise evenly in your small baking tins.
- Hot Water: Hot water is essential because it blooms the cocoa powder, releasing its full aromatic potential before it goes into the oven. This simple step transforms the batter into a deeply flavorful dessert.
- Baking Powder and Soda: This duo of leavening agents provides the rise to our small-batch batter. They guarantee the layers remain light and airy, avoiding any heavy or dense texture.
| Ingredient | Why It Matters |
|---|---|
| Espresso Granules | Deepens the natural chocolate flavor without adding a coffee taste. |
| Flavourless Oil | Keeps the cake layers tender and soft for days on the counter. |
| Cornstarch | Weakens the flour proteins to create a lighter, more delicate crumb. |
| Cocoa Powder | Provides the classic, rich chocolate foundation for the batter. |
| Whipping Cream | Forms a light, billowy frosting that is easy to spread with a spoon. |
Using room-temperature ingredients is a simple kitchen habit that yields a much better cake. When your egg and milk are at room temperature, they combine smoothly with the wet chocolate mixture without causing the batter to split. This small step guarantees a uniform rise and a consistent crumb throughout the baking process.
Additionally, choosing a high-quality cocoa powder can make a noticeable difference in the final taste. While standard pantry cocoa works beautifully, a premium option will provide a deeper, darker chocolate experience. Take your time to measure each ingredient carefully to keep the balance of flavors perfect.
From Bowl to Pan
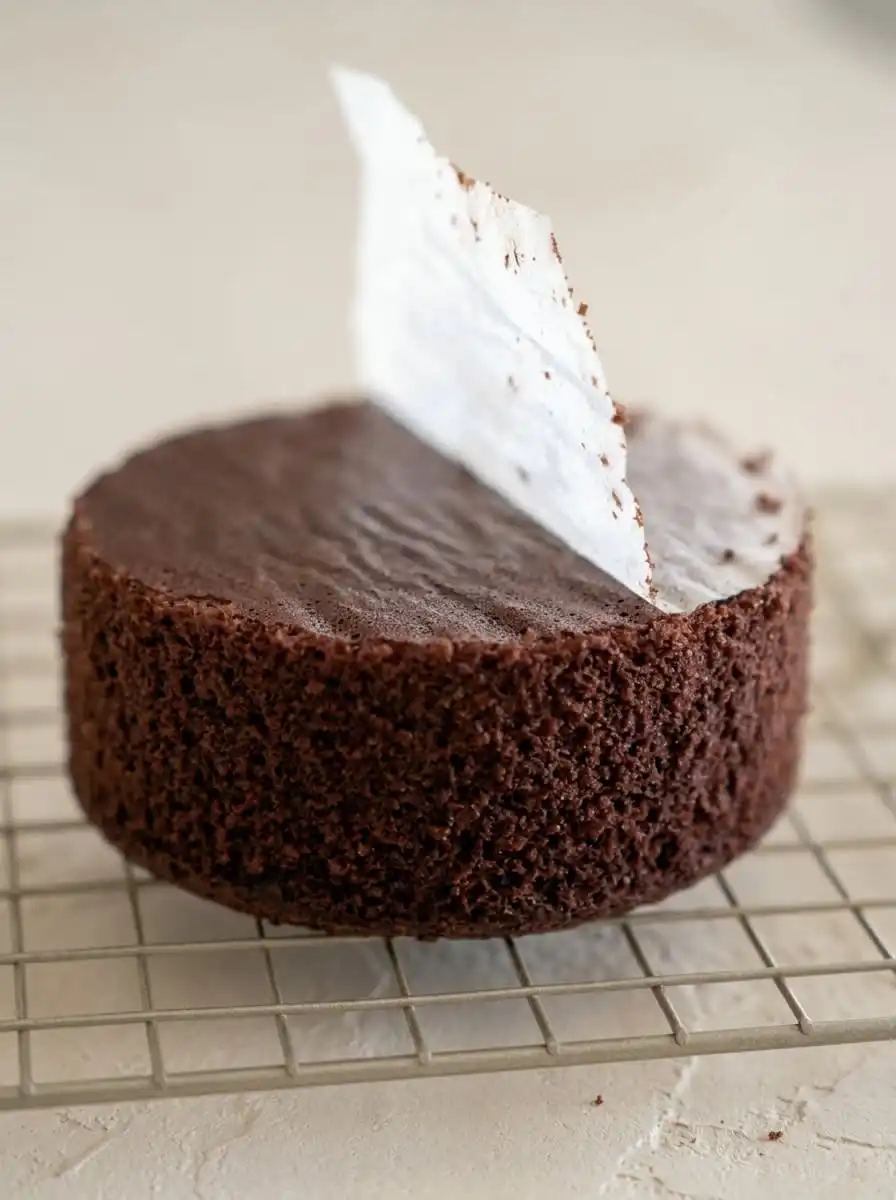
Step 1: Prepare Your Baking Pans
Before you begin mixing your ingredients, take a moment to set your kitchen up for success. Preheat your oven to 340°F (170°C) and line two small four-inch cake tins with parchment paper. Greasing the sides with a little oil helps the cakes slide out easily after baking.
Having your pans ready beforehand keeps the batter from sitting on the counter too long. When cake batter sits, the leavening agents can lose their strength, resulting in a heavier cake. A little preparation guarantees a tall, fluffy rise every single time.
Step 2: Dissolve the Cocoa and Espresso
In your main mixing bowl, combine the hot water with the instant espresso granules and cocoa powder. Whisk them together gently until the powder is fully dissolved and no dry lumps remain. You will notice a rich, deep chocolate aroma filling the kitchen as the hot water awakens the cocoa.
Allow this mixture to sit for a minute to cool slightly before moving on. Hot liquids can cook the egg if added too quickly, so patience is key here. The mixture should feel warm to the touch, not piping hot.
Step 3: Combine the Liquid Ingredients
Humble ingredients combine beautifully when mixed in the correct order. Pour the milk and flavourless oil directly into your chocolate mixture. Whisk steadily until the liquids are fully emulsified, creating a smooth and glossy liquid. This step helps distribute the fat evenly throughout the base, which is crucial for a soft cake crumb.
The mixture will look like a thin chocolate milk once everything is fully combined. Do not worry if it seems very wet at this stage. This liquid foundation is what keeps our cake so wonderfully soft as it bakes.
Step 4: Whisk Your Dry Ingredients
Combine your all-purpose flour, cornstarch, baking soda, baking powder, and a pinch of salt in a separate medium bowl. Sifting these dry ingredients through a fine mesh strainer can help remove any stubborn flour lumps. This step also introduces air into the dry mix, leading to a lighter cake texture.
Make sure the baking powder and baking soda are evenly distributed throughout the flour. If these leavening agents cluster in one spot, your cake might rise unevenly or have a bitter taste. A basic hand whisk is the perfect tool for blending these dry basics.
Step 5: Whip the Sugar and Egg
Whisk your large egg and white granulated sugar together in another clean bowl. Using a hand whisk, whip them together vigorously until the mixture becomes pale yellow and frothy. This process traps tiny air bubbles that will help lift the cake batter during baking.
You do not need an electric mixer for this; a few minutes of steady whisking by hand will do the trick. The egg and sugar should flow off your whisk in a thick, ribbon-like stream. This light, airy texture is the secret to a delicate cake crumb.
Step 6: Bake Your Mini Chocolate Layer Cakes
Now it is time to combine your ingredients and bake your Mini Chocolate Layer Cakes. Gently fold the whipped egg and sugar into the cooled chocolate liquid until uniform. Next, slowly stir in the dry flour mixture, mixing only until the dry patches disappear and the batter is smooth.
Divide the chocolate batter evenly between your two prepared four-inch cake tins. Place them in the preheated oven and bake for 25 minutes. You will know they are finished when a wooden toothpick inserted into the center comes out clean.
Step 7: Cool and Slice Your Layers
Let the baked cakes cool in their tins for about ten minutes before turning them out onto a kitchen towel. Allow them to cool completely to room temperature before attempting to cut them. Slicing a warm cake will cause the crumbs to tear and the frosting to melt instantly.
Once cooled, use a long, sharp knife to slice off the domed tops to create flat surfaces. Then, slice each cake horizontally in half to create four beautiful, even layers. Take your time during this step to keep the layers uniform and ready for assembly.
Step 8: Frost and Decorate Your Creation
To make the frosting, mix the cocoa powder and sugar in a bowl before pouring in the cold whipping cream. Whip the cream to medium-stiff peaks, then use a butter knife or spoon to spread it between your cake layers. Top your creation with fresh sliced figs and toasted almonds for a beautiful, rustic finish.
Keep the layers aligned as you stack them to prevent your small cake from tipping over. Once assembled, you can place a kitchen towel over the cooling cake or serve it immediately. It is a simple process that brings immense satisfaction to any home baker.
Little Things That Matter
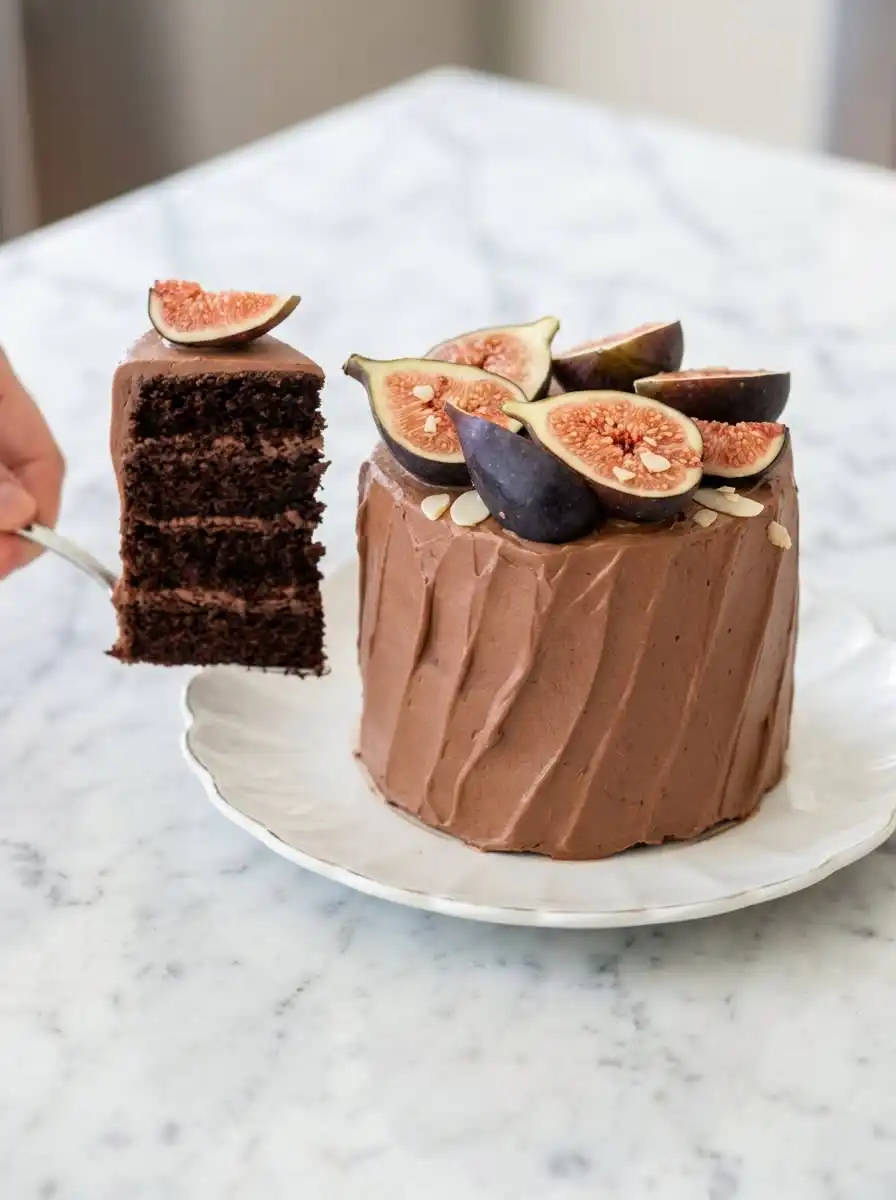
When baking Mini Chocolate Layer Cakes, precise measurements guarantee success. Measuring your flour accurately is the most important step in home baking. If you scoop flour directly from the bag with a measuring cup, you will pack too much flour into the recipe. Instead, spoon the flour gently into your cup and level it off with the back of a knife to keep your cake crumb light.
If your cake layers sink in the middle after baking, your oven temperature might be running too hot. A hot oven causes the cake to rise too quickly before the center has time to set, leading to a sudden collapse. You can use an inexpensive oven thermometer to make sure your temperature is accurate.
Should your whipping cream frosting turn out too soft or soupy, the bowl or the cream might be too warm. To fix this, place your mixing bowl and whisk in the freezer for ten minutes before whipping the cream. Cold cream whips much faster and holds its shape far better when assembling your layers.
For a deeper flavor, let your baked cake layers rest on the counter wrapped in plastic wrap overnight. Chocolate cakes often develop a richer, more satisfying taste the next morning. If you enjoy rich cakes, you might also like to read about our favorite chocolate mousse cake for your next baking day.
Cutting your small cake into clean, neat layers is much easier if the cake is slightly chilled. Place your cooled cake in the refrigerator for thirty minutes before slicing. Use a long, sharp serrated knife and a gentle sawing motion to cut through the delicate crumb without crushing it.
To expand your baking skills further, you can check out this helpful mini chocolate cake guide for more inspiration on single-serving desserts. Making small desserts is a wonderful way to practice your decorating techniques without wasting ingredients. It allows you to focus on the joy of the process in a cozy kitchen.
Frequently Asked Questions
How Do You Make Mini Chocolate Layer Cakes?
Making these small treats involves mixing dissolved cocoa powder and espresso with wet ingredients like oil, milk, and eggs, then folding in the flour. The batter is divided into two small four-inch pans and baked until a toothpick comes out clean. Once cooled, the cakes are cut into layers and stacked with a simple chocolate whipped cream frosting.
What is the Best Frosting for a Mini Chocolate Layer Cake?
A light, chocolate-infused whipped cream is the best choice because it complements the rich cake without overpowering it. It is incredibly easy to whip up by hand and spreads smoothly over the delicate layers. If you need a sturdier option for warm weather, a classic chocolate buttercream is also an excellent choice.
How Many People Does a Mini Chocolate Layer Cake Serve?
This recipe makes a single four-inch layer cake, which is perfectly portioned to serve one or two people. It is the ideal size for a quiet dessert to share with a loved one at the kitchen table. You can easily double the ingredients if you want to make multiple Mini Chocolate Layer Cakes for a larger gathering.
Why Do You Put Coffee or Hot Water in Chocolate Cake?
Hot water helps dissolve the cocoa powder completely, which blooms the chocolate and intensifies its natural flavor. The addition of instant espresso granules works behind the scenes to deepen the chocolate notes without leaving any coffee taste. It is an old-fashioned baker’s secret that makes a massive difference in the final cake.
Can I freeze the cake layers before assembling them?
Yes, you can freeze the un-frosted cake layers for up to three months. Wrap each cooled layer tightly in two layers of plastic wrap and a sheet of aluminum foil before placing them in the freezer. Thaw them overnight in the refrigerator before frosting and serving.
How should I store the assembled mini cake?
Because this recipe uses a fresh whipped cream frosting, you should store the assembled cake in the refrigerator. Place it under a cake dome or in an airtight container to keep it from drying out. It tastes even better the next day as the flavors meld together.
Can I use gluten-free flour for this recipe?
Substituting a high-quality 1-to-1 gluten-free baking flour in place of the all-purpose flour works wonderfully. Make sure your blend contains xanthan gum to help hold the cake structure together. The resulting cake will still be wonderfully soft and tender, though the crumb may be slightly more delicate.
What can I use instead of fresh figs for decoration?
If fresh figs are out of season, you can easily use fresh blackberries, dark sweet cherries, or even a simple dusting of cocoa powder. Toasted coconut flakes or chocolate curls also make a beautiful, rustic topping on the whipped frosting. Choose whatever comforts your soul and looks lovely on your kitchen table.
Family Variations
Adapting these Mini Chocolate Layer Cakes for different seasons is simple. You can easily swap the fresh figs for other seasonal fruits depending on what is growing in your garden. Fresh raspberries or sliced strawberries pair beautifully with the dark chocolate layers and whipped cream. The tartness of the berries cuts through the richness of the cocoa, creating a balanced bite that feels fresh and light.
If you prefer a richer, more decadent frosting, you can use a simple chocolate buttercream instead of whipped cream. Buttercream holds its shape exceptionally well and is perfect if you plan to keep the cake on the counter for a few days. For more inspiration on working with chocolate, browse our list of rich chocolate treats to satisfy your sweet tooth.
To add a comforting crunch to your cake, try sprinkling a handful of crushed pecans or walnuts between the layers. Toasting the nuts in a dry skillet for a few minutes before adding them releases their natural oils and deepens their flavor. This simple addition brings a wonderful texture that contrasts beautifully with the soft cake crumb. It turns a simple cake into something truly memorable.
At the Kitchen Table
Preparing Mini Chocolate Layer Cakes for a Sunday afternoon tea is a delightful tradition. Place the finished cake on a small dessert stand or a vintage plate under a glass dome on your kitchen counter. Slice it gently into wedges using a sharp knife, and serve it alongside a warm pot of chicory coffee or hot tea. It makes any ordinary afternoon feel like a special occasion.
If you are hosting a small afternoon tea, these individual cakes make a stunning centerpiece. You can pair them with other miniature treats to create a beautiful spread for your guests. To see how to make a classic vanilla version, take a look at our mini vanilla layer cakes story for more inspiration. It is a wonderful way to expand your dessert table.
This dessert is also the perfect way to end a quiet Sunday dinner with family. Because the cake is small, every person gets to enjoy a fresh, beautifully frosted slice without any leftover waste. It brings a touch of old-fashioned hospitality to your table, reminding everyone of the comfort of home baking. It is a sweet end to a long, busy week.
A Quiet Last Word
Baking these Mini Chocolate Layer Cakes offers a quiet retreat from a busy day. This recipe is a gentle reminder that we do not need elaborate celebrations or giant kitchen mixers to create something memorable. A single bowl, a hand whisk, and a bit of love are all that is required to bring comfort to your table. It is the simple things that keep our kitchens warm and inviting.
Should you look for more comforting chocolate recipes to add to your collection, try our decadent chocolate turtle cake next. It is another beloved family favorite that delivers honest, old-fashioned flavor in every single bite. Sharing these sweet creations with the people you love is what makes baking so special. It connects us across generations and fills our homes with joy.
I hope this simple recipe brings a little bit of warmth and comfort to your kitchen this week. If you decide to bake these cakes, I would love to hear about your experience. You can connect with us and share your baking photos on Pinterest, Facebook, TikTok, and Telegram to join our cozy community of home bakers.