A quiet truth in Southern baking is that the most precious memories are often born from the simplest pans and a mother’s own two hands.

This Smash Cake Made from Watermelon brings that humble spirit to a child’s first big milestone. It captures the bright colors of summer without needing a professional decorator or expensive tools. You can create a beautiful centerpiece that feels like home and tastes like a celebration. This recipe relies on a tender crumb and smooth buttercream that any parent can master on a Sunday afternoon.
Why This Smash Cake Made from Watermelon Works Every Time
Prep: 60 min · Serves: 6 · Difficulty: Easy
- No fancy equipment required for success.
- Soft texture perfect for tiny hands.
- Fun colors that look great in photos.
- Familiar flavors everyone at home loves.
- Forgiving method that allows for mistakes.
This is the kind of smash cake that focuses on the joy of the moment rather than the perfection of the frosting. No fuss, honest flavor.
Get The Full Cake Recipe
Print
Smash Cake Made from Watermelon
- Total Time: 85 mins
- Yield: 6 servings
Description
Create a charming, watermelon-inspired smash cake perfect for a first birthday milestone. This simple, tender-crumbed cake uses vibrant food coloring and classic buttercream to bring a touch of summer cheer to your celebration.
Ingredients
- 2 cups all-purpose flour
- 1 cup unsalted butter, softened
- 1 1/2 cups granulated sugar
- 1 cup whole milk
- 3 large eggs
- 2 teaspoons vanilla extract
- 2 teaspoons baking powder
- Pink food coloring gel
- Green food coloring gel
- 3 cups powdered sugar
Instructions
- Prepare oven and pans. Set your oven to 350 degrees Fahrenheit and grease three five-inch round pans, lining the bottoms with parchment paper.
- Cream butter and sugar. In a large bowl, mix the softened butter and granulated sugar for three minutes until pale and fluffy.
- Combine wet and dry. Beat in the eggs one at a time, add vanilla, then gradually fold in the whisked flour and baking powder, alternating with milk.
- Tint the batter. Separate one-third of the batter for green coloring and mix the remaining two-thirds with pink coloring.
- Bake the layers. Pour the batter into pans and bake for twenty-five minutes, then cool completely on a wire rack.
- Level the cakes. Use a serrated knife to trim the domed tops off the cooled layers for a flat, even stack.
- Whip the frosting. Beat the remaining butter, powdered sugar, milk, and vanilla until stiff and spreadable.
- Assemble the cake. Stack the layers with a thick coating of pink frosting in between, then smooth the sides for a tidy finish.
Notes
- Always bring your butter and eggs to room temperature to ensure a smooth, stable batter that won’t curdle.
- Spoon your flour into the measuring cup rather than scooping directly from the bag to prevent dense, heavy layers.
- Chill your cake layers in the freezer for one hour before frosting to significantly reduce crumbs and improve the final look.
- Use gel food coloring instead of liquid drops to achieve intense, vibrant colors without compromising the texture of your batter.
- Prep Time: 60 mins
- Cook Time: 25 mins
- Category: Dessert
- Method: Baking
- Cuisine: American
Simple Ingredients

Creating a memorable dessert starts with opening the pantry and finding the basics you already know. These ingredients are chosen for their reliability and their ability to create a soft, welcoming texture for a little one. Each component plays a specific part in making this cake both sturdy enough to stand and soft enough to crumble.
- All-purpose flour: This provides the backbone of the cake so the layers stay level and tall.
- Unsalted butter: Using softened butter ensures a rich flavor and a crumb that stays moist for days.
- Powdered sugar: The fine texture of this sugar makes the frosting smooth and easy to spread over the sides.
- Baking powder: A small amount creates the necessary lift so the cake is not too heavy for a baby to handle.
- Food coloring: These gels provide the recognizable shades of a summer melon without changing the flavor of the batter.
- Whole milk: Adding milk at the end creates a smooth batter that flows easily into your small baking pans.
- Vanilla extract: A splash of high-quality vanilla gives that classic home-baked aroma that fills the entire kitchen.
| Ingredient | Why It Matters |
|---|---|
| Butter | Creates the tender and soft crumb |
| Flour | Offers structural support for the layers |
| Sugar | Provides the sweetness and helps browning |
| Milk | Thins the batter for a smooth finish |
| Eggs | Binds the ingredients together for strength |
Selecting the right butter is often the secret to a cake that people remember long after the party. You want it softened to room temperature so it creams together with the sugar without leaving any cold lumps behind. When the butter and sugar are properly combined, they trap air which helps the cake rise naturally in the oven heat.
The Simple Method

Step 1: Prepare the Southern Oven and Pans
Before you start mixing, set your oven to 350 degrees Fahrenheit so it has plenty of time to reach a steady heat. Grease three five-inch round pans thoroughly with butter or a bit of shortening to ensure the layers release cleanly later. Placing a circle of parchment paper at the bottom of each pan is an old trick that saves a lot of heartache. The kitchen should feel warm and ready for the work ahead as you gather your bowls.
Step 2: Cream the Butter and Sugar
In a large mixing bowl, combine your softened butter and the granulated sugar using a steady hand or a basic electric mixer. You are looking for the mixture to become pale and slightly fluffy, which usually takes about three minutes of consistent mixing. This process incorporates air that helps the cake feel light and airy when it is finally served. It should smell sweet and buttery, like the start of every good Sunday afternoon in a Southern kitchen.
Step 3: Mix the Wet and Dry Ingredients
Add your eggs one at a time, making sure each one is fully incorporated before adding the next one. Pour in the vanilla extract and stir gently to keep the air you just worked so hard to create. In a separate smaller bowl, whisk together the flour and baking powder until they are well combined. Gradually add these dry ingredients to your butter mixture, alternating with splashes of milk to keep the batter from becoming too thick or difficult to stir.
Step 4: Color Your Smash Cake Made from Watermelon
Separate about one-third of your smooth batter into a small bowl and stir in the green food coloring until the shade is uniform. This green portion will represent the rind of the watermelon once the cake is sliced and stacked. Add the pink food coloring to the remaining two-thirds of the batter, aiming for a shade that looks like a ripe summer fruit. Seeing these colors come together brings a bit of cheer to the baking process and hints at the finished design.
Step 5: Bake and Cool the Layers
Pour the green batter into one prepared pan and divide the pink batter between the remaining two pans. Place them in the center of the oven and bake for about twenty-five minutes or until the tops spring back when you touch them lightly. The kitchen will fill with the scent of vanilla and toasted sugar as the edges turn a soft golden brown. Once they are done, let them sit in the pans for ten minutes before turning them out onto a wire rack to cool completely.
Step 6: Trim for a Level Finish
Use a serrated knife to gently saw off the domed tops of the cooled cakes so they are flat and sit evenly on top of one another. Trimming the outer edges slightly can also reveal the bright colors inside, making the final presentation look much cleaner and more deliberate. This step ensures your tower of cake does not lean or slide once the frosting is applied between the layers. Keep the scraps aside for a snack later, as they are often the baker’s reward for a job well done.
Step 7: Whip the Buttercream Frosting
Beat the remaining butter and powdered sugar together with a little milk and vanilla until the frosting is stiff but spreadable. You want it to hold its shape when you pull the mixer away, forming little peaks that do not collapse. If the icing feels too soft, add another spoonful of sugar; if it is too stiff, a drop of milk will thin it out perfectly. This frosting is the glue that holds your celebration together, providing a sweet contrast to the tender cake layers.
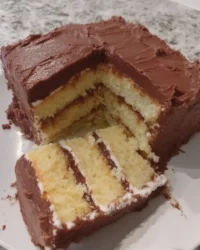
Step 8: Assemble the Colorful Layers
Place the green layer on your cake board first to act as the base of the watermelon design. Spread a thick layer of pink frosting over the green cake and then stack the first pink layer on top. Repeat this with more frosting and the final pink layer, making sure the stack is straight and centered. Using a simple spatula to smooth the sides will give the cake a tidy look that lets the colors of the cake shine through.
Grandmother’s Tips

If your frosting starts to feel soupy or begins to melt while you are working, here is why and how to fix it. This often happens because the kitchen is too warm or the butter was too soft to begin with. You can solve this by placing the bowl of icing in the refrigerator for fifteen minutes to firm up the fats before you continue. A cool environment is the best friend of a Southern baker trying to create a beautiful finish.
Freezing your cake layers for an hour before you start frosting them makes the process much easier. Cold cake is firmer and produces fewer crumbs, which means your pink icing will stay clean and bright. You can find more about this technique in this two layer smash cake story which explains how to handle delicate layers. It is a small step that makes a big difference in the final look.
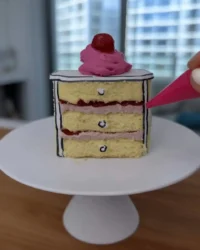
When applying the black icing seeds, use a toothpick to guide each dot onto the cake surface. This prevents the dark color from smearing across your light pink frosting and keeps the design looking sharp. Clean the toothpick after every single seed to ensure no residue transfers to the next spot. Taking your time with these small details is what turns a simple cake into a beautiful centerpiece for the high chair.
Always use room temperature eggs because they incorporate into the butter much more smoothly than cold ones. If you forget to take them out of the fridge, place them in a bowl of warm water for five minutes to take the chill off. This ensures your batter does not curdle or separate when you start mixing the wet ingredients. It is a plain-kitchen note that has been passed down through many generations of bakers.
To get the best results with your colors, consider learning how to make a fruit-based smash cake if you want to see how natural tones can be used. Using gel colors instead of liquid drops will give you deeper shades without thinning out your cake batter. This keeps the texture of the cake consistent regardless of how much color you decide to add to the bowls.
Make sure you measure your flour by spooning it into the cup rather than dipping the cup into the bag. Dipping packs the flour down and leads to a dry, heavy cake that is difficult for a baby to enjoy. Lightly filling the measuring cup ensures the crumb remains soft and tender. The kind of cake that keeps is one that was measured with a light and careful hand.
Frequently Asked Questions
How do I store the cake if I make it a day early?
You can keep the assembled cake in the refrigerator under a glass dome or wrapped gently in plastic. It is often said that this type of dessert tastes even better the next day after the flavors have had time to meld. Simply take it out of the fridge an hour before the party so the buttercream has time to soften to a pleasant texture.
Can I use a different size pan for this recipe?
Yes, you can use larger pans, but the layers will be much thinner and the baking time will need to be shortened. If you use six-inch pans instead of five-inch, start checking the oven at eighteen minutes to ensure they do not overbake. The cake should still be tall enough to make a statement on the child’s high chair tray.
What if I do not have a piping bag for the seeds?
A simple plastic sandwich bag with a tiny corner snipped off works just as well as any professional tool. This method is what many of us use when we want to keep things simple and avoid extra cleanup. Just fill the bag with your black frosting and squeeze gently to create the small seed shapes on top of the pink icing.
Is this cake soft enough for a six-month-old baby?
The crumb of this cake is specifically designed to be tender and easy to break apart with small fingers. Because it uses plenty of butter and milk, it remains moist and soft rather than becoming tough or dry. It is a very forgiving recipe that creates a texture perfectly suited for a first taste of birthday sweets.
Can I freeze the finished cake for later use?
While you can freeze the individual cake layers for several weeks, it is best to freeze the fully frosted cake for only a few days. Wrap it carefully in several layers of plastic wrap to prevent the frosting from picking up any odors from the freezer. Thaw it slowly in the refrigerator overnight before the celebration begins to maintain the best quality.
How do I prevent the colors from bleeding into the frosting?
The most important thing is to make sure the cake layers are completely cold before you even think about applying the icing. If the cake is even slightly warm, it will melt the butter in the frosting and cause the colors to run together. Patience is your best tool here, so let the layers sit on the counter until they feel cool to the touch.
Simple Twists
You might consider making a cake with fruit by adding finely chopped fresh strawberries to the pink batter layers. This adds a burst of natural flavor and a different texture that complements the vanilla base beautifully. Just be sure to pat the fruit dry with a kitchen towel so the extra moisture does not ruin the rise of the cake. It is a simple way to bring a bit of the garden into your baking.
Another idea is to swap the vanilla buttercream for a cream cheese frosting if you prefer a slightly tangy finish. This variation works well with the sweetness of the cake and provides a very stable base for the watermelon seed decorations. Many families find that the richness of cream cheese makes the dessert feel even more like a special treat. It still uses the same simple tools you already have in your kitchen drawer.
If you want to avoid food coloring altogether, you can use beet juice for the pink layers and spinach juice for the green. While the colors may be more muted, it offers a natural alternative that many parents appreciate for a first birthday. These natural dyes have been used for decades in country kitchens to bring life to desserts without using store-bought bottles. It is a wonderful way to keep the tradition of honest baking alive while trying something new.
At the Kitchen Table
When it comes time to serve, placing the cake on a simple wooden board or a plain white pedestal allows the bright colors to be the star. This is a moment for the family to gather around the high chair and enjoy the messy fun of a first birthday. Have a few kitchen towels nearby, as the pink frosting and green cake are meant to be enjoyed with hands and faces alike. It is the kind of celebration that reminds us why we bake in the first place.
To make the occasion even more special, you could offer a healthy cake for the adult guests that uses similar flavors. Serving a tray of fresh watermelon slices alongside the cake is a wonderful way to tie the theme together and provide a refreshing snack. The contrast between the cold fruit and the sweet, soft cake makes for a lovely summer afternoon spread. It keeps the atmosphere light and focused on the joy of the day.
Remember that the best photos often happen after the first bite when the baby discovers the bright pink interior. Setting the high chair in a spot with plenty of natural light will help you capture those honest expressions of surprise and delight. You do not need a fancy backdrop when you have a homemade cake and a happy child at the center of the room. Just clear the table, put on some music, and let the celebration happen at its own unhurried pace.

Keep This One Close
This recipe is a reminder that you do not need to be a professional chef to create something beautiful and meaningful for your family. A handwritten recipe card and a few basic ingredients are all it takes to start a new tradition that your children will remember. As you clean up the flour and the stray drops of pink food coloring, you can take pride in the fact that you made this from the heart. It is the simple, honest baking that survives the test of time.
If you find yourself making a fake cake for a photo session, you might find these techniques just as useful for creating a lasting look. We hope this guide helps you feel more confident in your kitchen as you prepare for your next big family milestone. Please share your photos and stories with us as you bake your way through these memories. Plain ingredients really do provide the best kind of real comfort for the people we love most.


