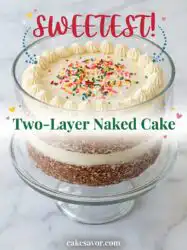
You do not need a fancy stand mixer, an expensive springform pan, or a special trip to a gourmet grocery store to bake a beautiful cake.

This simple Two-Layer Naked Cake brings real, old-fashioned comfort to the table without any fussy decorating rules. We use a dependable buttermilk batter that bakes up flat and stays supremely tender under a light sweep of sweet vanilla buttercream. By keeping the sides bare and clean, you let the honest color of the cake shine through for a rustic look. It is the ideal centerpiece for a quiet family gathering, a birthday party, or a Sunday afternoon dessert with your loved ones.
Why This Two-Layer Naked Cake Has Stayed in the Family
Prep: 15 min · Serves: 15 · Difficulty: Easy
- Simple pantry ingredients you already own.
- Forgiving crumbs that stay soft tomorrow.
- No expert decorating skills are required.
- Bakes evenly in basic round pans.
- Rustic looks that feel deeply comforting.
This classic nude cake style is the most reliable way to make a beautiful dessert without spending hours with a piping bag. It is a forgiving, straightforward recipe that yields honest flavor and a beautiful crumb every single time. This reliable dessert is sure to become your favorite comfort sweet to share with family.
Get The Full Cake Recipe
Print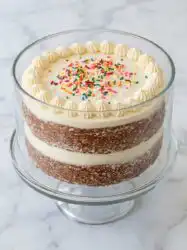
Two-Layer Naked Cake
- Total Time: 45 mins
- Yield: 15 servings
- Diet: Vegetarian
Description
This rustic two-layer naked cake features a tender, buttermilk-based sponge lightly finished with vanilla buttercream. Its unfussy, elegant appearance and honest flavor make it the perfect centerpiece for family gatherings and weekend celebrations.
Ingredients
- Cake flour
- Granulated sugar
- Unsalted butter
- Large eggs
- Buttermilk
- Vegetable oil
- Vanilla extract
- Baking powder
- Baking soda
- Salt
- Powdered sugar
Instructions
- Prepare the oven. Preheat oven to 350 degrees Fahrenheit, grease two 8-inch round cake pans with shortening, and lightly dust with flour.
- Combine dry ingredients. Whisk together cake flour, baking powder, baking soda, and salt in a medium bowl until uniform.
- Mix wet components. Stir buttermilk, vegetable oil, and vanilla extract together in a liquid measuring cup until the oil is dispersed.
- Cream butter and sugar. Beat softened butter with a hand mixer until smooth, then gradually add sugar and beat for three to five minutes until fluffy.
- Add the eggs. Mix in eggs one at a time, ensuring each is fully incorporated into the batter before adding the next.
- Alternate additions. Mix in the flour and buttermilk mixtures alternately at low speed, beginning and ending with the flour mixture.
- Bake the layers. Divide batter between pans and bake for 25 to 30 minutes, or until a toothpick inserted into the center comes out clean.
- Assemble the cake. Spread vanilla buttercream between the cooled layers and scrape a thin layer over the sides for a rustic, naked finish.
Notes
- Use room temperature ingredients to ensure the batter emulsifies properly during mixing.
- Measure flour by spooning it into a measuring cup and leveling it off to prevent a dense cake.
- Chill the baked cake layers overnight to improve the texture and make them easier to stack.
- Maintain a clean bench scraper by wiping it frequently to keep the exterior frosting look sharp.
- Trim any domed tops from the cake layers to create a stable, flat base for stacking.
- Prep Time: 15 mins
- Cook Time: 30 mins
- Category: Dessert
- Method: Baking
- Cuisine: American
Pantry Basics
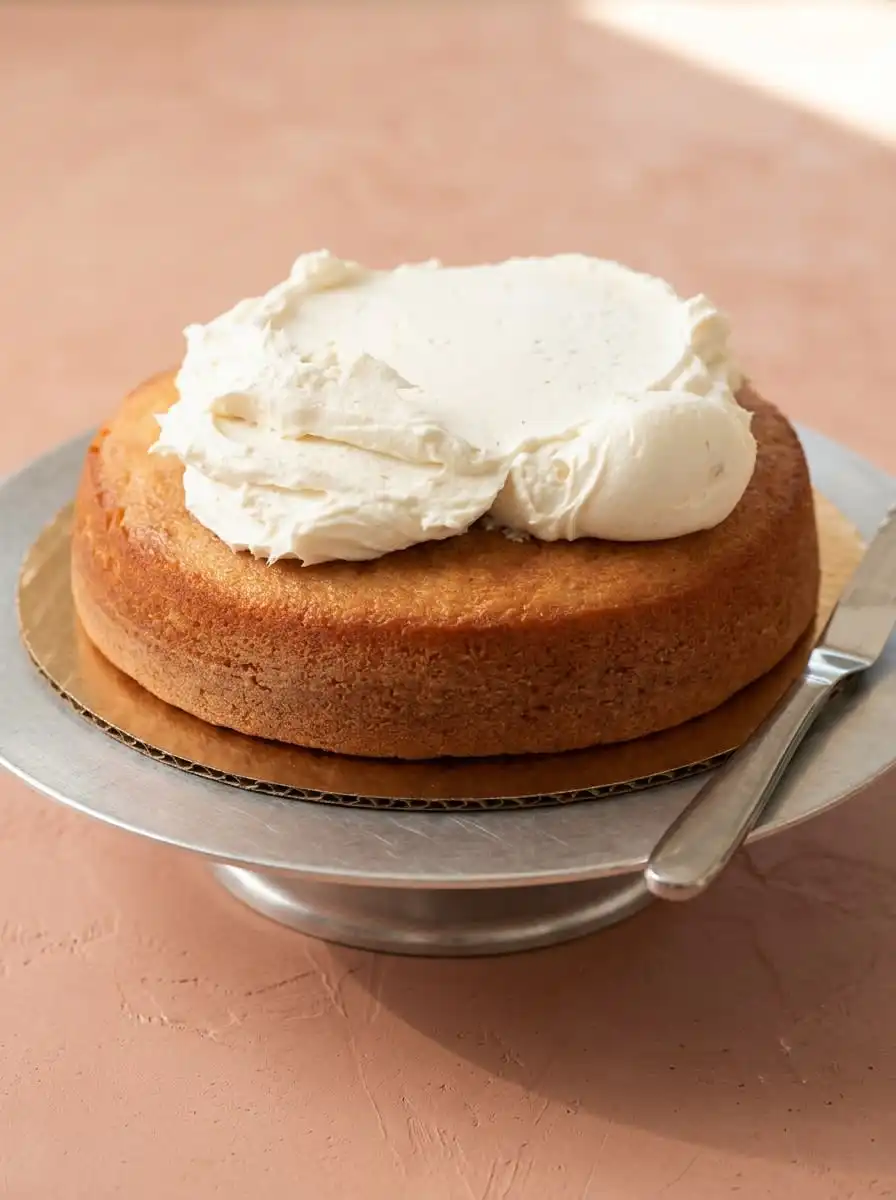
You do not need anything exotic to get this beautiful dessert onto your cake stand. We rely on honest, straightforward ingredients that you likely already keep in your kitchen cabinets. These basic staples come together to create a reliable dessert that boasts a tender crumb and a rich vanilla flavor. Each component plays a vital role in creating the ideal texture and flavor balance.
- Cake Flour: This low-protein flour creates an incredibly tender crumb that melts in your mouth. We spoon it into the cup and level it off to keep the cake light.
- Granulated Sugar: It sweetens the layers while helping to lock in moisture as the cake bakes. This guarantees that your dessert stays soft and delicious for several days.
- Unsalted Butter: Real butter delivers a nostalgic flavor that shortening cannot match. It needs to be softened until it holds its shape but dents when pressed.
- Large Eggs: These provide structure and rise to our cake layers. Bring them to room temperature before cracking them to make sure they blend smoothly.
- Buttermilk: This classic Southern ingredient brings a gentle tang that balances the sweet buttercream. It works with the leavening agents to keep the crumb pillowy.
- Vegetable Oil: A tiny splash of oil works alongside the butter to guarantee a moist texture. This little secret keeps your cake tasting fresh even on day two.
- Vanilla Extract: This aromatic extract brings a deep warmth to both the cake and the frosting. Use a good quality brand for the most comforting flavor.
- Baking Powder & Baking Soda: These two leavening agents work in harmony with the buttermilk to lift the heavy batter. They make sure the layers rise evenly with a light and airy texture.
- Powdered Sugar: This forms the sweet structure of our rich vanilla buttercream frosting. Sift it carefully to ensure the frosting remains completely smooth.
| Ingredient | Why It Matters |
|---|---|
| Cake Flour | Keeps the cake structure light and delicate |
| Granulated Sugar | Sweetens and locks in moisture for a soft crumb |
| Unsalted Butter | Delivers that classic, nostalgic buttery flavor |
| Buttermilk | Activates the leavening and ensures supreme tenderness |
| Vegetable Oil | Guarantees the layers do not dry out over time |
| Vanilla Extract | Provides a sweet, aromatic base for the entire cake |
From Bowl to Pan
Step 1: Prep Your Oven and Pans
Preheat your oven to 350 degrees Fahrenheit before you begin mixing your ingredients. Grease two 8-inch round cake pans generously with shortening and dust them lightly with flour. Tap out any excess flour over your kitchen sink to prevent a chalky layer on your baked cakes. This careful preparation guarantees that your golden layers will release cleanly without sticking to the pan.
Step 2: Whisk the Dry Mixture
Stir your cake flour, baking powder, baking soda, and salt together in a medium bowl. Use a simple wire whisk to blend everything for about thirty seconds until the mixture looks uniform. This step makes sure that the leavening agents are distributed evenly throughout the flour. You will see the flour lighten in color and texture as air is incorporated into the dry mix.
Step 3: Combine the Wet Ingredients
Measure the buttermilk, vegetable oil, and vanilla extract into a liquid measuring cup. Whisk them together with a fork until the oil breaks into small droplets. Combining these wet ingredients now makes it much easier to incorporate them later without overworking your batter. The mixture will look slightly separated, but this is completely normal and correct.
Step 4: Cream the Butter and Sugar
Beat your softened butter in a large bowl with a hand mixer until it is smooth. Gradually pour in the sugar and continue beating on medium speed for three to five minutes. You want the mixture to look fluffy and pale, resembling sweet cream. This process creates tiny pockets of air that give the cake its light rise.
Step 5: Incorporate the Eggs Slowly
Add the eggs to your creamed butter one at a time, mixing well after each addition. You should mix until the yellow of the yolk completely disappears into the batter before adding the next one. This steady pace prevents the rich mixture from separating or curdling. The final batter base should look smooth, thick, and velvety.
Step 6: Alternate Dry and Wet Additions
Turn your mixer to its lowest speed to avoid splashing batter outside the bowl. Add the flour mixture and the buttermilk mixture alternately, starting and ending with the flour. Mix only until the flour pockets disappear to keep the cake tender. Overmixing at this stage will activate the gluten and make your layers dense.
Step 7: Bake the Golden Layers
Divide the thick batter evenly between your prepared round pans. Bake at 350 degrees for 25 to 30 minutes until the tops are golden. A wooden toothpick inserted into the center should come out clean or with only a few moist crumbs. Your kitchen will fill with the comforting aroma of sweet vanilla and warm butter.
Step 8: Assemble the Two-Layer Naked Cake
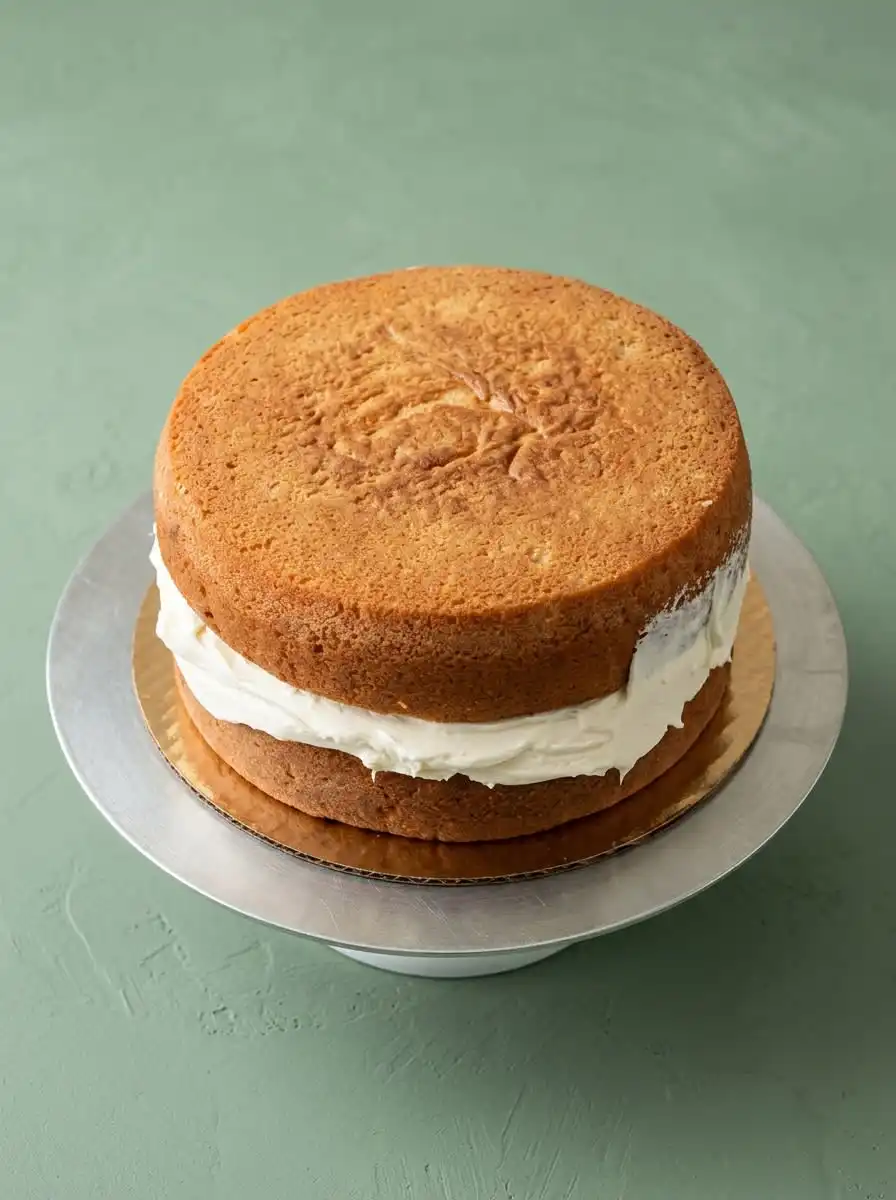
Once the layers are completely cool, place the first cake round onto your pedestal. Spread a thick layer of vanilla buttercream over the top, letting it reach the very edges. Place the second layer on top, then lightly scrape a thin coat of frosting over the sides. The golden edges of the cake should peek through the frosting for that classic rustic look.
Plain-Kitchen Notes
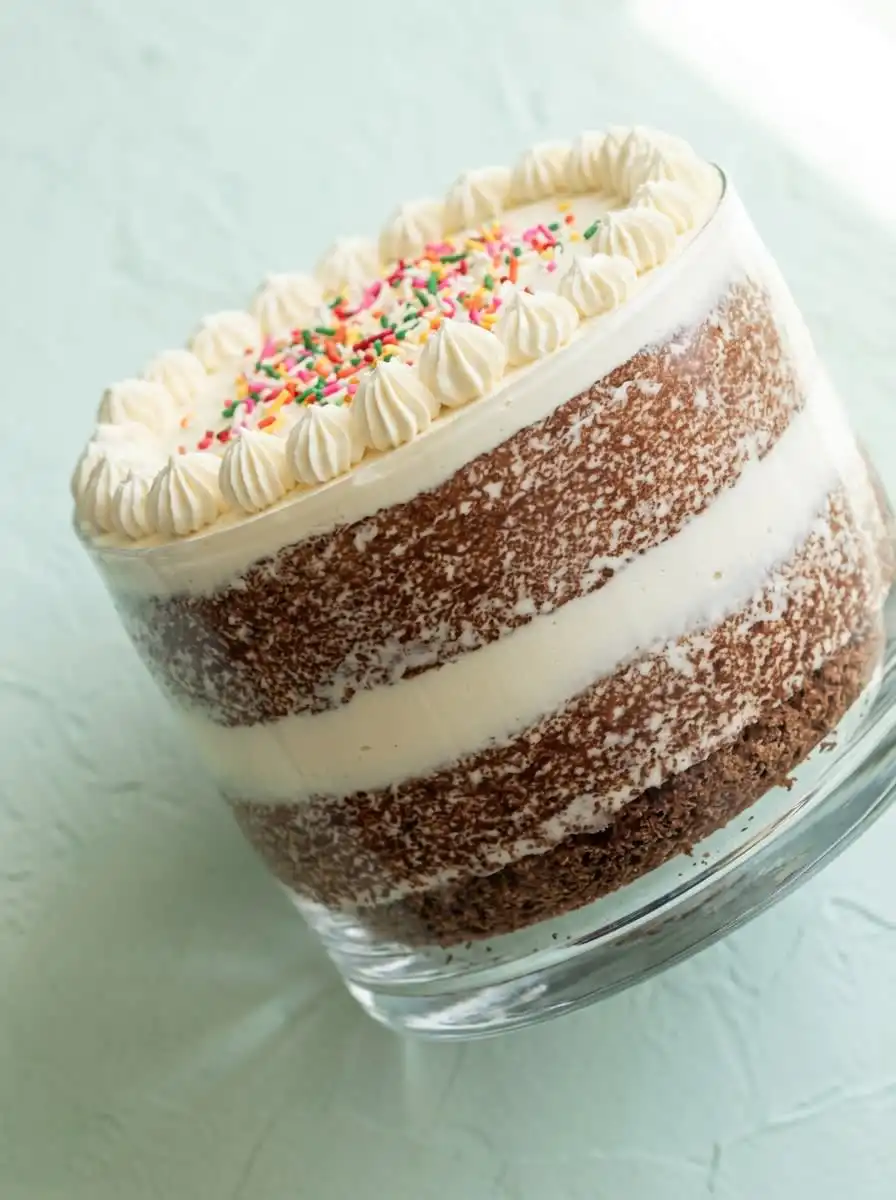
Always measure your flour by spooning it into the measuring cup and leveling it off with a flat knife. Scooping directly with the cup packs the flour down, which can lead to a heavy crumb instead of a light bake. This simple adjustment is the secret to achieving a professional bakery texture at home. Your cakes will consistently turn out soft and light.
Make sure your buttermilk and eggs are at room temperature before you begin mixing. Cold ingredients will cause the creamed butter to seize up, which prevents the batter from blending together into a smooth emulsion. Set them out on your counter about an hour before you plan to start baking. This simple habit makes a world of difference in the final rise.
If your buttercream looks grainy and separated, the butter was likely too warm or too cold. You can easily fix this by setting the bowl over a pot of warm water for only ten seconds, then whipping it again until it becomes smooth. This gentle heat softens the stubborn fat and allows the sugar to integrate beautifully. It is a quick lifesaver for any busy baker.
Keep a damp kitchen towel nearby to wipe your bench scraper after every single pass against the sides of the cake. This clean edge is what allows you to scrape off the excess frosting cleanly, leaving behind that beautiful rustic look. If you leave frosting on the tool, it will smear and cover the golden cake layers. Take your time and clean the blade often.
Letting your baked layers rest wrapped in plastic wrap in the refrigerator overnight makes them much easier to slice and frost without excess crumbles. If you love this clean crumb structure, you should also try our classic vanilla cake recipe for your next gathering. Chilled cake is structurally stronger and holds its shape beautifully under the spatula. This extra step guarantees a neat, professional presentation.
Use a long serrated knife to carefully trim the domed tops off your cake layers before you begin assembly. Flat layers are much easier to stack and prevent the cake from sliding or leaning as it sits. Save the trimmed scraps for a sweet snack while you decorate. A flat foundation is key to a beautiful presentation.
Frequently Asked Questions
How do you keep a naked cake from drying out?
Because the sides of the cake are not sealed with a thick coat of frosting, the layers can dry out faster than traditional cakes. To keep it moist, make sure to brush the layers with a simple sugar syrup before assembling. You should also keep the cake covered under a glass dome or wrapped gently in plastic wrap until you are ready to serve. This simple barrier protects the delicate crumb from the circulating air.
What is the difference between a naked cake and a semi-naked cake?
A true naked cake has absolutely no frosting on the outer sides, leaving the cake layers completely bare. A semi-naked cake has a very thin crumb coat swept over the sides, showing some of the cake through the frosting. This thin layer of buttercream helps trap moisture while keeping that beautiful rustic look. Most bakers prefer the semi-naked style because it offers the ideal balance of beauty and freshness.
How do you get straight, even layers on a naked cake?
Use a sharp serrated bread knife to slice off the domed tops of your cooled cake rounds before stacking them. This creates flat, even surfaces that prevent the cake from leaning. You can also bake with cake strips around your pans to keep the layers flat from the start. Taking the time to level your cakes guarantees a professional and stable result.
What is the best frosting for a naked cake?
A stiff vanilla buttercream or a cream cheese frosting works best because they hold their shape under the weight of the layers. Avoid using whipped cream or thin glazes, as they will slide off the sides and won’t hold the cake together. The frosting needs to act as a sturdy mortar between your cake rounds. It also provides the ideal contrast to the golden cake edges.
How do you decorate a two-layer naked cake?
You can keep it simple by topping the cake with fresh, unsprayed flowers or a handful of seasonal berries. A light dusting of powdered sugar over the top layer adds a beautiful vintage touch right before slicing. You can also let a little caramel or chocolate ganache drip slowly down the sides for an elegant finish. The key is to let the natural textures of the cake be the star.
Can I make the cake layers ahead of time and freeze them?
Yes, you can bake the layers, let them cool completely, and wrap them tightly in a double layer of plastic wrap. Store them in the freezer for up to three months before assembling. Thaw the wrapped layers on your kitchen counter for a few hours before you slice and frost them. Freezing actually helps lock in the moisture and makes the cake even more tender.
Do I need to refrigerate a naked cake before serving?
It is best to chill the assembled cake for at least one hour to let the buttercream set and stabilize the layers. Remove it from the refrigerator about two hours before your guests arrive so it can warm up to room temperature. A room-temperature cake will always have a much softer and more flavorful crumb. Chilling beforehand makes sure the structure is locked in tight.
What is the best way to store leftovers?
Store any remaining cake in an airtight container or press a piece of plastic wrap directly against the sliced edges. Keep it in the refrigerator to preserve the freshness of the buttercream. Bring individual slices to room temperature before enjoying them with your morning coffee. The cake will stay delicious and moist for up to three days.
Easy Switch-Ups
You can easily transform this simple recipe into a beautiful fruit-forward dessert by adding fresh berries. Spread a generous layer of homemade jam or fresh sliced berries between the layers before frosting. If you want a detailed guide on this fruity combination, check out our favorite strawberry vanilla cake recipe for inspiration. The natural acidity of the fruit cuts through the rich buttercream beautifully.
Try adding a warm touch of spice by whisking a teaspoon of ground cinnamon and a pinch of nutmeg into your dry flour mixture. This simple change pairs wonderfully with a brown sugar buttercream or a light cream cheese frosting for cool autumn afternoons. It fills your home with a wonderful, cozy aroma as it bakes in the oven. It is an excellent twist for holiday gatherings.
For bakers who want to master the art of stacking different sizes, learning about assembling rustic tiered cakes can help you scale this design up for larger celebrations. Keeping the sides lightly frosted allows any flavor profile, from lemon to rich chocolate, to look elegant on the dessert table. It is a wonderful skill to have for family weddings or big anniversaries. Your guests will love the simple, understated elegance.
At the Kitchen Table
This rustic cake looks best when served on a simple wooden pedestal or a vintage glass cake stand. Cut thick, generous slices using a long, sharp knife dipped in warm water and wiped clean between each cut. The clean slices will beautifully display the contrasting layers of golden cake and white buttercream to your guests. It creates an instantly inviting centerpiece for any dining table.
Pair each slice with a hot cup of black coffee or a tall glass of cold milk on a quiet Sunday afternoon. The gentle tang of the buttermilk layers balances beautifully with the sweet, rich frosting. If you want a quick visual guide on how we assemble this dessert, take a moment to look through our two layer buttermilk cake story for inspiration. This pairing is a wonderful way to wind down a relaxing weekend with family.
If you are serving this for a special birthday celebration, try surrounding the base of the pedestal with fresh green leaves or wild berries. This simple touch makes the entire dessert look festive without requiring any fancy piping skills. It is an honest, beautiful presentation that makes everyone feel right at home around your table. Your guests will appreciate the warm, home-cooked feel of this elegant design.
A Quiet Last Word
Baking does not have to be a complicated chore filled with fancy tools and stressful decorating steps. This simple cake reminds us that plain ingredients and a little patience can create something truly beautiful. It is the ideal recipe to bake with your children or grandchildren on a rainy weekend afternoon. The process is relaxed and enjoyable from start to finish.
We hope you find comfort in the steady rhythm of creaming butter and dusting cake pans in your own kitchen. If you enjoy simple, honest baking, you might also find inspiration in our classic two layer yellow cake chocolate frosting story for your next weekend project. There is nothing quite like the feeling of sharing a homemade treat with the people you care about most. It is comfort food at its very best.
Our team would love to hear how your cake turned out and see how you chose to decorate your beautiful layers. Please share your baking photos with us and join our growing community on Pinterest, Facebook, and Telegram. We always enjoy connecting with fellow bakers who love plain ingredients and real comfort. Let us keep these timeless kitchen traditions alive together.