What is that hidden note that makes each bite so distinct and bright?

This Neapolitan Anniversary Cake brings the classic trio of chocolate, strawberry, and vanilla together in a way that feels intentional rather than just nostalgic. By using a concentrated fruit reduction, we turn a basic sponge into something deeply aromatic and sophisticated. It is the perfect centerpiece for a celebration where you want a simple cake with unforgettable flavor and a touch of elegance. Your guests will immediately notice the care put into balancing the bitter cocoa against the floral berry and creamy bean notes.
What Makes This Neapolitan Anniversary Cake Special
Prep: 120 min · Serves: 14 · Difficulty: Medium
- Floral strawberry flavor from real fruit
- Three distinct cakes in one pan
- Sophisticated bittersweet chocolate crumb depth
- Silky buttercream with natural berry tints
- Simple cake with an unforgettable flavor
One smart addition, all the wow, because this strawberry vanilla cake base proves that classic flavors never truly go out of style.
Get The Full Cake Recipe
Print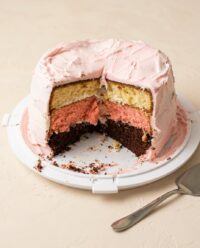
Neapolitan Anniversary Cake
- Total Time: 150 mins
- Yield: 14 servings
Description
This stunning Neapolitan Anniversary Cake combines layers of moist vanilla, bittersweet chocolate, and floral strawberry sponge into one elegant celebration centerpiece. By using a concentrated fruit reduction and high-quality cocoa, this balanced dessert offers a sophisticated take on a classic flavor trio.
Ingredients
- Fresh strawberries
- All-purpose flour
- Unsalted butter
- Granulated sugar
- Vegetable oil
- Vanilla extract
- Large eggs
- Baking powder
- Salt
- Whole milk
- 60% cacao bittersweet chocolate
- Natural cocoa powder
- Red food coloring
- Strawberry extract
- Chocolate chips
- Heavy cream
Instructions
- Reduce strawberry puree. Process strawberries until smooth, simmer in a saucepan for 15 minutes until reduced by half, and cool completely.
- Prepare cake pans. Grease three 8-inch pans, line with parchment paper, and preheat your oven to 350°F (176°C).
- Cream butter base. Beat butter, oil, sugar, and vanilla for 3 to 4 minutes until pale and fluffy.
- Incorporate dry ingredients. Add eggs one by one, then alternate folding in the sifted dry ingredients and milk until smooth.
- Divide the batter. Measure one-third of the base batter into a separate bowl, leaving the remainder for the other layers.
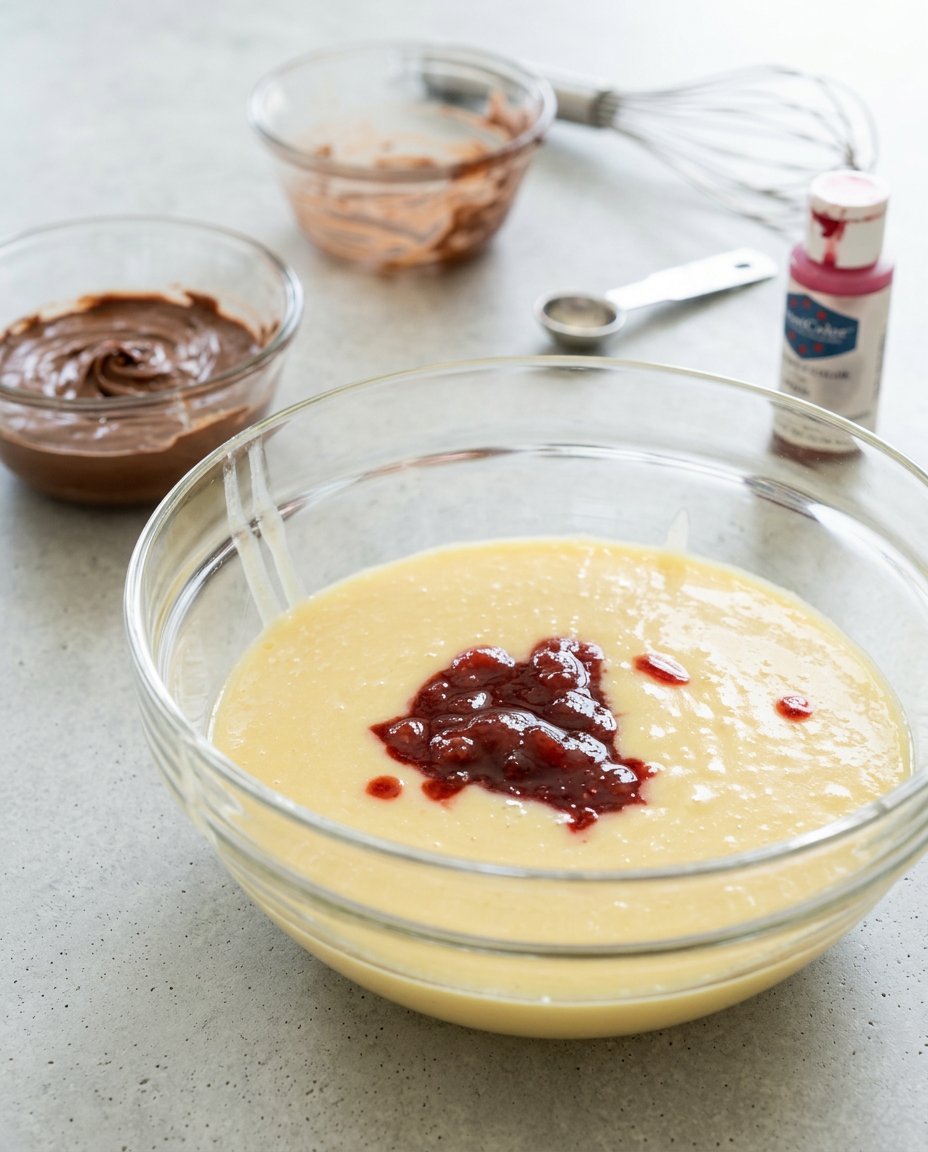
- Flavor strawberry layer. Fold the cooled strawberry reduction, strawberry extract, red coloring, and two tablespoons of flour into the first portion of batter.
- Prepare vanilla layer. Take half of the remaining white batter, stir in extra vanilla and a spoonful of flour, then spread into a prepared pan.
- Create chocolate layer. Melt the bittersweet chocolate and stir it into the final batter portion along with cocoa powder and remaining milk.
- Bake the layers. Bake all pans for 23 to 28 minutes, testing with a toothpick until moist crumbs remain, then cool on a wire rack.
- Assemble the cake. Level cakes and stack them using buttercream between layers, starting with chocolate on the bottom, then strawberry, and topped with vanilla.
- Frost and decorate. Apply a tricolor stripe design with buttercream, smooth the edges, drizzle with ganache, and garnish with fresh berries.
Notes
- Always bring your eggs and milk to room temperature to ensure the batter emulsifies perfectly.
- The strawberry reduction must be completely cool before being added to the batter to prevent melting the butter solids.
- Use an offset spatula for the most professional finish when smoothing the tricolor frosting stripes.
- Check the chocolate layer individually as its higher fat content may require a slightly longer bake time.
- Dipping your knife in hot water before slicing ensures clean, sharp lines through the dense layers.
- Prep Time: 120 mins
- Cook Time: 30 mins
- Category: Dessert
- Method: Baking
- Cuisine: American
Simple Ingredients + One Smart Add
This recipe relies on standard pantry staples like all-purpose flour, unsalted butter, and granulated sugar to create a sturdy yet tender crumb. The secret to the flavor pop is the strawberry puree reduction, which removes excess moisture while concentrating the natural esters of the fruit. Bittersweet chocolate provides a dark, adult contrast to the sweet vanilla and tart berry layers, ensuring the cake tastes complex rather than sugary.
- Strawberry Puree: Reduced by half to provide intense floral flavor without watering down the delicate batter consistency.
- Bittersweet Chocolate: Melted 60% cacao chocolate adds a rich, fudgy texture to the dark layer that cocoa powder alone cannot achieve.
- Vegetable Oil: Paired with butter to keep the sponge moist and soft even after the cake is refrigerated.
- Natural Cocoa Powder: Provides that classic, earthy chocolate aroma that balances the sweetness of the strawberry frosting.
- Fresh Eggs: Large eggs provide the structure needed to support the different densities of the three unique flavored layers.
| Ingredient | Why It Matters |
|---|---|
| Strawberry Reduction | Concentrates flavor without adding too much liquid to the batter. |
| Bittersweet Chocolate | Creates a sophisticated, deep cocoa profile for the bottom layer. |
| Whole Milk | Adds fat and moisture for a velvety, melt-in-the-mouth texture. |
| Vanilla Extract | Acts as the floral bridge that ties the three flavors together. |
Building the Flavor
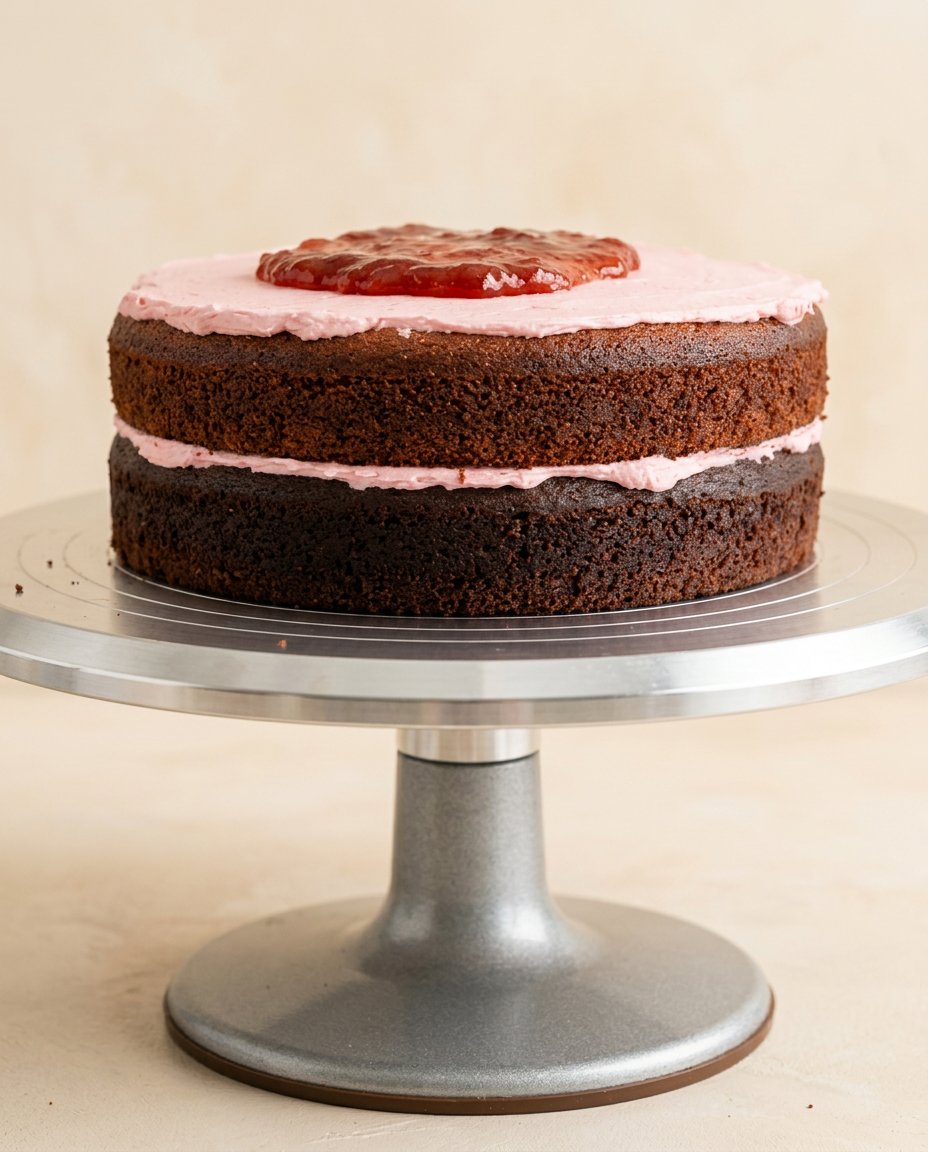
Step 1: Reduce the Strawberry Puree
Add your chopped strawberries to a blender and process until smooth, then transfer the mixture to a small saucepan. Cook over medium heat for about 15 minutes, stirring consistently until the liquid reduces by half and looks like a thick, jammy paste. Once it reaches that concentrated state, pour it into a measuring cup and let it cool completely to room temperature before you begin the batter.
Step 2: Prep the Baking Stations
Grease three 8-inch cake pans thoroughly and line the bottoms with parchment paper circles to ensure a clean release later. Set your oven to 350°F (176°C) so it has plenty of time to reach a steady heat while you work on the separate batters. Having your pans ready now prevents the batter from sitting and losing its aeration while you scramble for supplies.
Step 3: Cream the Butter and Sugars
In a large mixer bowl, combine the softened butter, vegetable oil, sugar, and a generous portion of vanilla extract. Beat these together for at least 3 to 4 minutes until the mixture looks pale, fluffy, and significantly lighter in volume than when you started. This step is where you build the air pockets that result in a light, tender crumb rather than a dense, heavy sponge.
Step 4: Incorporate the Eggs and Flour
Add your eggs one at a time, making sure each is fully incorporated before adding the next to keep the emulsion stable. Sift your flour, baking powder, and salt together, then add half of this dry mixture to the butter base followed by a small splash of milk. Fold in the remaining dry ingredients until the batter is thick and uniform, being careful not to overwork the gluten which can make the cake tough.
Step 5: Divide the Base Batter
Measure out roughly one-third of your base batter into a separate bowl to begin the fruit-focused portion of the Neapolitan Anniversary Cake. This ensures each layer has the correct ratio of ingredients to bake at a similar rate despite the different flavor additions. Keep the remaining two-thirds of the batter in the main bowl for now as you prepare to split it again for the chocolate and vanilla layers.
Step 6: Flavor the Strawberry Layer
Fold the cooled strawberry reduction, a drop of strawberry extract, and a touch of red food coloring into your first bowl of batter. Add two tablespoons of flour to compensate for the extra moisture from the fruit so the layer remains structurally sound. The batter should look pink and smell intensely like summer fruit, with a texture that is thick enough to hold its shape in the pan.
Step 7: Mix the Vanilla Layer
Take half of the remaining white batter and place it in another bowl, adding a final half-teaspoon of vanilla and a small spoonful of flour. This layer serves as the creamy, neutral anchor for the entire cake, providing a soft background for the bolder chocolate and berry notes. Spread this batter evenly into your second prepared cake pan and smooth the top with a small offset spatula.
Step 8: Create the Chocolate Layer
Melt your bittersweet chocolate gently and fold it into the last portion of batter along with the cocoa powder and remaining milk. The chocolate should be glossy and smooth as it incorporates, turning the batter a deep, mahogany brown that smells like toasted cocoa. This layer is often the thickest, so spread it carefully into the final pan to ensure it reaches all the edges.
Step 9: Bake the Layers to Perfection
Place all three pans in the oven and bake for 23 to 28 minutes, or until a tester comes out with just a few moist crumbs. The chocolate layer often takes a minute or two longer because of the extra fat from the melted chocolate, so keep a close eye on it toward the end. Allow the cakes to rest in their pans for a few minutes before moving them to a wire rack to cool entirely.
Step 10: Assemble the Neapolitan Anniversary Cake
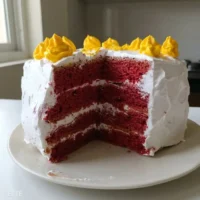
Level your cooled cakes with a serrated knife to ensure they sit flat, then stack them starting with chocolate, then strawberry, and finally vanilla. Spread a layer of the corresponding buttercream between each cake to create clear, defined bands of flavor when the cake is sliced. Once stacked, apply a thin crumb coat to the entire exterior and chill the cake for 20 minutes to set the structure before the final decorating.
Step 11: Frost and Drip
Apply stripes of chocolate, strawberry, and vanilla frosting to the sides of the cake and smooth them together with an icing scraper for a tricolor look. Melt your chocolate chips and cream together to create a silky ganache, then drizzle it carefully over the edges to create a professional-looking drip. Top the cake with remaining frosting swirls and fresh berries to signal the bright flavors hidden inside each slice.
Small Tweaks, Big Wow
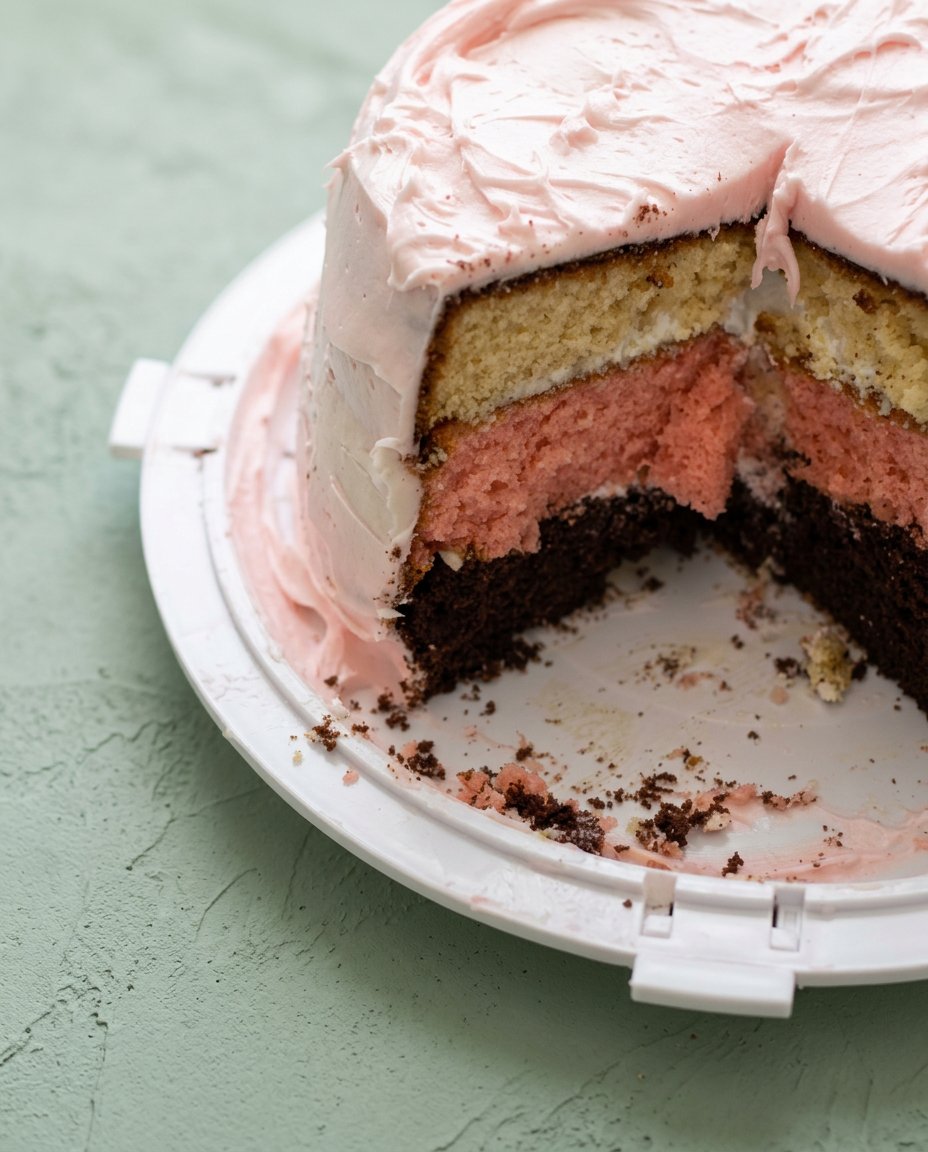
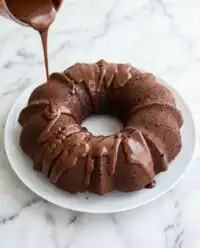
For the smoothest ganache drip, ensure your cream is hot but not boiling before you pour it over the chocolate chips. If the ganache seems too thick to run, add a teaspoon of warm cream; if it is too runny, let it sit at room temperature for five minutes to thicken. Mastering this chocolate layer cake technique is the secret behind those beautiful, clean drips you see in professional bakeries.
If your buttercream starts to look curdled or grainy while mixing, it is likely because the butter was too cold or the liquid was added too quickly. You can fix this by taking a small bowl of the frosting, melting it in the microwave for five seconds, and then whipping it back into the main batch. This small shot of warmth helps the fats and liquids emulsify into a perfectly silky finish.
Always use room temperature eggs and milk to ensure the batter emulsifies properly without breaking the butter solids. Cold ingredients can cause the batter to look split, which leads to a greasy crumb after the cake is baked. Simply set your ingredients on the counter for sixty minutes before you plan to start your baking project.
When smoothing the tricolor frosting on the sides, use a metal bench scraper and move in one continuous motion. Stopping and starting creates visible lines in the frosting that are difficult to hide later. Clean the scraper after every single pass to keep the colors from bleeding into each other too much and losing their distinct bands.
To ensure your strawberry reduction is the correct consistency, it should be thick enough to coat the back of a spoon without running. If you find your reduction is too thin, the cake might sink in the middle because of the excess water content. You can learn more about managing fruit moisture by reading about how to measure flour for baking to keep your ratios exact.
For the best flavor, allow the finished cake to sit at room temperature for at least thirty minutes before serving to guests. Cold buttercreams and cakes can mask the delicate nuances of the strawberry and the richness of the bittersweet chocolate. A slightly warmer cake will have a much softer, more luxurious mouthfeel that makes the flavors truly bloom.
Frequently Asked Questions
Can I Freeze Neapolitan Cake?
Yes, you can freeze this cake either as whole layers or as a fully assembled dessert for up to three months. To freeze layers, wrap them tightly in several layers of plastic wrap and a final layer of foil to prevent freezer burn. If freezing a decorated cake, place it in the freezer for an hour to set the frosting before wrapping it carefully to preserve the decorations.
How do I keep the fruit flavor strong without it being too sweet?
The key is the reduction process which removes the water and concentrates the natural sugars and acids of the berries. Avoid adding extra sugar to the puree while it cooks so the tartness remains present to balance the frosting. Using high-quality strawberry extract alongside the reduction also helps the flavor pop without requiring more sugar.
What if my strawberry layer sinks in the middle?
This usually happens if the strawberry reduction was not cooked down enough or if too much red food coloring was used. The extra liquid weakens the structure of the cake during the rise, causing it to collapse as it cools. Always ensure your reduction is the thickness of a light jam before adding it to the batter to prevent this issue.
Can I use frozen strawberries for the reduction?
Frozen strawberries work perfectly well for the puree, though they often release more water than fresh berries. You may need to simmer the puree for an extra five to ten minutes to reach the desired thickness. Just be sure to thaw the berries completely before blending them so you can measure the initial volume accurately.
Why use bittersweet chocolate instead of just more cocoa powder?
Melted bittersweet chocolate adds cocoa butter and solids that provide a much richer, fudgier texture than powder alone. Cocoa powder can sometimes make a cake feel dry if used in large quantities, whereas melted chocolate keeps the crumb moist. This combination ensures the chocolate layer is just as decadent as the other two layers in the stack.
How long can this cake stay at room temperature?
Because of the butter content in the frosting, the cake can safely sit out for about four to five hours in a cool room. If your kitchen is warm, the frosting may begin to soften and the layers could shift, so it is best to keep it refrigerated until shortly before serving. Always store leftovers in the fridge in an airtight container to keep the sponge from drying out.
Make It Yours
If you prefer a more floral profile, try swapping the strawberry reduction for a concentrated raspberry puree instead. Raspberry offers a sharper tartness that pairs beautifully with the dark chocolate layer and creates a slightly more sophisticated palette. This is an excellent way to use the same basic method found in a chocolate strawberry cake 3 while creating an entirely different flavor experience for your next celebration.
To add a nutty element to the cake, replace the vegetable oil in the vanilla layer with brown butter for a toasted aroma. Brown butter adds a deep, savory note that bridges the gap between the sweet vanilla and the earthy cocoa powder. Simply melt the butter over low heat until it smells nutty and the milk solids turn a light golden brown before letting it cool and whisking it into your batter.
For a lighter, more refreshing version, you can replace the heavy buttercream on the outside with a stabilized whipped cream frosting. This creates a texture reminiscent of neapolitan ice cream and is perfect for outdoor summer gatherings where a heavy butter-based frosting might feel too rich. Be sure to use a stabilizer like gelatin or mascarpone so the cream holds its shape during assembly and serving.
Bringing the Wow to the Table
This cake is a visual feast, so serve it on a simple white or glass pedestal to let the colorful stripes and chocolate drips take center stage. When you are ready to slice, use a long, sharp knife dipped in hot water and wiped dry between every single cut. This technique ensures that the layers of chocolate, strawberry, and vanilla stay distinct on the plate rather than smearing together. Pair each slice with a few fresh berries or a small dollop of lightly sweetened cream to accent the fruit notes.
For a festive celebration, this cake pairs beautifully with a glass of dry sparkling wine or a chilled hibiscus tea. The bubbles in the wine help cleanse the palate between rich bites of chocolate and sweet buttercream, making the fruit flavor feel even brighter. If you are serving this for a birthday, consider a strawberry vanilla cake recipe as a side option for those who might prefer a simpler flavor profile without the cocoa. The combination of different textures and temperatures will make the dessert course the highlight of your evening.
Your Turn to Riff
Building this cake is a rewarding process that turns simple pantry items into a magnificent celebration piece. While the three layers might seem like a lot of work, the process of reducing the fruit and melting the chocolate is where the real magic happens. It is a simple cake with an unforgettable flavor that rewards your patience with every tricolor slice. Once you master the base, you can start to layer your own favorite extracts or spices to make the recipe your own.
You can always find more inspiration for your baking projects by checking out our chocolate strawberry cake guide for more fruit and cocoa pairings. I would love to see how your anniversary celebration turns out, so please share your results with our community of bakers. Baking is all about the joy of sharing something handmade and delicious with the people you love most.