You do not need a hot oven, a fancy stand mixer, or a trip to a specialty kitchen shop to make these sweet, chocolatey treats.

These Oreo Cake Pops rely on simple pantry staples and basic kitchen tools you already keep in your cupboards. We are blending familiar chocolate cookies with cream cheese to form a soft, rich center that tastes like a bite of homemade fudge. It is the sort of honest sweet that stays fresh on the counter and brings smiles on a slow Sunday afternoon. Best of all, you can put the whole batch together with a single mixing bowl and a sturdy wooden spoon.
What Makes Oreo Cake Pops a True Comfort
Prep: 30 min · Serves: 15 · Difficulty: Easy
Sometimes the finest treats are the ones that require the least amount of fuss. These bite-sized confections bring the deep chocolate flavor of classic cookies together with a rich, tangy creaminess. You will find that making these treats brings a quiet comfort to your kitchen, filling the space with sweet aromas without heating up the entire house.
- Requires no baking in a hot oven.
- Tastes even better the very next day.
- Needs only a few everyday grocery items.
- Fun to make with young family members.
- Soft texture that melts in your mouth.
If you have ever made traditional cake pops from scratch, you know that crumbling baked layers can take a fair amount of time. This straightforward recipe cuts out the extra steps while delivering a rich texture that everyone loves. This is the recipe my family requests every single weekend.
Get The Full Cake Recipe
Print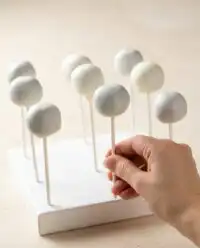
Oreo Cake Pops
- Total Time: 45 mins
- Yield: 15 cake pops
- Diet: Vegetarian
Description
These delightful no-bake Oreo Cake Pops feature a fudgy center made from crushed chocolate sandwich cookies and cream cheese, dipped in a crisp white candy shell. They are a simple, crowd-pleasing treat perfect for any gathering and require only a few basic pantry staples.
Ingredients
- 24 Oreo cookies
- 4 ounces cream cheese, softened
- 12 ounces white candy melts
- 2 tablespoons candy melting aid
- 1/4 cup semisweet chocolate chips
Instructions
- Crush the cookies. Place the cookies into a food processor and pulse until they form fine, uniform crumbs.
- Combine with cream cheese. Add the softened cream cheese to the crumbs and pulse until a thick, fudge-like dough forms.
- Portion the dough. Use a cookie scoop to divide the mixture into even mounds on a clean surface.
- Shape the spheres. Roll each portion between your palms into a smooth ball and place them on a parchment-lined baking sheet.
- Chill the spheres. Place the baking sheet in the freezer for fifteen minutes to firm up the balls for dipping.
- Prepare for dipping. Melt a small amount of candy coating, dip the tip of a stick into it, and insert it halfway into each chilled sphere.
- Melt the coating. Combine the remaining candy melts and melting aid in a deep bowl, microwaving in intervals until smooth.
- Coat and drizzle. Dip each sphere into the candy, tap off the excess, and once set, drizzle with melted semisweet chocolate.
Notes
- Ensure cream cheese is fully softened to room temperature to guarantee a smooth, well-bound dough.
- Allow the chilled spheres to rest for a few minutes at room temperature before dipping to prevent the candy shell from cracking due to thermal shock.
- Use a tall, narrow glass for dipping to allow for a single, clean motion that completely covers the sphere.
- Keep the work area free of water, as even a small drop can seize the melted candy coating and ruin its texture.
- Prep Time: 30 mins
- Cook Time: 15 mins
- Category: Dessert
- Method: No-bake
- Cuisine: American
From the Kitchen Shelf
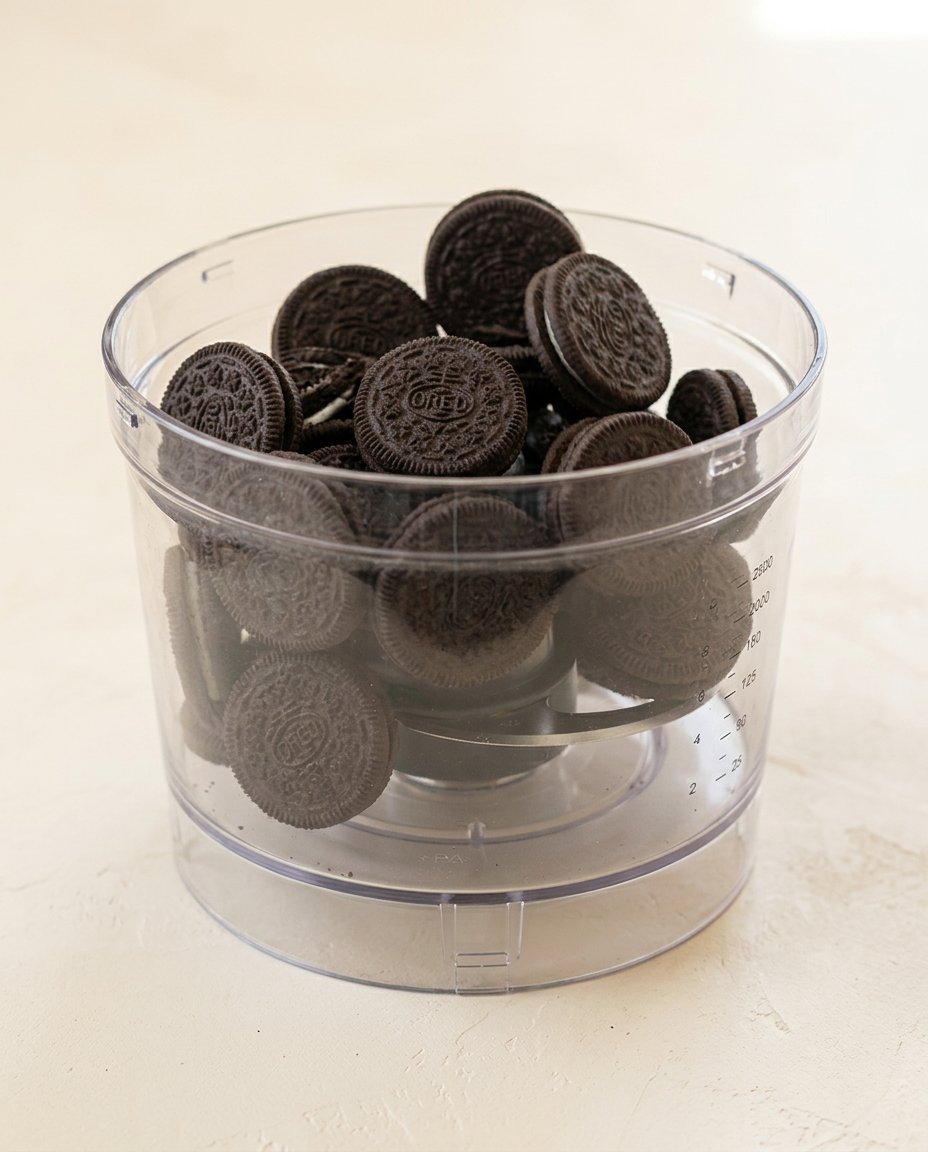
Creating these sweet treats requires only a handful of plain, dependable ingredients that you can find at any local grocery store. We do not use any unusual additives or complicated emulsifiers here. Instead, we rely on the natural balance of chocolate cream biscuits and rich dairy to build a velvety filling that holds its shape beautifully under a smooth candy shell.
- Oreo Cookies: These chocolate sandwich biscuits provide both the deep cocoa crunch and the sweet cream filling that forms the base of our treat.
- Cream Cheese: A brick of softened cream cheese binds the cookie crumbs together while adding a subtle tang that balances the sugary coating.
- White Candy Melts: These confectionery discs melt down smoothly to create a clean, sturdy shell that snaps delightfully with every bite.
- Candy Melting Aid: A small splash of this specialized oil helps thin out the melted candy so it coats each sphere in a thin, uniform layer.
- Semisweet Chocolate Chips: Melted chocolate is used to drizzle beautiful, rustic lines across the finished treats for a simple decorative touch.
| Ingredient | Why It Matters |
|---|---|
| Oreo Cookies | Provides the rich chocolate cocoa base and sweet filling |
| Cream Cheese | Binds the dry crumbs and balances the sweetness |
| White Candy Melts | Creates a firm and clean confectionery outer shell |
| Candy Melting Aid | Thins the coating to prevent thick or clumpy layers |
| Semisweet Chocolate | Adds a beautiful rustic drizzle to the finished treat |
The Simple Method
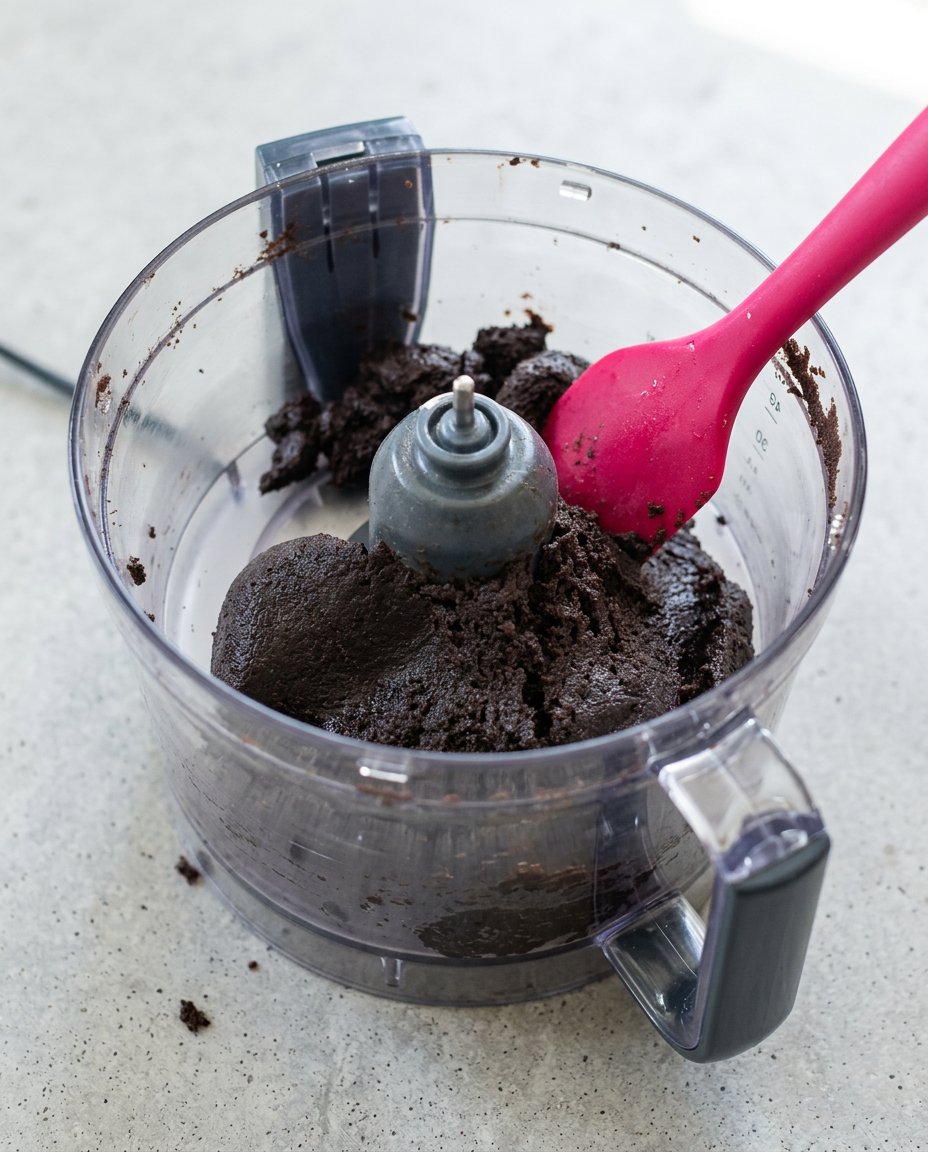
Step 1: Crush the Chocolate Cookies
Place twenty-four chocolate sandwich cookies into the bowl of your food processor. Pulse the machine on high speed until the cookies are broken down into uniform, fine crumbs with no large pieces remaining. If you do not own a food processor, you can place the cookies inside a sturdy zip-top bag and crush them thoroughly with a wooden rolling pin. The key is to achieve a sandy texture that will easily absorb the moisture from the cream cheese.
Step 2: Combine with Cream Cheese
Add four ounces of fully softened cream cheese directly to the fine cookie crumbs. Pulse the mixture again in short bursts until the ingredients are completely integrated and a thick, fudge-like dough forms. When you press a small amount between your fingers, it should hold its shape without crumbling or feeling sticky. A well-mixed dough guarantees that your finished spheres will remain firm and stable on their sticks.
Step 3: Portion the Dough
Transfer the rich chocolate mixture into a wide mixing bowl to make portioning easy. Use a small cookie scoop or a specialized shaping tool to portion out even mounds of the dough onto a clean workspace. Portioning the dough evenly makes sure that each treat looks neat and finishes chilling at the exact same rate. This step is a wonderful way to involve young helpers who enjoy scooping and measuring.
Step 4: Shape into Smooth Spheres
Take each portioned mound into the palms of your hands and roll it gently to form a smooth, round ball. Apply light, even pressure so you do not compress the filling too tightly, which can make them heavy. If the dough starts to warm up from your hands, set it down for a moment to cool. Place each completed chocolate sphere onto a baking sheet lined with clean parchment paper.
Step 5: Chill the Chocolate Spheres
Carry the baking sheet carefully to your freezer and let the chocolate spheres chill for fifteen minutes. Chilling the dough firms up the fats in both the cream cheese and the cookies, making them sturdy enough to handle the warm candy coating. Do not leave them in the freezer for too long, as overly frozen spheres can cause the outer candy coating to crack later. Keep a close eye on the clock during this brief chilling window.
Step 6: Prepare the Oreo Cake Pops for Dipping
While the chocolate spheres are chilling in the freezer, place a quarter cup of white candy melts into a small, microwave-safe bowl. Heat the melts in short fifteen-second intervals, stirring thoroughly after each turn, until the candy is fully liquid. Dip the tip of a paper stick about half an inch into the warm liquid, then insert it halfway into a chilled sphere. Repeat this process for all fifteen treats, then return them to the freezer for five minutes to secure the sticks.
Step 7: Melt and Thin the Coating
In a wide, deep bowl, combine twelve ounces of white candy melts and two tablespoons of candy melting aid. Microwave the mixture in twenty-second intervals, stirring gently with a rubber spatula until the candy is smooth and fluid. Pour the warm liquid into a tall, narrow glass or cup to make dipping easier and cleaner. The narrow vessel allows you to submerge the chocolate spheres fully in one single motion without wasting any coating.
Step 8: Coat and Drizzle the Treats
Hold a chilled treat by its paper stick and lower it straight down into the narrow glass of warm candy coating. Pull the treat straight back up in one steady motion, then tap your wrist gently to allow any excess coating to drip back into the cup. Place the coated stick upright into a block of foam so the outer shell can dry completely. Once the white coating has set, melt a small handful of semisweet chocolate chips and drizzle beautiful rustic patterns over the top.
Plain-Kitchen Notes
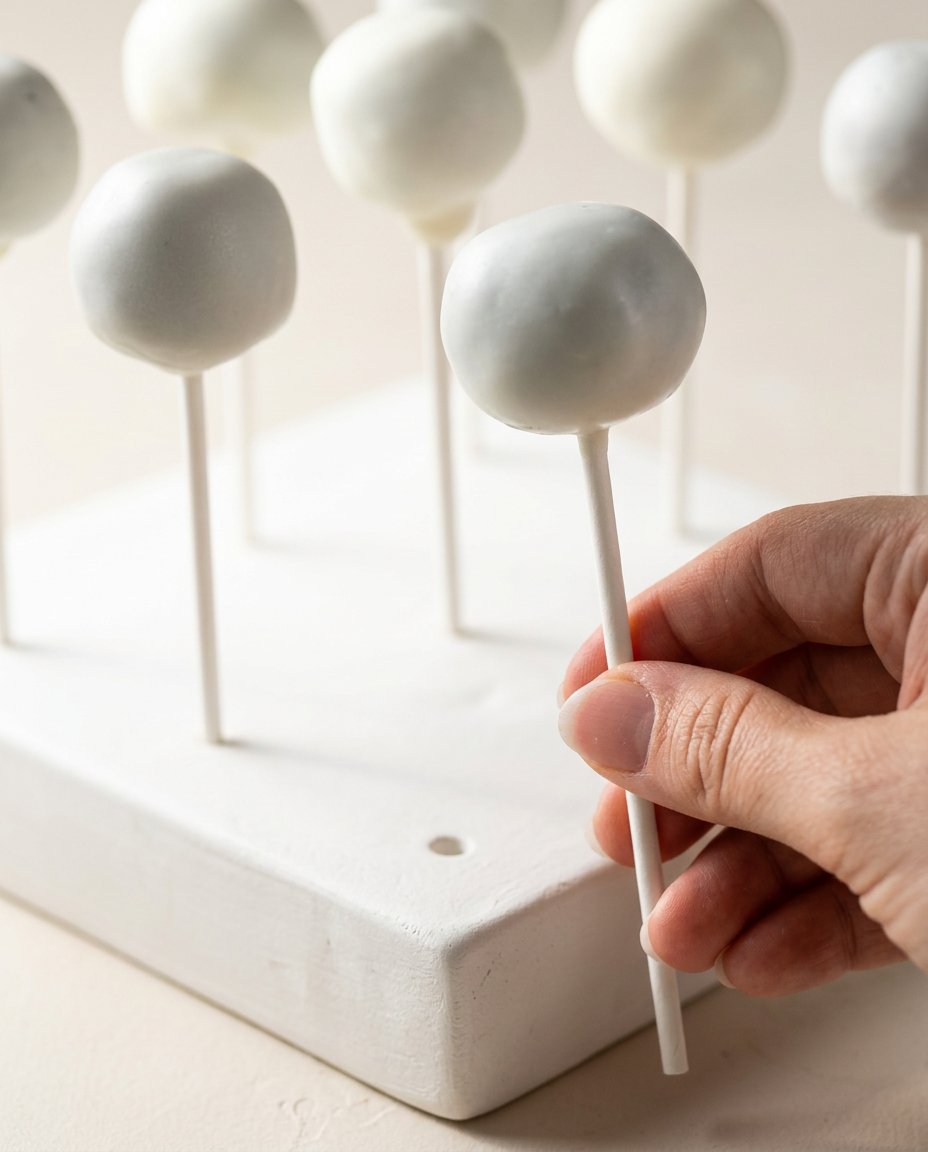
When working with confectionery coatings, the temperature of your ingredients plays a critical role in the final look of your sweets. If your chocolate spheres are freezing cold when you dip them, the sudden temperature change will cause the warm candy shell to shrink and crack. Always let your chilled spheres sit on the counter for two or three minutes before dipping them into the warm coating to prevent this common headache.
Using a tall, narrow glass rather than a shallow bowl makes the coating process much more manageable for home bakers. A deep reservoir of warm candy allows you to cover the entire chocolate sphere in one quick, fluid motion without twisting the stick. For more help with this technique, you can watch a helpful visual guide for dipping treats to see the proper wrist-tapping motion in action.
If your candy coating becomes too thick or begins to set while you are still working, do not add water to thin it out. Water will cause the confectionery melts to seize up instantly into a dry, clumpy paste. Instead, stir in a tiny spoonful of coconut oil or commercial melting aid, then warm the mixture in the microwave for ten seconds to restore its smooth consistency.
For those who enjoy baking larger chocolate desserts, you might want to try making an oreo cake for your next big family gathering. It uses many of the same rich flavors but scales them up into beautiful, towering layers that look wonderful on any dessert table.
Always make sure that your cream cheese is fully softened to room temperature before you attempt to mix it with the cookie crumbs. Cold cream cheese will remain lumpy and will not bind the crumbs evenly, leaving dry pockets of cookie dust inside your treats. Let the cream cheese sit on the counter for at least one hour before starting your prep.
Keep your work surfaces and hands dry throughout the entire process. Even a single drop of water falling into your melted candy melts can ruin the entire batch, causing it to lose its silky texture. Keep a dry kitchen towel nearby to wipe your hands and tools frequently as you work.
Frequently Asked Questions
How many Oreos do I need for a batch?
You will need exactly twenty-four standard cookies to make a batch of fifteen sweet treats. This quantity provides the ideal ratio of dry crumbs to bind with four ounces of softened cream cheese. Do not use snack packs, as they may have slightly different weights.
Can I use Double Stuf or Golden Oreos?
You can certainly use golden sandwich cookies for a sweet vanilla flavor. However, avoid using Double Stuf cookies because the extra cream filling will make the dough too wet and greasy. The excess grease will prevent the spheres from staying firmly on their paper sticks.
Do I need to crush the cream filling?
Yes, you should keep the sweet white filling inside the cookies when you crush them. The sweet filling blends right in with the chocolate wafers to help bind the mixture into a cohesive dough. Simply throw the whole cookies directly into your food processor.
Do you freeze or refrigerate Oreo balls?
You should freeze the rolled spheres briefly for fifteen minutes before you dip them. This quick chill firms up the fats so they hold their shape in the warm candy melts. Once coated and decorated, store the finished treats in the refrigerator to keep them fresh.
How do you keep the cake pops from falling off the stick?
The secret is dipping the tip of the paper stick into the melted candy before inserting it into the chilled sphere. This acts as a strong glue that secures the chocolate center to the paper. Letting them chill for five minutes after inserting the sticks guarantees a sturdy bond.
What is the best chocolate for dipping?
Confectionery candy melts or high-quality chocolate melting wafers are the easiest options for home bakers. They melt down to a thin, smooth consistency and set up quickly at room temperature. Standard chocolate chips can be used, but they often require tempering to set firmly.
Why did my Oreo balls crack?
Cracking usually happens when the chocolate spheres are too cold when they are dipped into the warm candy melts. The sudden temperature difference causes the outer shell to expand and crack as it cools. Letting the frozen spheres sit at room temperature for a couple of minutes helps prevent this.
How long do they last?
These treats will keep beautifully in an airtight container in the refrigerator for up to one week. Because of the cream cheese filling, they should not be left out on the counter for more than a couple of hours. They actually taste even better the next morning with a warm cup of coffee.
Easy Switch-Ups
While the classic combination of dark chocolate cookies and white candy coating is hard to beat, you can easily adapt this recipe to suit your family’s preferences. For a bright, summery twist, try using golden sandwich cookies in place of the chocolate ones. The golden crumbs combine beautifully with the tangy cream cheese to create a filling that tastes remarkably like vanilla cheesecake under a sweet coating.
If you find yourself craving a cool, refreshing dessert on a warm afternoon, you can also look into making a simple oreo icebox cake for your family. It is another wonderful no-bake treat that relies on simple pantry items and tastes even better after chilling in the refrigerator overnight.
You can also experiment with the decorative drizzle to match the theme of a holiday or birthday party. Stir a drop of oil-based food coloring into a small portion of the white candy melts to create soft pastel drizzles. Avoid water-based liquid food coloring, as it will cause the melts to clump and lose their smooth texture.
At the Kitchen Table
These sweet chocolate treats look absolutely lovely when arranged on a simple white ceramic platter in the center of your table. Because they are individual portions, they are perfect for casual Sunday afternoon gatherings where folks can grab a treat as they chat. You can tie small colorful ribbons around each paper stick to add a touch of old-fashioned charm.
If you are planning a larger family celebration, these bites pair wonderfully with a larger centerpiece dessert. For a complete cookies and cream themed table, consider serving them alongside a slice of rich cookies and cream cake that your guests can enjoy. The contrast of the soft, moist cake layers with the firm, sweet snap of the dipped treats makes for a wonderful dessert experience.
Keep a clean kitchen towel handy to wipe away any stray drips when arranging your dessert display. Serve these treats chilled alongside a pitcher of cold milk or a pot of freshly brewed black coffee. The bitter warmth of the coffee cuts through the rich sweetness of the chocolate filling beautifully.

A Quiet Last Word
There is a simple, lasting joy in preparing treats that do not require a hot oven or hours of precise measuring. This recipe relies on everyday pantry items and basic kitchen tools to create something truly special for the people you love. Whether you are baking with grandchildren on a quiet weekend or sharing a plate with neighbors, these sweet bites bring a taste of home to any table.
If you enjoy reading about the history of these sweet treats, take a moment to read the cookies cream birthday cake story to see how these classic flavors have brought families together over the years. We hope this simple recipe finds a permanent place on your handwritten kitchen cards for generations to come.
For more classic southern recipes and kitchen inspiration, please join our sweet community. You can find us and share your baking creations on our Pinterest and Facebook pages. We also love sharing short video guides and kitchen chats on our TikTok and Telegram channels, where we share the quiet comfort of home baking every single day.